
Crossfire V6-3.2L VIN L (2004)
REMOVAL
1. Raise and support the vehicle.
2. Remove the wheel and tire assembly.
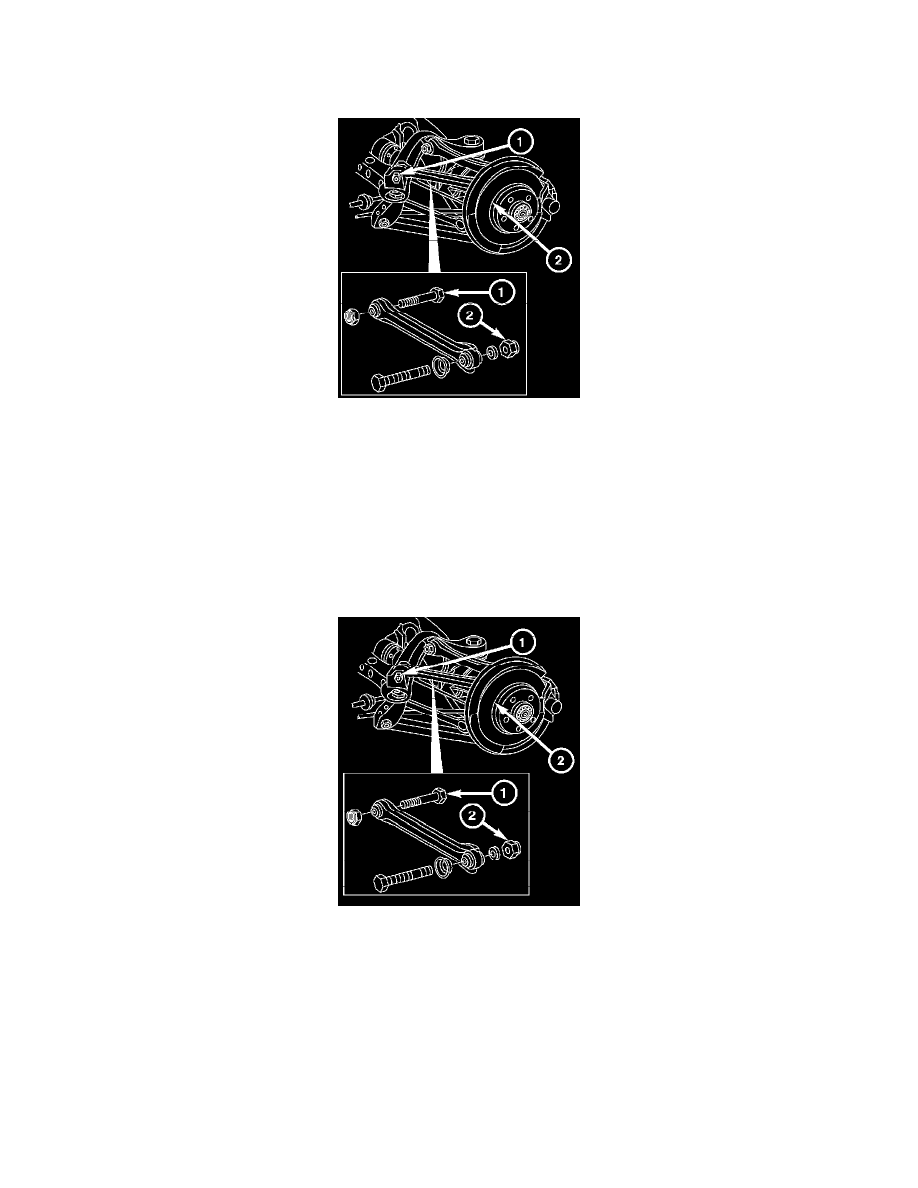
3. Remove the inner trailing link bolt (1) attaching the trailing link to the rear axle carrier.
4. Remove the outer trailing link bolt (2) attaching the trailing link to the wheel carrier.
Note: Lightly tap the trailing link with a plastic headed hammer to loosen or guide the rubber mounts out of their mounting flanges.
5. Remove the trailing link.
INSTALLATION
1. Install the trailing link onto the vehicle.
CAUTION: Do not tighten to torque value at this point. The vehicle must be in its ready-to-drive position.
2. Install the outer trailing link bolt (2) attaching the trailing link to the wheel carrier.
CAUTION: Do not tighten to torque value at this point. The vehicle must be in its ready-to-drive position.
3. Install the inner trailing link bolt (1) attaching the trailing link to the rear axle carrier.
4. Install the wheel and tire assembly.
5. Lower the vehicle so it is not being supported by the lift.
6. Tighten the outer trailing link bolt attaching the trailing link to the wheel carrier to 70 Nm (52 ft. lbs.).
7. Tighten the inner trailing link bolt attaching the trailing link to the rear axle carrier to 70 Nm (52 ft. lbs.).
8. Check vehicle alignment.