
Lebaron GTS L4-153 25L SOHC VIN K TBI: Air Bag Systems Fault Diagnosis
Removal
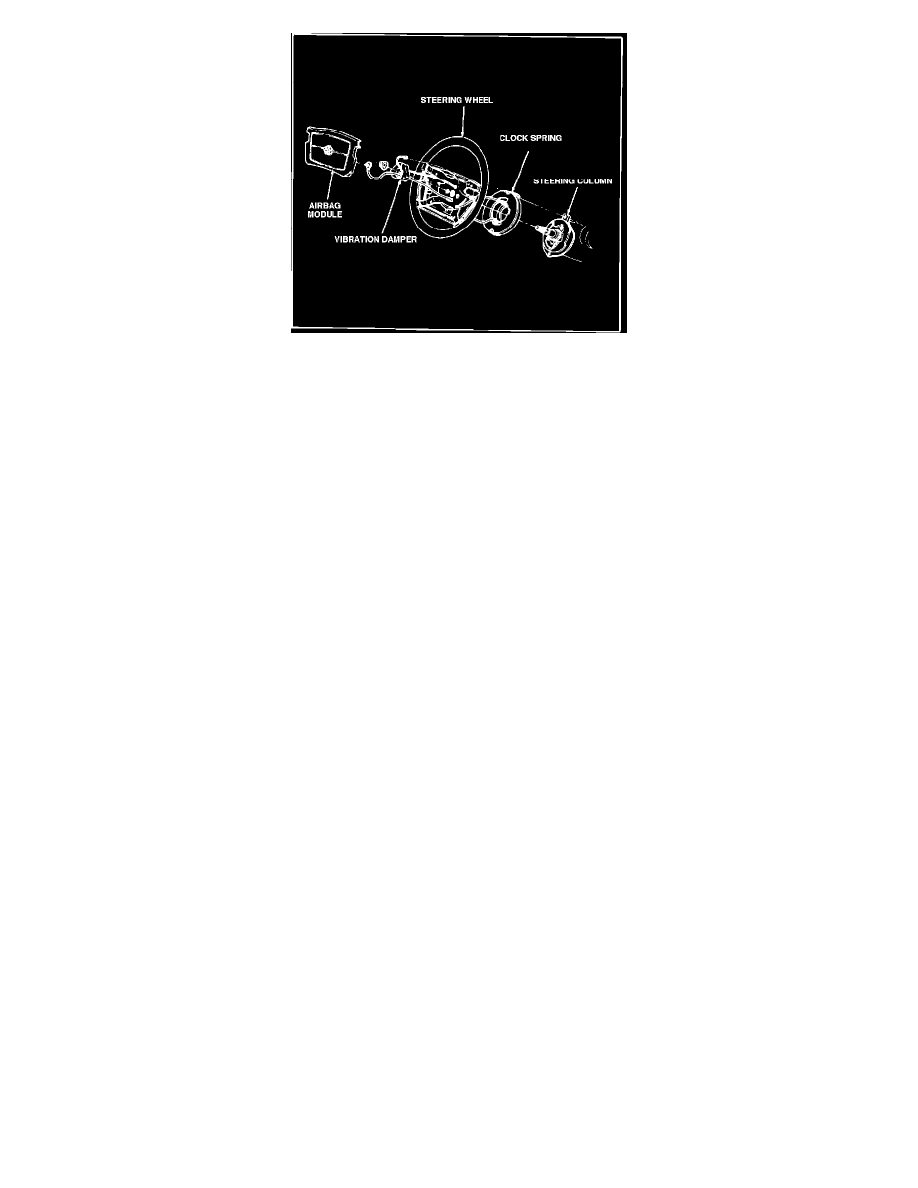
1.
Make sure the road wheels are in the straight ahead position before starting the repair.
2.
Disconnect battery ground cable and isolate.
3.
Remove the airbag module as previously outlined.
4.
Remove the steering wheel as previously outlined making sure to move the clockspring set screw to the clockspring, to insure proper positioning.
5.
Disconnect the two-way connector between the clockspring and the instrument panel wiring harness at the base of the column.
6.
To remove the clockspring assembly, loosen the two mounting screws. Cut off the connector at the base of the steering column, tape another piece
of wire (about 12" long) to the clockspring wire lead. Pull the wire up through the column. Untape the two wires and remove the clockspring,
making sure to leave the second piece of wire in the column. The clockspring cannot be used again. DO NOT attempt to repair this part.
7.
Obtain a new clockspring assembly service kit containing a clockspring assembly and lower two-way connector. Make sure all the parts are with
this kit.
Installation
1.
Tape the new clockspring wire lead to the wire that you fed into the steering column when removing the old clockspring. Pull the new clockspring
wire lead down through the column using the wire that you taped it to. Once you have the clockspring lead through the column, untape the two
wires, insert the clockspring lead terminals into the connector, and install the locking wedge.
2.
Reconnect the clockspring assembly to the instrument panel wiring harness.
3.
Mount the clockspring assembly to the turn signal switch using the two screws. Torque to 10-20 in. lbs.
4.
Reinstall steering wheel and vibration damper (if so equipped), making sure to pull the horn lead through the upper smaller hole, and the
clockspring lead through the bottom larger hole, making sure not to pinch either of them.
Be careful to index the flats on the hub of the steering wheel with the formations on the inside of the clockspring.
5.
Remove the clockspring assembly locking screw and insert the screw into the steering wheel where it was stored before and tighten. (Torque to 4
in.lbs.)
6.
Connect the horn lead wire then the clockspring lead wire to the airbag module. The clockspring lead wire will "snap" when proper connection is
made.
7.
Bolt the airbag module to the steering column.
8.
Connect DRB II to ASDM diagnostic connector. (Located at right side of console on G/J-body and at right kick panel on M-body.)
9.
From PASSENGER side of vehicle, turn the ignition key to "ON" position. Exit vehicle with DRB II.
10.
After checking that no one is inside the vehicle, reconnect the negative battery terminal.
11.
Using the DRB II, read and record any fault data including stored faults.