
Pacifica V6-3.8L VIN L (2005)
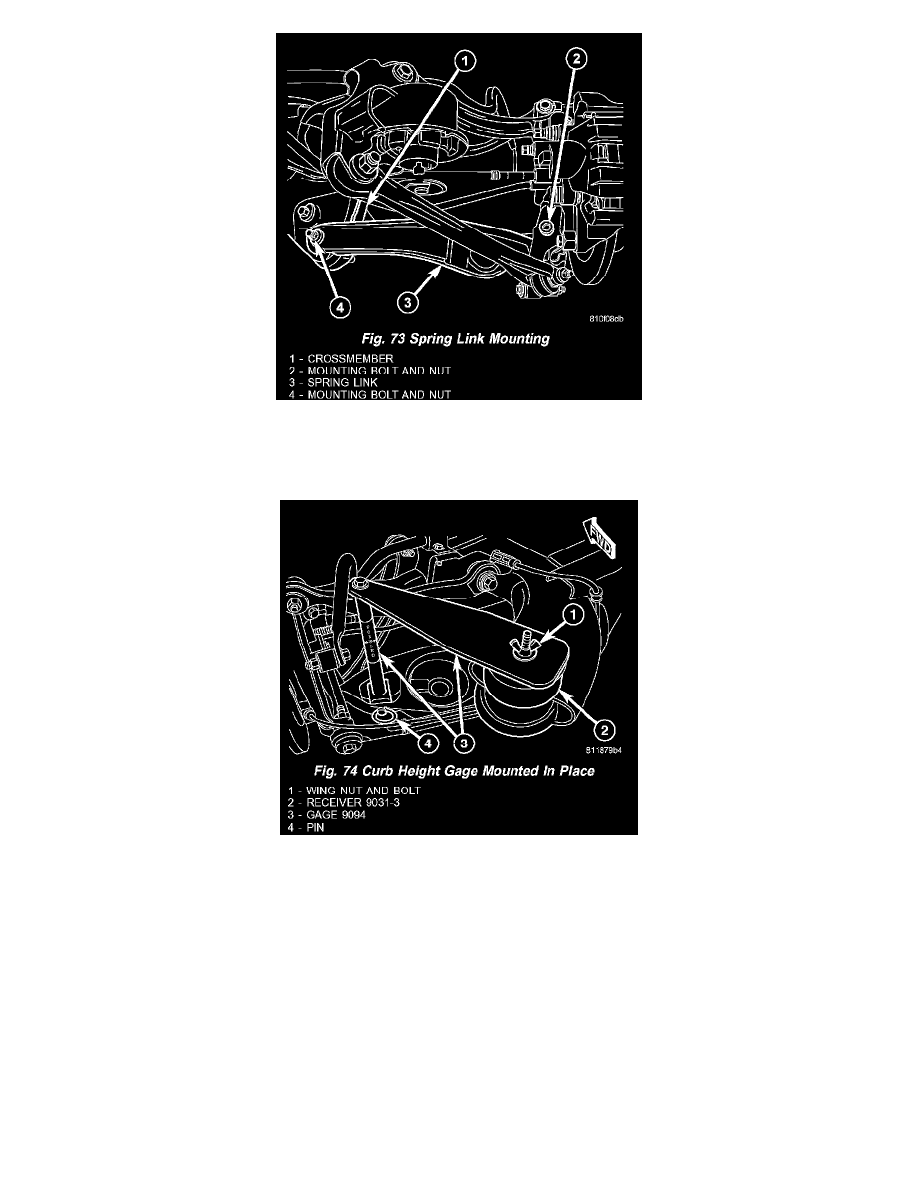
Fig. 73
f.
Install bolt and nut fastening spring link to crossmember (Fig. 73). Do not tighten at this time.
g. Set current-side of rear suspension to curb height using following tools:
Fig. 74
I.
Place Receiver, Special Tool 9031-3, cup-side-down over top of crossmember rear mount bushing (Fig. 74).
II. Place Curb Height Gage, Special Tool 9094, into shock absorber pocket in spring link and opposite end of tool over Receiver, Special
Tool 9031-3 (Fig. 74).
III. Install bolt through crossmember rear mount bushing, Receiver, Special Tool 9031-3, and Curb Height Gage, Special Tool 9094. Install
wing nut, hand tightening tools in place (Fig. 74).
IV. Move spring link up or down as necessary aligning lower shock bolt mounting hole with Curb Height Gage hole, then insert pin through
both (Fig. 74).
h. Tighten link fasteners at crossmember to following specifications:
-
Camber Link bolt - 68 N.m (50 ft.lbs.) torque (Fig. 69).
-
Compression Link bolt - 68 N.m (50 ft.lbs.) torque (Fig. 70).
-
Spring Link bolt - 129 N.m (95 ft.lbs.) torque (Fig. 73).
-
Tension Link bolt - 68 N.m (50 ft.lbs.) torque (Fig. 69).
-
Toe Link nut - 172 N.m (127 ft.lbs.) torque (Fig. 72).