
Pacifica V6-3.8L VIN L (2005)
Crankshaft: Removal and Replacement
CRANKSHAFT
REMOVAL
1) Remove the engine assembly.
2) Separate transaxle from engine.
3) Mount engine on an engine stand.
4) Remove the oil filter.
5) Remove the oil pan and oil pick-up tube.
6) Remove the timing chain cover.
7) Remove timing chain and sprockets.
8) Remove crankshaft rear oil seal and retainer.
NOTE: The 3.8L can have any number or combination of standard forged or cracked connecting rod caps. Do not mix or interchange the rod
caps.
9) Rotate the crankshaft until connecting rod cap is accessible.
10) Paint mark or scribe the connecting rod cap position.
11) Remove connecting rod bearing cap. Use care to prevent damage to the crankshaft bearing surfaces.
12) Repeat removal procedure for each connecting rod cap.
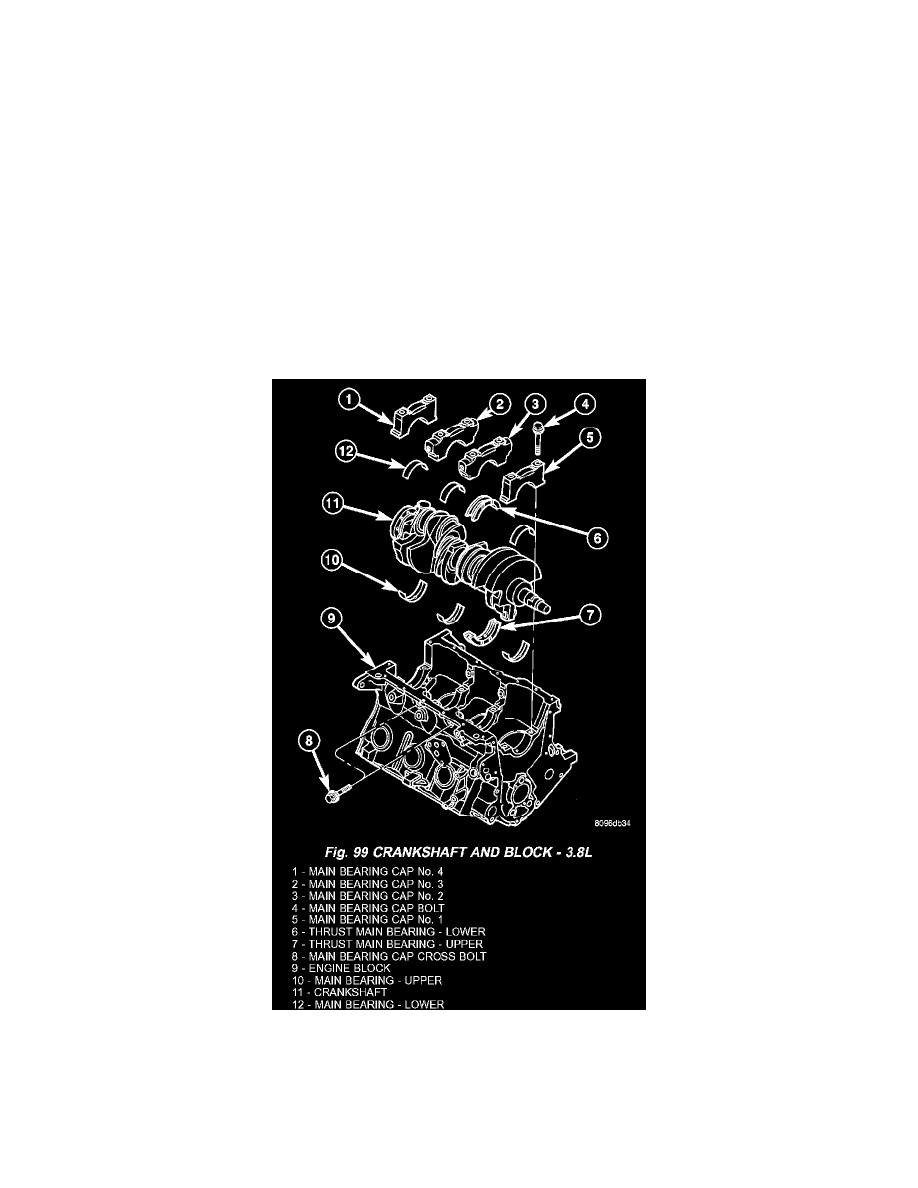
13) Remove and discard the main bearing cross bolts and washers. (Fig. 99)
NOTE: Install new cross bolt and washer assembly upon reassembly.
14) Remove the main bearing cap bolts (Fig. 99)
15) Remove the main bearing caps (Fig. 99).
16) Remove the crankshaft from engine block (Fig. 99).