
Pacifica V6-3.8L VIN L (2005)
Receiver Dryer: Service and Repair
REMOVAL
WARNING: REFER TO THE APPLICABLE WARNINGS AND CAUTIONS FOR THIS SYSTEM BEFORE PERFORMING THE
FOLLOWING OPERATION. FAILURE TO FOLLOW THE WARNINGS AND CAUTIONS COULD RESULT IN POSSIBLE PERSONAL
INJURY OR DEATH.
1. Recover the refrigerant from the refrigerant system.
2. Remove the air cleaner housing.
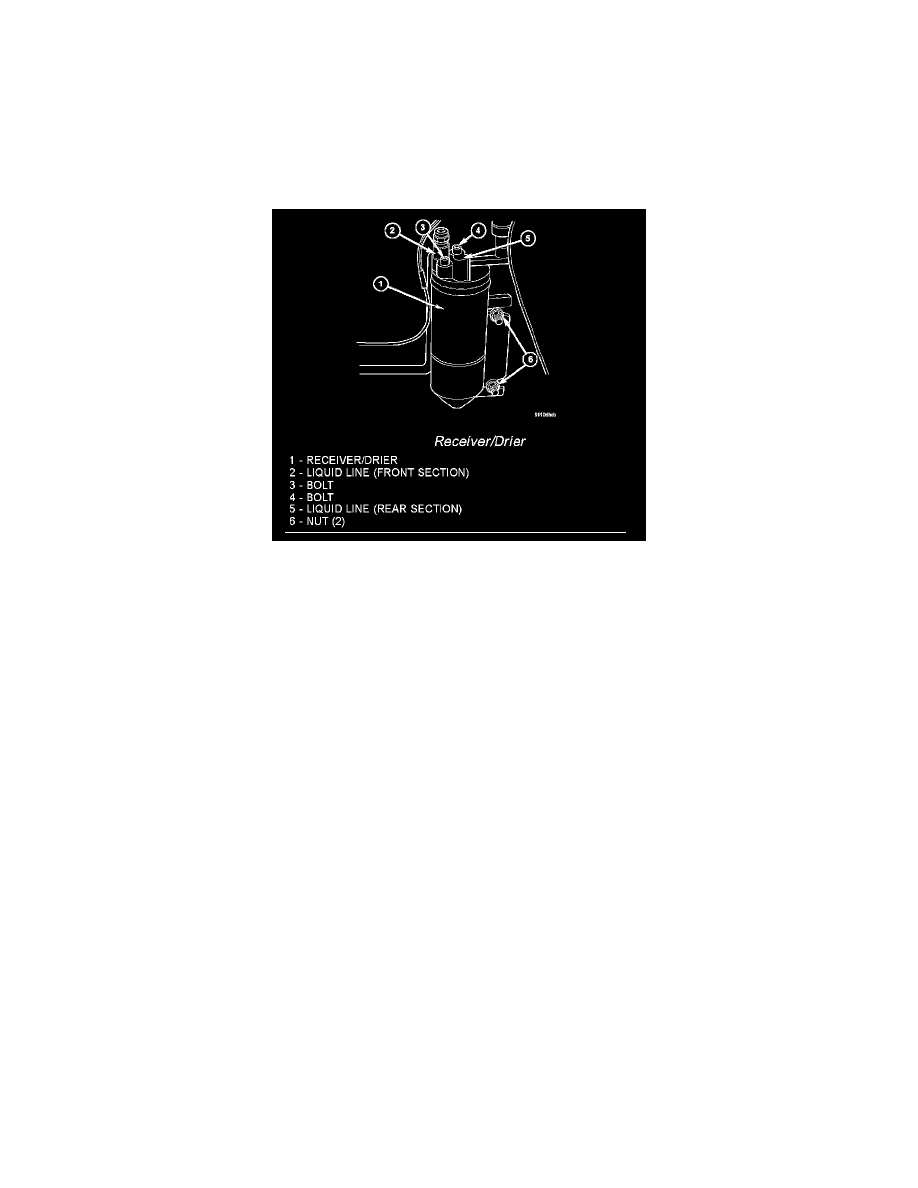
Receiver/Drier
3. Remove the bolts that secures the front and rear sections of the A/C liquid line to the receiver/ drier.
4. Disconnect the A/C liquid lines from the receiver/drier and remove and discard the O-ring seals.
5. Install a plug in, or tape over the opened liquid line fittings and the receiver/drier ports.
6. Remove the two nuts that secure the receiver/ drier to the right strut tower and remove the receiver/drier.
INSTALLATION
NOTE: If the receiver/drier is being replaced, add 30 milliliters (1 fluid ounce) of refrigerant oil to the refrigerant system. Use only refrigerant oil of
the type recommended for the A/C compressor in the vehicle.
1. Position the receiver/drier onto the weld studs on the right strut tower.
2. Install the two nuts that secure the receiver/ drier to the right strut tower. Tighten the nuts to 10 N.m (89 in. lbs.).
3. Remove the tape or plugs from the liquid line fittings and the receiver/drier ports.
4. Lubricate new rubber O-ring seals with clean refrigerant oil and install them on the liquid line fittings.
5. Connect the front and rear sections of the A/C liquid line to the receiver/drier.
6. Install the bolts that secures the A/C liquid lines to the receiver/drier. Tighten the bolts to 11 N.m (100 in. lbs.).
7. Install the air cleaner housing.
8. Evacuate the refrigerant system.
9. Charge the refrigerant system.