
Pacifica V6-3.8L VIN L (2005)
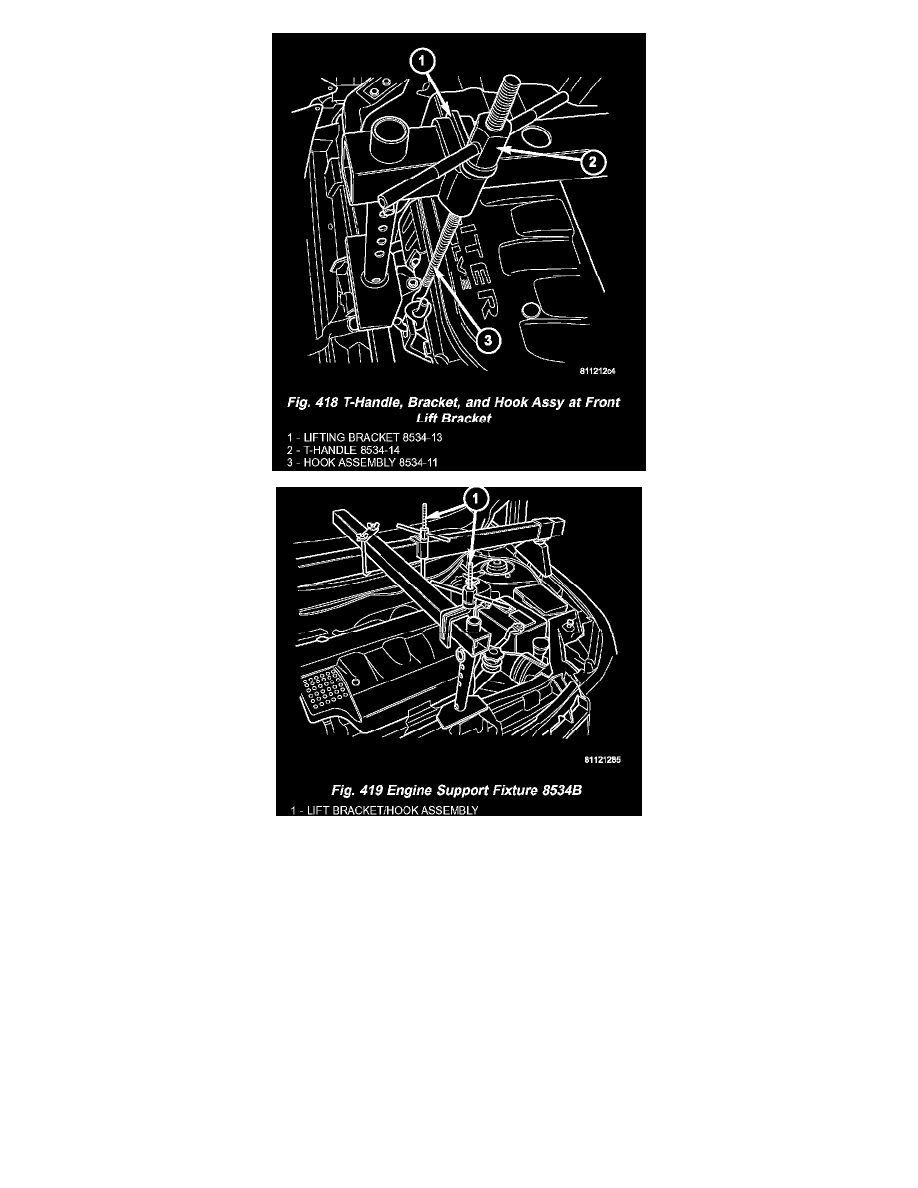
f.
Install lift bracket/hook assemblies as shown in (Fig. 417) (Fig. 418) (Fig. 419). Tighten t-handles just enough to build tension between the
fixture and drivetrain.
4. Disconnect gearshift cable from manual valve lever.
5. Remove manual valve lever from manual shaft.
6. Raise vehicle on hoist.
7. Remove engine mount (front and rear) to engine cradle crossmember nuts.
8. Place scribe marks at engine cradle crossmember and body for alignment upon reassembly.
9. Support cradle at rear with screw jack or equivalent. Partially remove engine cradle crossmember-to-body bolts, lowering cradle at rear enough to
facilitate cradle pivoting.
10. Support cradle at front with screw jack or equivalent. Remove engine cradle crossmember-to-body bolts. Lower cradle at front approximately 10
inches to facilitate valve body removal.