
PT Cruiser L4-2.4L (2008)
Trunk / Liftgate Handle: Service and Repair
Installation
INSTALLATION
1. Clean outside liftgate panel surfaces with isopropyl alcohol.
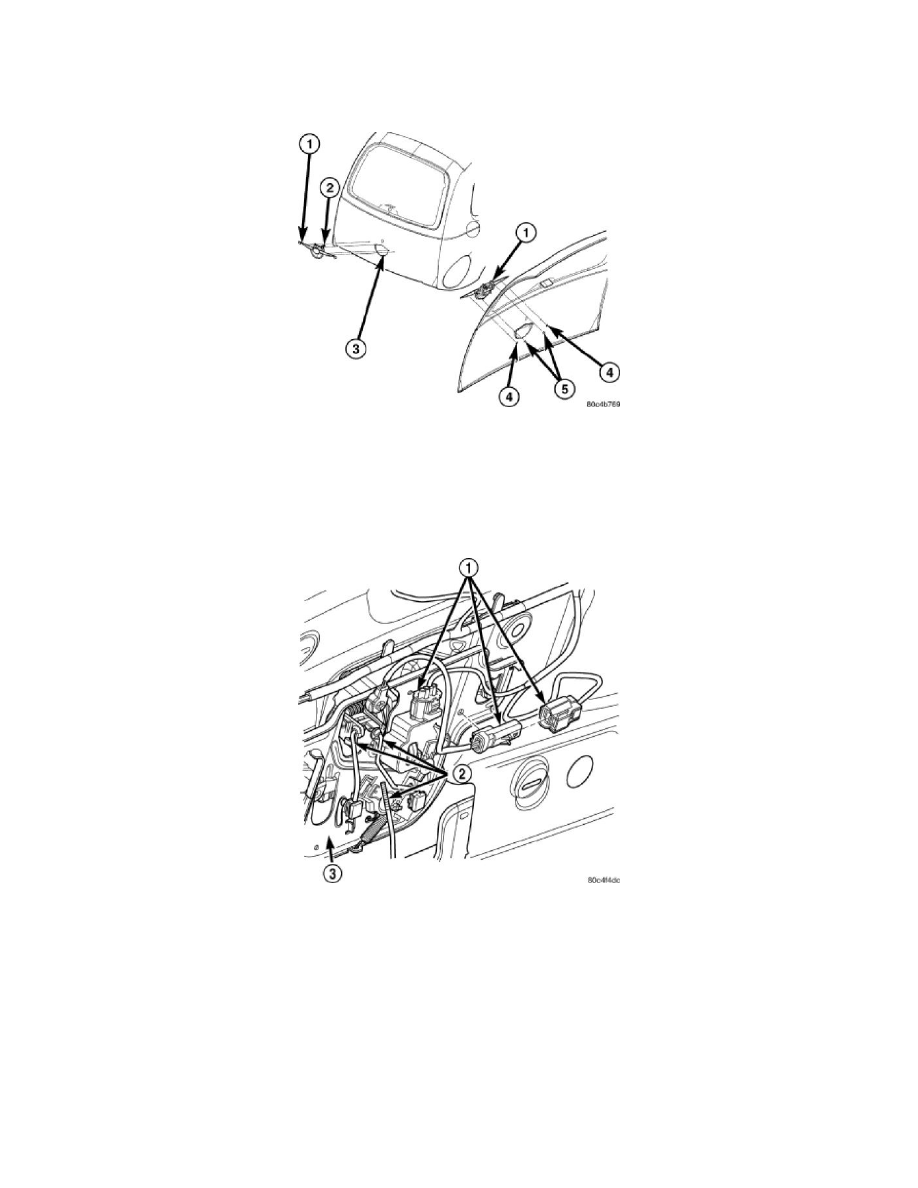
2. If the original liftgate outside handle (1) is being reused, remove the old adhesive tape from the outside handle and install new double sided
adhesive tape onto the handle.
3. Remove the backing paper from the adhesive tape on the outside handle and position the outside handle onto the liftgate (3). Rotate the handle as
necessary to gain clearance for the lever pull arm (2).
4. Install and press the outside handle securely onto the liftgate to ensure the adhesive fully adheres to the liftgate panel.
5. Install the four nuts (4 and 5) that secure the outside handle to the liftgate.
6. Position the liftgate latch control (3) to the liftgate and install the two retaining bolts. Tighten the bolts securely.
7. Connect the linkage rods (2) to the latch control and install the retainer clips. Make sure the retainer clips are fully engaged.
8. Connect the liftgate wire harness connectors (1) and engage the connector retainer to the control.
9. Reconnect the negative battery cable.
10. Verify liftgate lock cylinder and latch operation.
11. Install the liftgate trim panel See: Trunk / Liftgate Interior Trim Panel/Service and Repair/Liftgate Trim Panel - Installation.