
PT Cruiser L4-2.4L (2008)
Trunk / Liftgate Hinge: Service and Repair
Decklid Hinge
Removal
REMOVAL
1. Disconnect and isolate the negative battery cable.
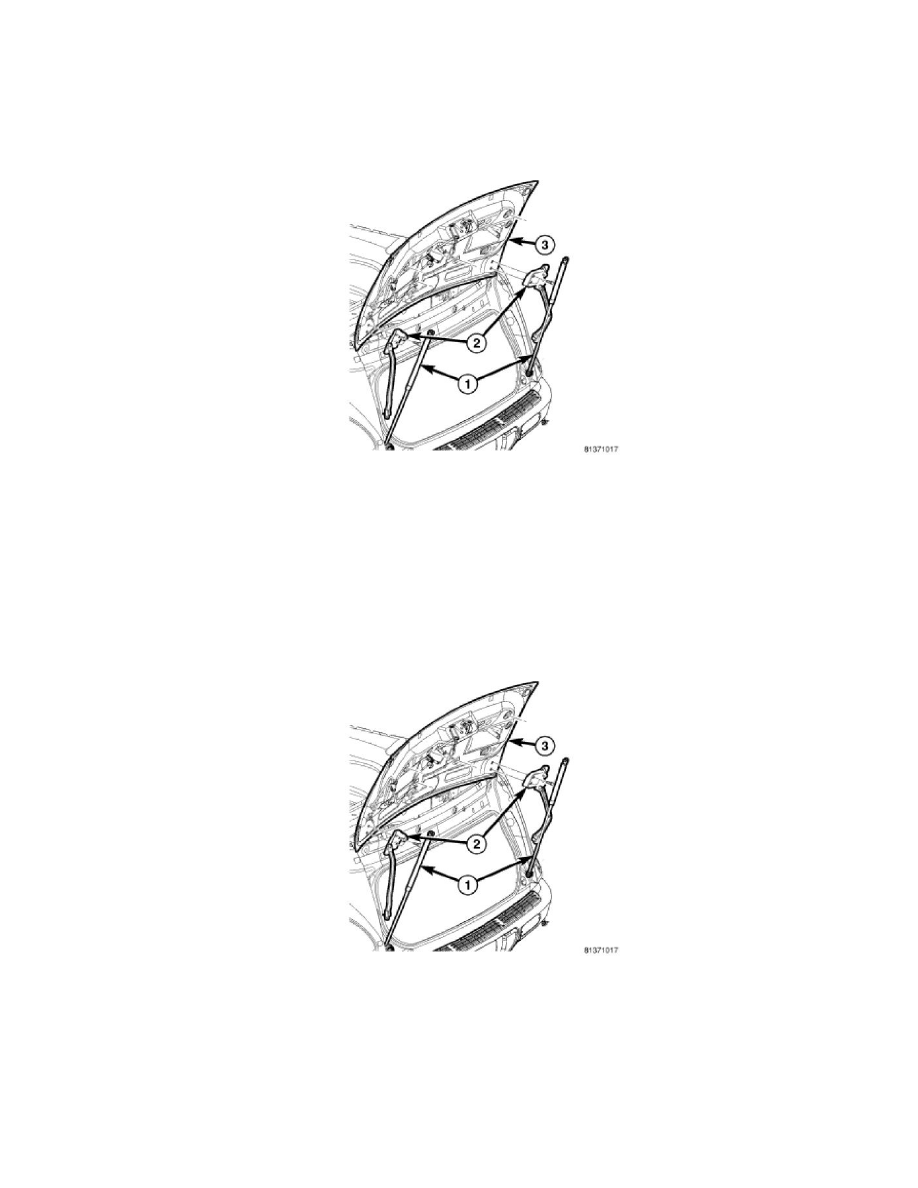
2. Release the decklid latch and open the decklid (3).
3. Remove the decklid trim panel See: Interior Moulding / Trim/Trim Panel/Service and Repair/Decklid - Convertible/Decklid Trim Panel - Removal
.
4. Disconnect the decklid wire harness from the body wire harness.
5. Support decklid with a suitable lifting device and disengage the clips that secure the gas prop rods (1) to the decklid.
6. Remove the bolts that secure the decklid to the decklid hinges (2) and with assistance, carefully remove the liftgate the from vehicle.
7. Remove the bolts that secure the decklid hinges to the body and remove the hinges.
Installation
INSTALLATION
1. Position the decklid hinges (2) to the rear of the body and install the retaining bolts. Tighten the bolts to 33 Nm (24 ft. lbs.).
2. With assistance, carefully position the decklid (3) to the rear of the vehicle.
3. Install the bolts that secure the decklid to the decklid hinges. Tighten the bolts to 33 Nm (24 ft. lbs.).
4. Position the gas prop rods (1) to the decklid and engage the prop rod retaining clips.
5. Remove the lifting device.
6. Connect the decklid wire harness to the body wire harness.
7. Install the decklid trim panel See: Interior Moulding / Trim/Trim Panel/Service and Repair/Decklid - Convertible/Decklid Trim Panel - Installation
.
8. Align the decklid. The decklid should fit flush and have even gaps to adjacent body panels. Gap specifications are as follows:
-
7 mm (0.280 in.) to the fascia.