PT Cruiser L4-2.4L (2008)

Evaporator Core: Service and Repair
Installation
INSTALLATION
CAUTION: Be certain to adjust the refrigerant oil level when servicing the A/C refrigerant system See: Service and Repair/Refrigerant Oil
Level. Failure to properly adjust the refrigerant oil level will prevent the A/C system from operating as designed and can cause serious A/C
compressor damage.
NOTE: When replacing multiple A/C system components, refer to the Refrigerant Oil Capacities chart to determine how much oil should be
added to the refrigerant systemSee: Service and Repair/Refrigerant Oil Level.
NOTE: If only the A/C evaporator is being replaced, add 60 milliliters (2 fluid ounces) of refrigerant oil to the refrigerant system. Use only
refrigerant oil of the type recommended for the A/C compressor in the vehicle.
NOTE: Replacement of the refrigerant line O-ring seals is required anytime a refrigerant line is opened. Failure to replace the rubber O-ring
seals could result in a refrigerant system leak.
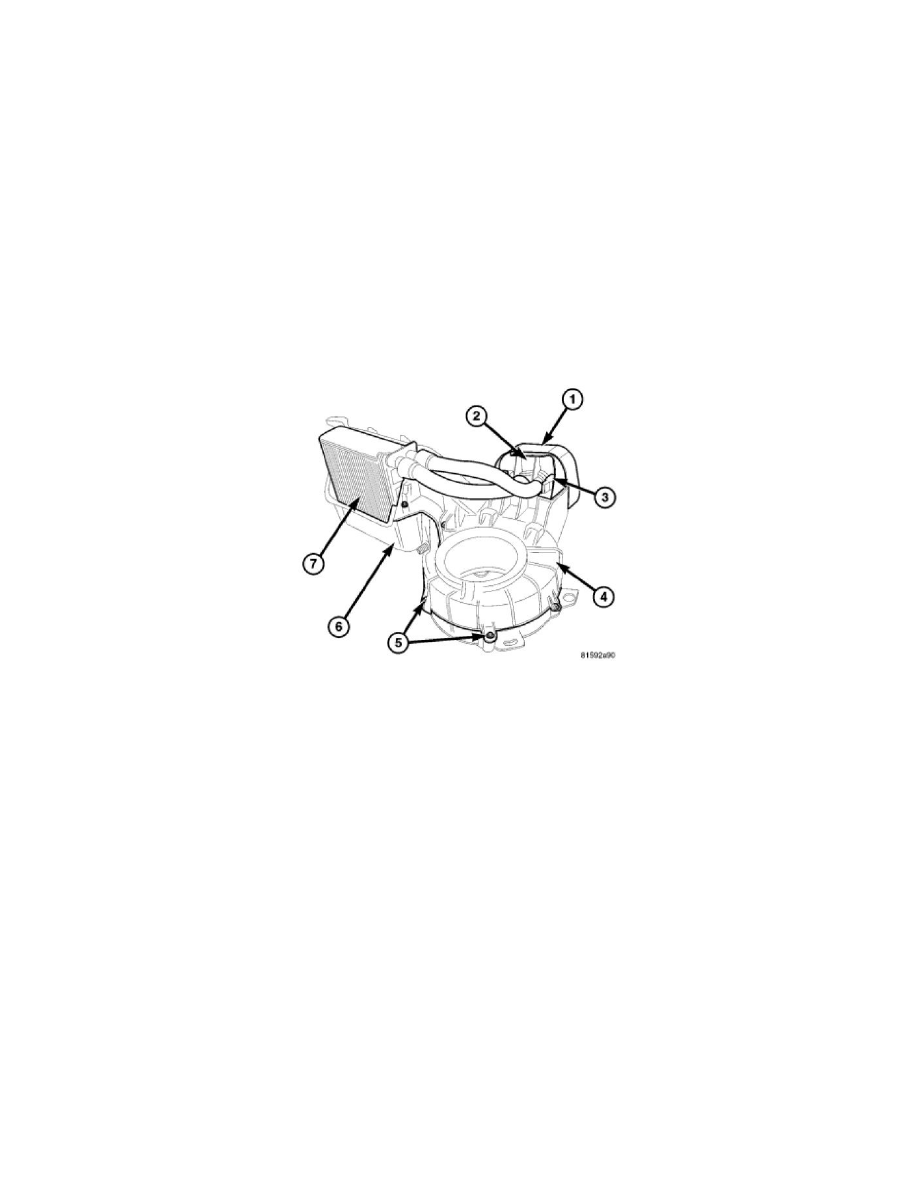
NOTE: LHD model with A/C shown in illustrations. RHD and heater-only model similar.
NOTE: If the foam insulator for the A/C evaporator or its tubes is deformed or damaged, it must be replaced.
1. Install the A/C evaporator and tubes (7) into the lower half of the HVAC housing (6). Make sure that the evaporator drain within the HVAC
housing is clean and unrestricted and that the insulators around the A/C evaporator and its tubes are properly installed.
2. Install the flange (2) to the upper half of the HVAC housing (4).
3. Install the two screws (3) that secure the flange to the HVAC housing. Tighten the screws to 2.2 Nm (20 in. lbs.).
NOTE: If the foam seal for the flange is deformed or damaged, it must be replaced.
4. Install the foam seal (1) onto the flange.
