PT Cruiser L4-2.4L (2008)

Hose/Line HVAC: Service and Repair
A/C Line - Removal
Discharge Line
REMOVAL
WARNING: Review safety precautions and warnings in this group before performing this procedure See: Service Precautions/Warning and
See: Service Precautions/Caution. Failure to follow the warnings and cautions could result in possible personal injury or death.
1. Recover the refrigerant from the refrigerant system See: Service and Repair/Refrigerant System Recovery.
2. Remove the upper radiator support See: Body and Frame/Radiator Support/Service and Repair/Removal.
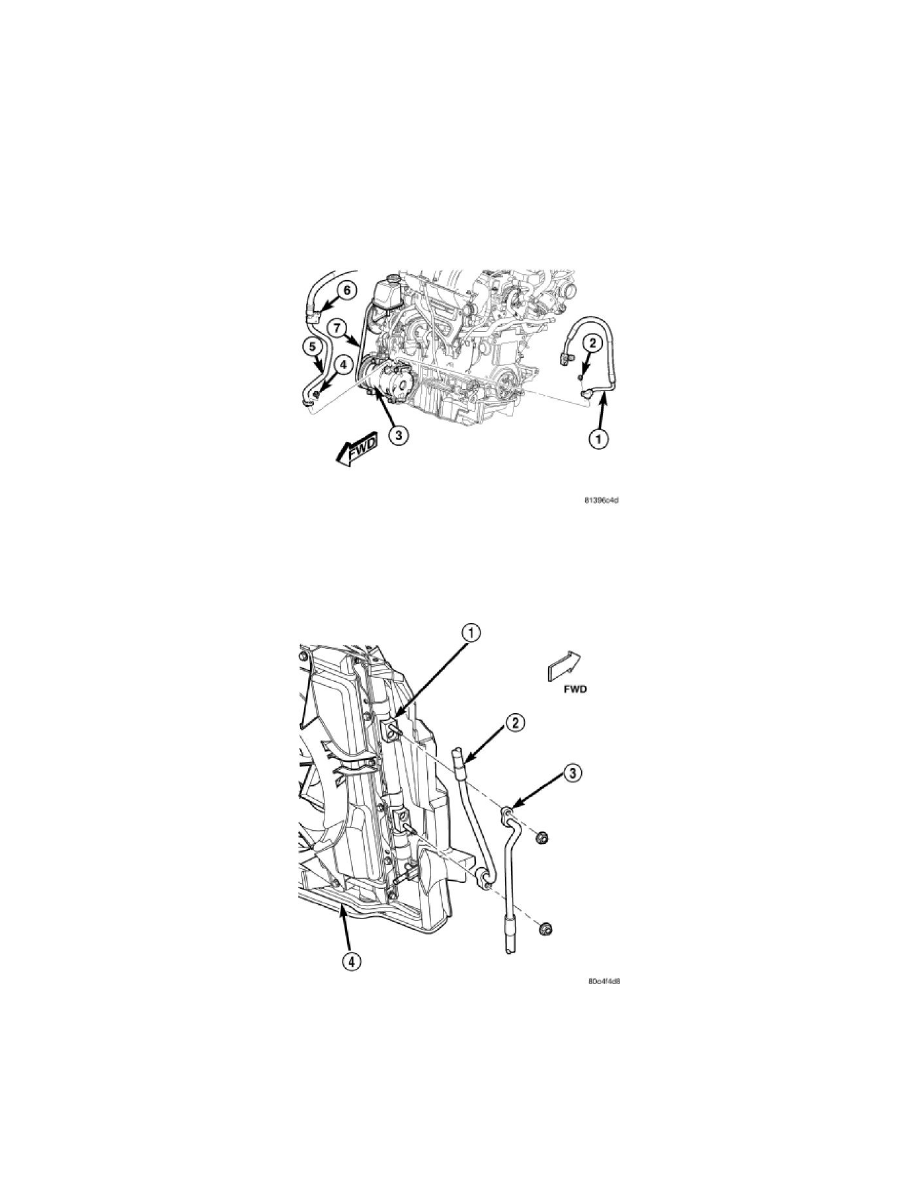
3. Remove the bolt (2) that secures the A/C discharge line (1) to the A/C compressor (3).
4. Disconnect the A/C discharge line from the A/C compressor and remove and discard the O-ring seal.
5. Install plug in, or tape over the opened discharge line fitting and the compressor discharge port.
6. Remove the nut that secures the A/C discharge line (3) to the A/C condenser (1).
7. Disconnect the A/C discharge line from the A/C condenser and remove and discard the O-ring seal.
8. Install plug in, or tape over the opened discharge line fitting and the condenser port.
Liquid Line
REMOVAL
WARNING: Review safety precautions and warnings in this group before performing this procedure See: Service Precautions/Warning and
