
PT Cruiser L4-2.4L (2008)
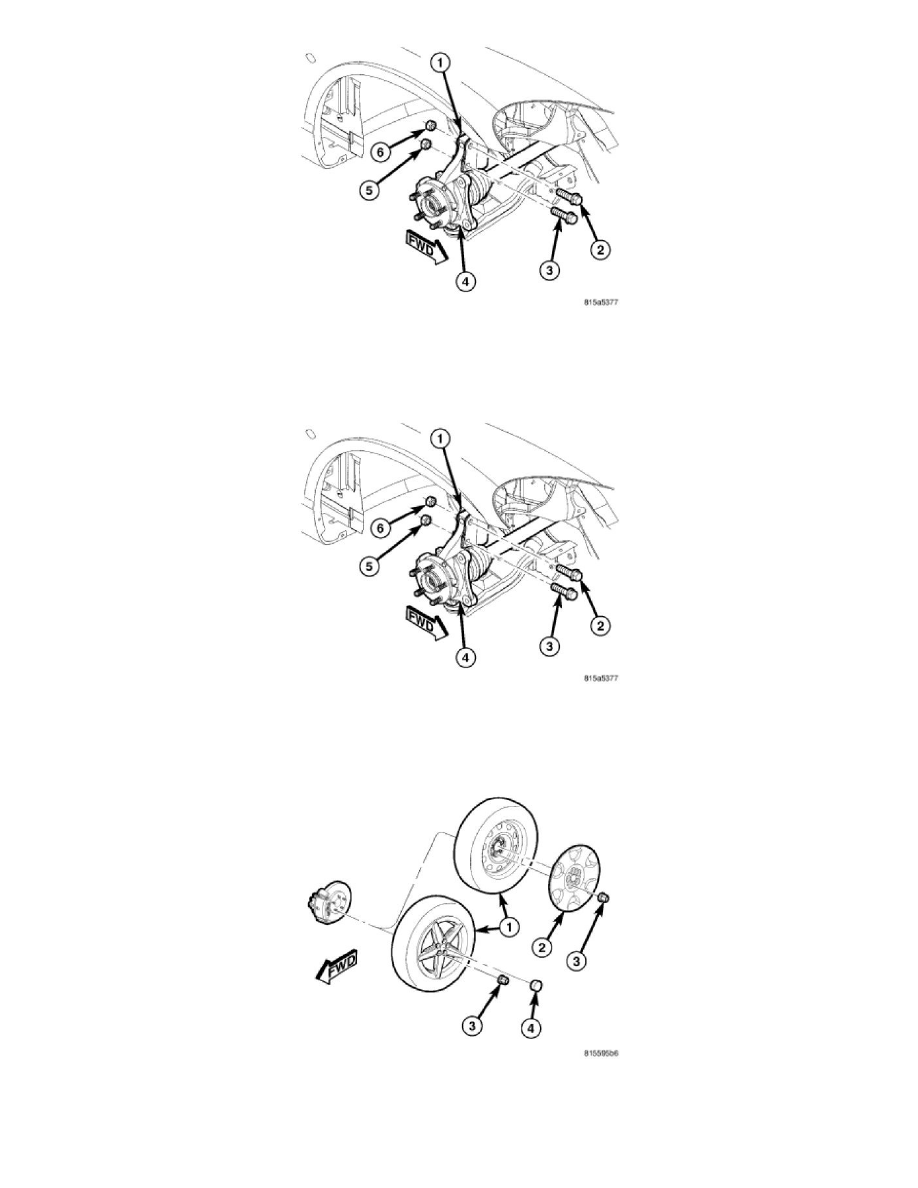
3. Remove the original upper bolt (2) and nut (6) attaching the strut clevis bracket (1) to the knuckle (4).
4. Install a bolt from the adjustment package into the hole where the original bolt was removed. Install the bolt from the front.
5. Install a nut provided in adjustment package on the replacement bolt. Tighten the nut until it's snug, but still allows the knuckle to slide in the
clevis bracket.
6. Remove the original lower bolt (3) and nut (5) attaching the strut clevis bracket (1) to the knuckle (4).
7. Install a bolt from the adjustment package into the bottom hole of the strut clevis bracket. Install the bolt from the front.
8. Install a nut provided in adjustment package on the replacement bolt. Tighten the nut until it's snug, but still allows the knuckle to slide in the
clevis bracket.
9. Install the tire and wheel assembly (1) See: Wheels and Tires/Service and Repair/Removal and Replacement/Tires and Wheels - Installation.
Install and tighten the wheel mounting nuts (3) to 135 Nm (100 ft. lbs.).
10. Perform the above procedure to opposite strut as required.
11. Lower the vehicle and jounce the front and rear of the vehicle.