
PT Cruiser L4-2.4L (2008)
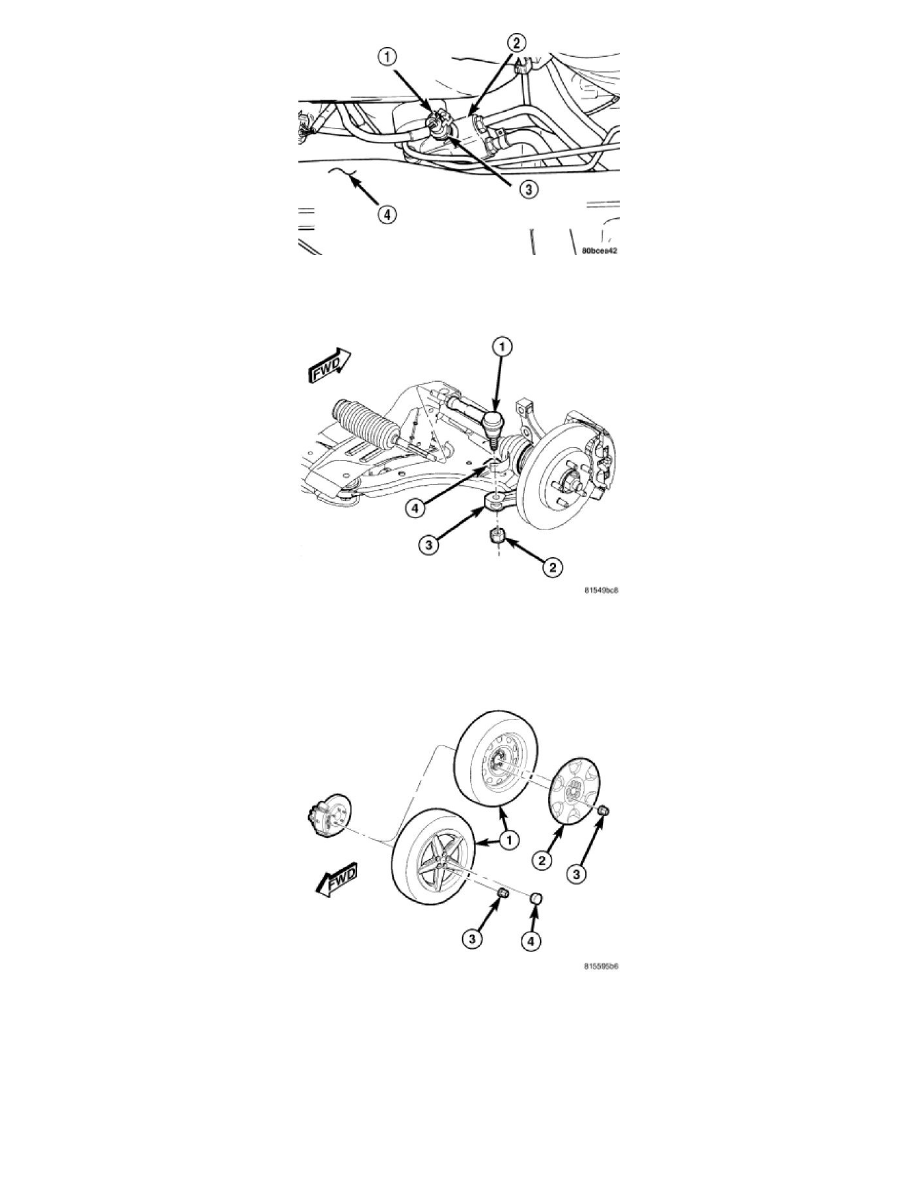
27. If equipped with a power steering fluid pressure switch (3), connect the wiring harness connector (1) to the power steering fluid pressure switch
(3). Be sure the locking tab on the wiring harness connector is securely latched following installation.
28. On each side of vehicle, place the tie rod heat shield (4) on the knuckle arm (3) so that the shield is positioned straight away from the steering gear
and tie rod end once installed. Align the hole in the shield with the tie rod end mounting hole.
29. On each side of vehicle, install the outer tie rod (1) ball stud into the hole in the knuckle arm (3). Start the tie rod mounting nut (2) onto the stud.
While holding the tie rod end stud with a wrench, tighten the nut with a wrench or crowfoot wrench. Tighten the nut to 55 Nm (40 ft. lbs.).
30. On both sides of vehicle, install the tire and wheel assembly (1) See: Wheels and Tires/Service and Repair/Removal and Replacement/Tires and
Wheels - Installation. Install and tighten wheel mounting nuts (3) to 135 Nm (100 ft. lbs.).
31. Lower the vehicle.
32. Position the dash-to-lower coupling seal in place over the lower coupling's plastic collar.
NOTE: Verify that grease is present on the lip of the dash-to-coupling seal where it contacts the coupling's plastic collar.