
PT Cruiser L4-2.4L (2008)
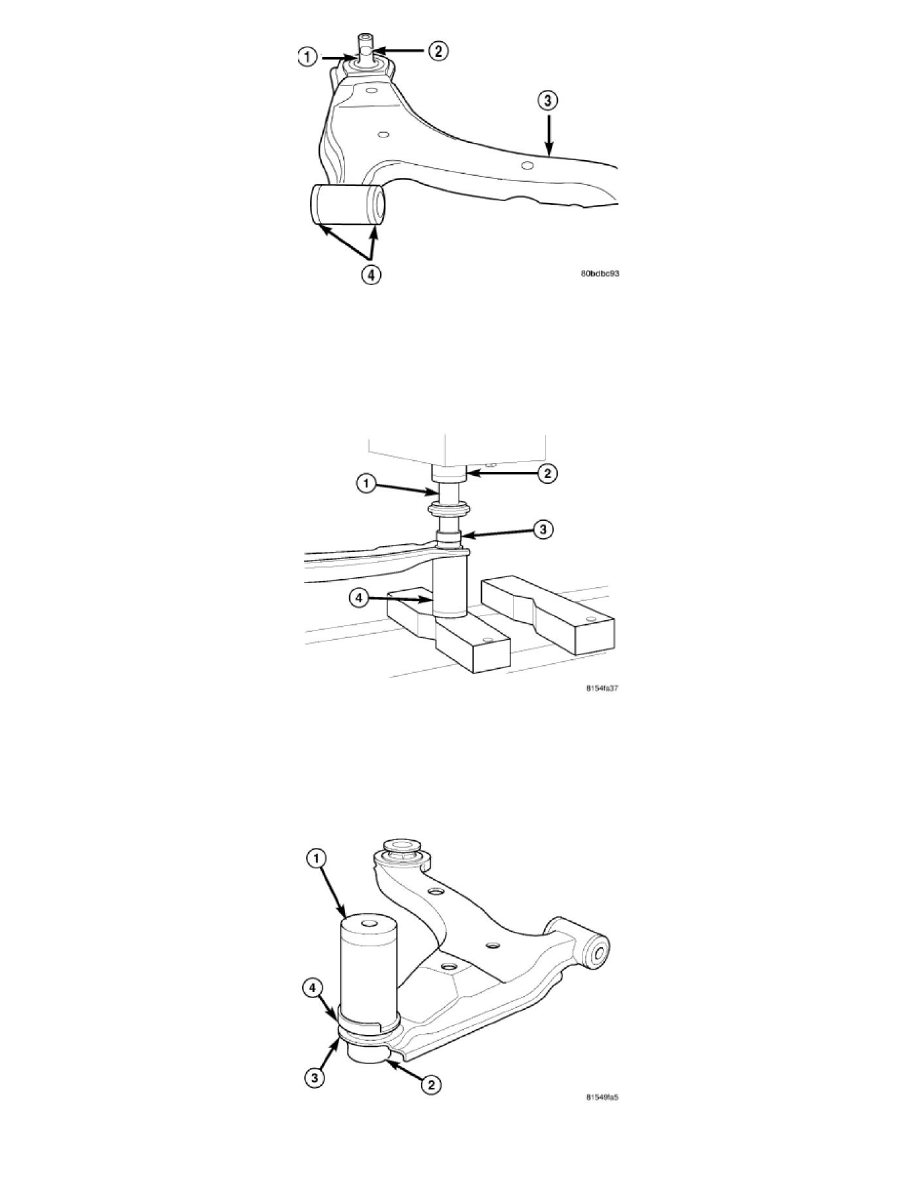
CAUTION: When installing a ball joint in its mounting hole in the lower control arm, position the ball joint so the notch (2) in the ball joint
stud (1) is facing the lower control arm front isolator bushing (4). This will ease pinch bolt installation once the ball joint is installed to the
knuckle.
1. By hand, position the ball joint into it's bore on the lower control arm from the bottom side. To avoid binding upon installation, be sure the ball
joint is not cocked in the bore.
2. Position the Installer (4), Special Tool 6758, on a hydraulic press, cup end upward to support the lower control arm.
3. Place the control arm upside-down over top of the Installer, aligning the ball joint (3) stud squarely with the Installer's cup.
4. Place the larger end of the Adapter (1), Special Tool 6804, on top of the ball joint (3) as shown.
5. Lower the hydraulic press ram (2), pressing the ball joint into the lower control arm until the shoulder on the ball joint bottoms against the lower
control arm ball joint bore. Do not apply excessive pressure against ball joint and lower control arm once the ball joint bottoms.
6. Remove the tools and arm from the hydraulic press.
CAUTION: When installing the sealing boot on the ball joint, position the upward lip on the outside perimeter of the seal boot (4) outward,