
PT Cruiser L4-2.4L (2008)
Lateral Stabilizer Rod: Service and Repair
Removal
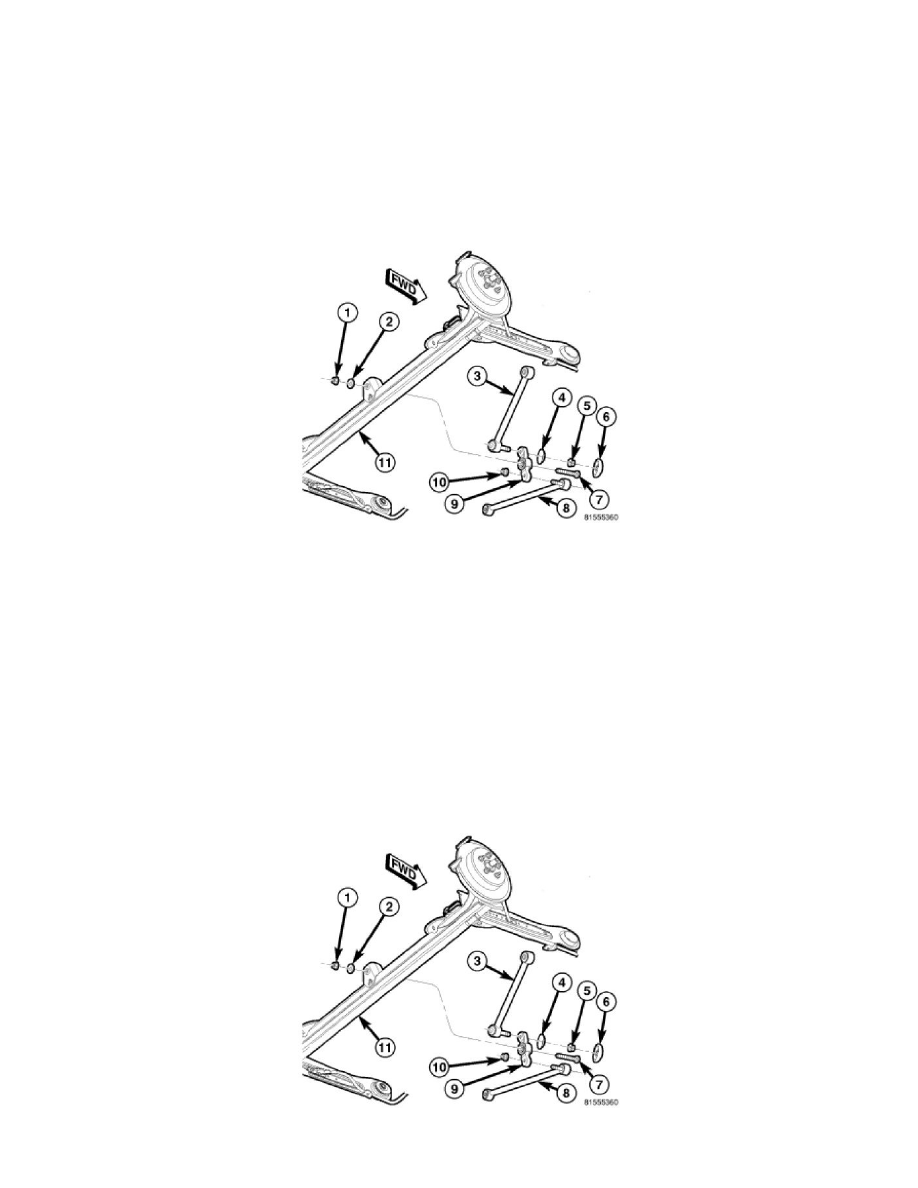
Bell Crank
BELL CRANK
NOTE: Before proceeding, See: Service Precautions/Rear Suspension.
1. Raise and support the vehicle. See: Wheels and Tires/Vehicle Lifting/Service and Repair
2. Remove the cap (6) from the upper link ball joint nut (5).
3. Remove the nut (5) securing the upper link ball joint to the bell crank (9).
4. Install Remover, Special Tool MB991113, on the upper link (3) ball joint at the bell crank and release the ball joint from the bell crank.
5. Remove the nut (1) securing the bell crank pivot bolt in the center of the axle (11).
6. With the bolt (7) still installed, slide the bell crank (9) away from the axle just enough to allow removal of the nut (10) securing the lower link to
the bell crank.
7. Remove the nut (10) securing the lower link ball joint to the bell crank (9).
8. Install Remover, Special Tool MB991113, on the lower link (8) ball joint at the bell crank and release the ball joint from the bell crank.
9. Remove the pivot bolt (7) and bell crank (9).
Lower
LOWER
NOTE: Before proceeding, See: Service Precautions/Rear Suspension.
1. Raise and support the vehicle. See: Wheels and Tires/Vehicle Lifting/Service and Repair
2. Remove the nut (1) securing the bell crank pivot bolt in the center of the axle (11).