PT Cruiser L4-2.4L (2008)

Wheel Fastener: Service and Repair
Studs - Installation
Front
INSTALLATION
NOTE: Use the following procedure to install one of five studs on one wheel hub.
1. Install the NEW wheel mounting stud in the flange of hub from the rear.
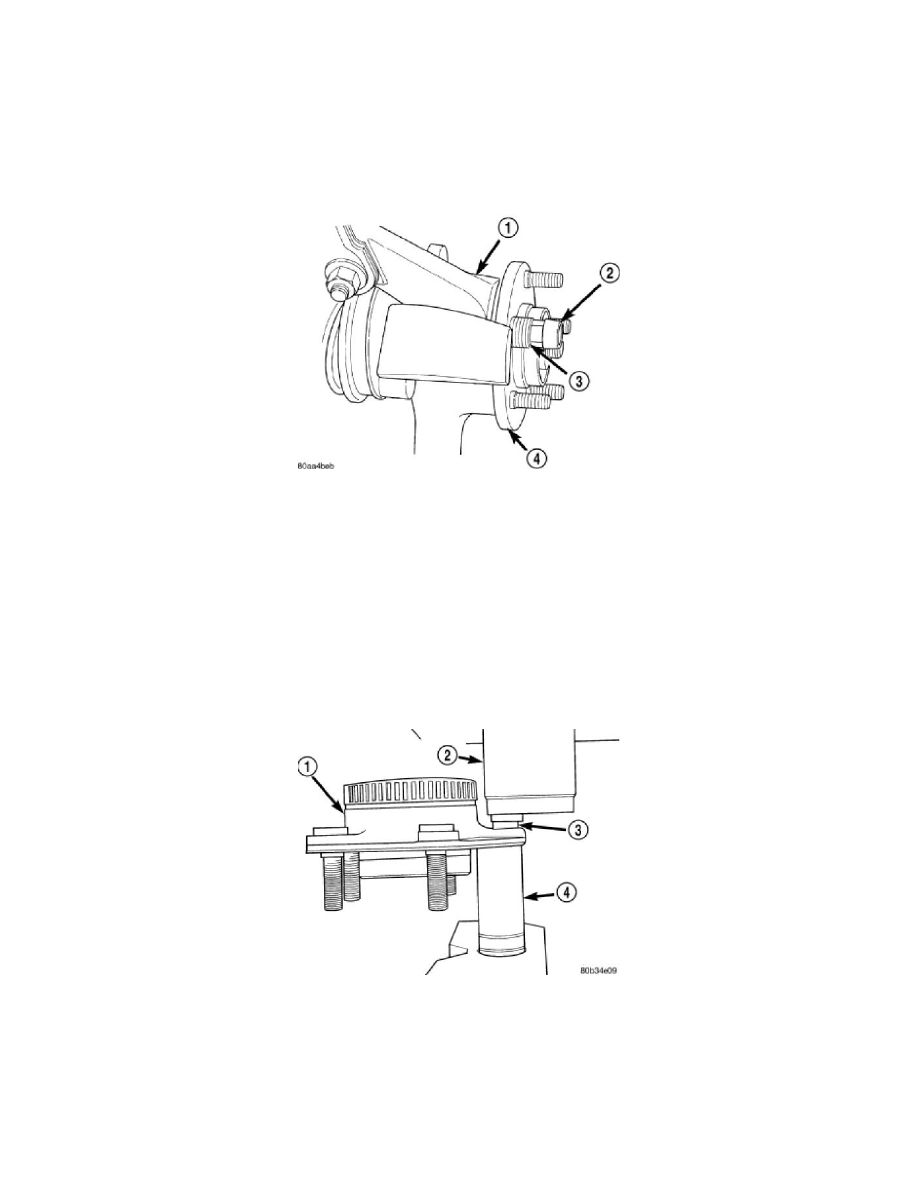
2. Install several washers (3) and a standard wheel mounting (lug) nut (2) on the stud. Install the mounting nut so that the flat side of the nut is against
the washers to eliminate any binding.
3. Tighten the wheel mounting nut (2). This will pull the wheel mounting stud into the hub flange. When the head of the stud is fully seated against
the rear of the hub flange, remove the wheel mounting nut and washers.
4. Install the brake rotor and all components previously removed to access it. See: Brakes and Traction Control/Disc Brake System/Brake
Rotor/Disc/Service and Repair/Removal and Replacement/Brake Rotor - Installation
Rear
INSTALLATION
CAUTION: DO NOT hammer studs into the hub flange. If a stud is installed in such a manner, damage to the hub and bearing assembly may
occur leading to premature bearing failure.
1. Install the wheel stud (3) into mounting hole from the rear of the hub and bearing assembly.
2. Position the hub and bearing assembly (1) face down with the stud pointing down into the well of the 21 mm impact socket (4). The hydraulic
press ram (2) must line up with the stud (3).
3. Press the stud (3) into the hub flange until it bottoms.
4. Remove the hub and bearing assembly (1) from the press.
5. Install the hub and bearing on the vehicle. See: Wheel Bearing/Service and Repair/Rear Hub / Bearing - Installation
