
PT Cruiser L4-2.4L (2008)
Windshield: Service and Repair
Installation
Coupe
COUPE
CAUTION: Open the left front door glass before installing windshield to avoid pressurizing the passenger compartment. If a door is slammed
before urethane bonding is cured, water leaks can result.
Allow the urethane at least 24 hours to cure before returning the vehicle to use.
To avoid stressing the replacement windshield, the urethane bonding material on the windshield fence should be smooth and consistent to the
shape of the replacement windshield. The support spacers should be cleaned and properly installed on weld studs or repair screws at bottom of
windshield opening.
1. Verify support spacers in windshield opening. If not present, install spacers as indicated.
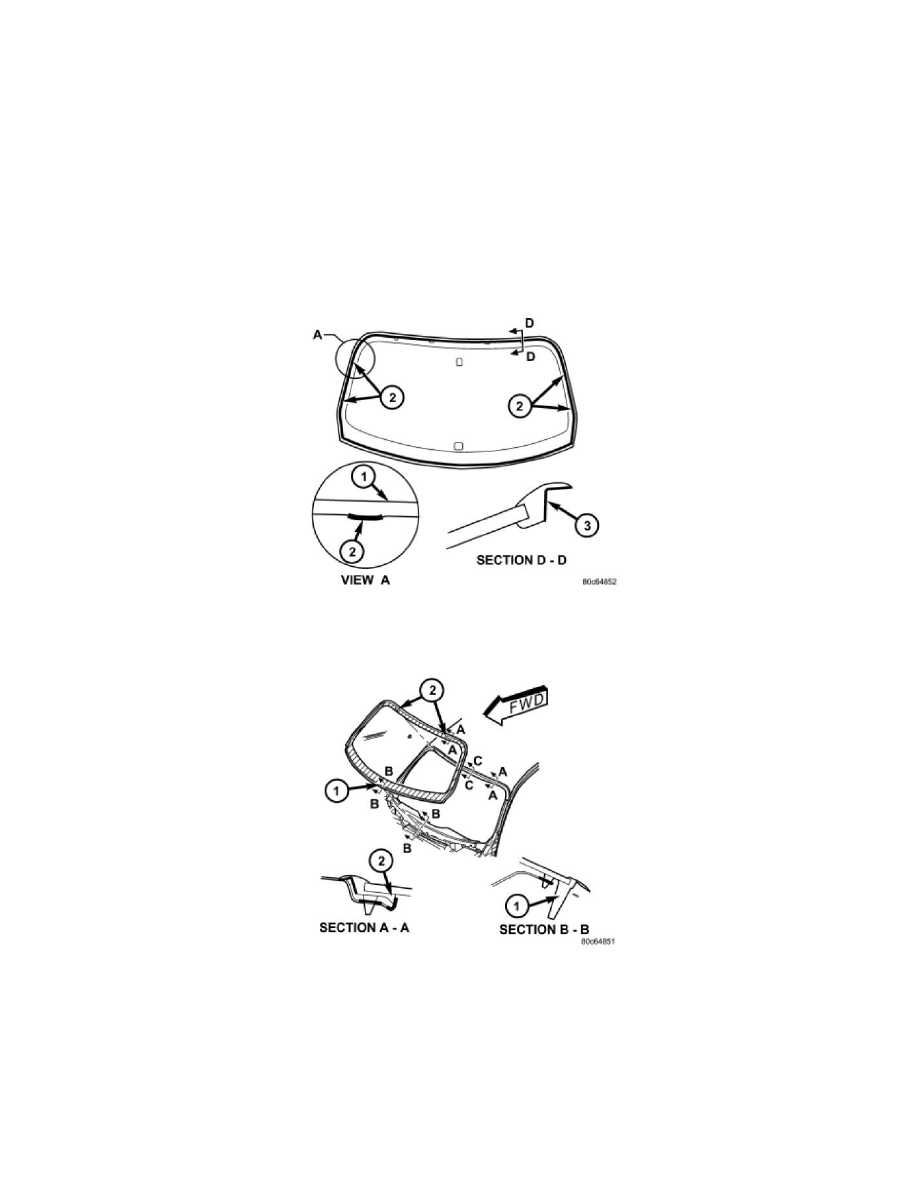
2. Verify squeak tape (2) on roof panel hooks. If not present, install squeak tape. Section C-C.
3. Verify replacement windshield has squeak tape (2) and anti-squeak lube (3). If not present, install squeak tape and anti-squeak lube.
4. Position windshield into opening by installing encapsulation locator pin (1) then loading the encapsulation hooks (2) onto the panel hooks.
5. Verify glass encapsulation lays evenly along roof panel and that there is no gapping of the encapsulation squeak tape to the windshield opening. If
gaps are present, the pinch weld fence must be formed to the shape of the new glass.
6. Remove replacement windshield from opening.
7. Position the windshield inside up on a suitable work surface with two padded, wood 10 cm by 10 cm by 50 cm (4 in. by 4 in. by 20 in.) blocks,
placed parallel 75 cm (2.5 ft.) apart.
WARNING: Do not use solvent based glass cleaner to clean windshield before applying glass prep and primer. Poor adhesion can result.
8. Clean inside of windshield with ammonia based glass cleaner and lint-free cloth.