
PT Cruiser L4-2.4L Turbo VIN 8 (2005)
Rear Door Panel: Procedures
Trim Panel
REMOVAL
1. Release door latch and open door.
2. Lower window glass.
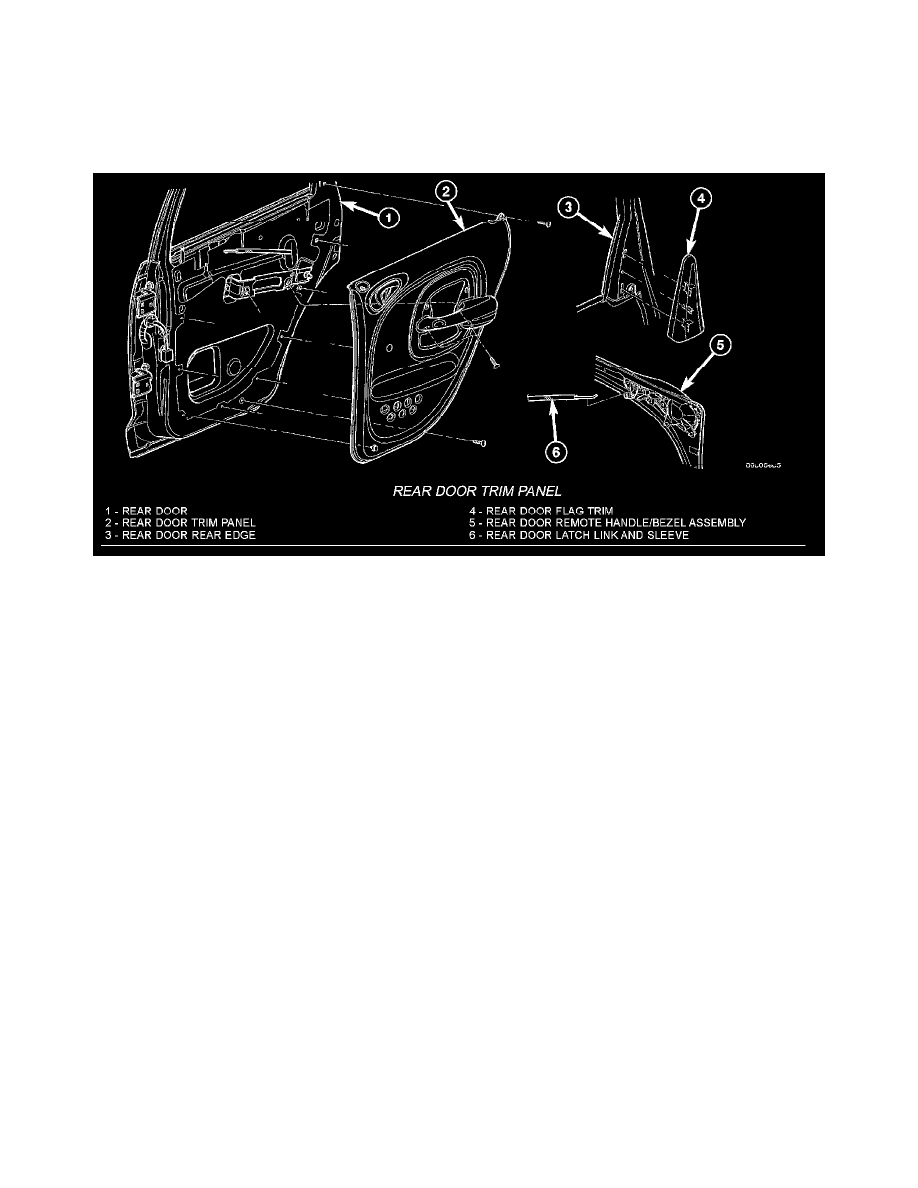
Rear Door Trim Panel
3. Remove screw from inside arm rest pull cup.
4. Remove screw from behind inside latch release handle.
5. Remove fasteners from door trim panel.
6. Disengage push in fasteners attaching trim to door panel around perimeter of trim panel.
7. Disengage push-in metal spring clip attaching trim in sail flag area.
8. Lift trim panel up off belt weatherstrip.
9. Tilt top of trim panel away from door and disengage clip attaching latch rod to handle.
10. Remove latch rod from handle.
11. Remove trim panel from door.
INSTALLATION
1. Replace any damaged or missing push in fasteners from around perimeter of door trim panel.
2. Place trim panel in position on door.
3. Insert latch rod into handle and engage clip.
4. Engage trim panel into retainer channel at top of door.
5. Locate door trim panel to inner door panel by aligning locating pins on backside of trim panel to mating holes in inner door panel.
6. Engage push in fasteners attaching trim to door panel around perimeter of trim panel.
7. Install fasteners in door trim panel.
8. Install screw behind inside latch release handle.
9. Install screw inside arm rest pull cup.
Water Dam
REMOVAL
1. Remove door trim panel.
2. Remove door speaker, if equipped.
3. Remove door trim pull cup mount bracket.
4. Disconnect clip attaching lock linkage to lock button bell-crank.
5. Peel water dam away from adhesive around perimeter of inner door panel.
INSTALLATION
1. Insure that enough adhesive remains to securely retain the water dam. Replace as necessary.
2. Place the water dam into position and press securely to adhesive making sure to properly route wiring and linkages.