
PT Cruiser L4-2.4L Turbo VIN 8 (2005)
Hood Latch Release Cable: Removal and Replacement
CABLE - LATCH RELEASE
REMOVAL
1. Remove the grille.
2. Remove the hood latch and disconnect the release cable from the latch.
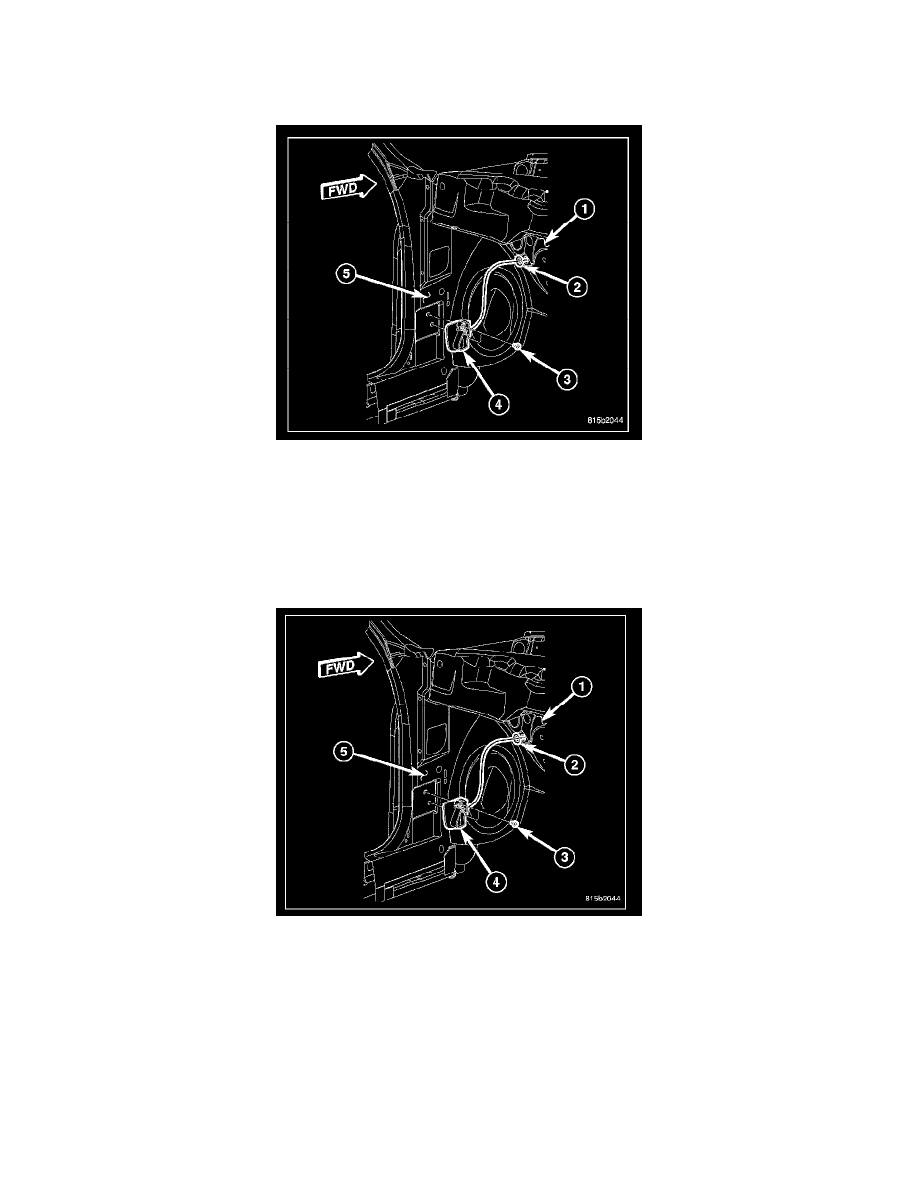
3. Remove the trim panel from the driver side cowl panel (5).
4. Remove the two screws (3) that secure the hood release cable assembly (4) to the cowl panel.
5. Remove the rubber grommet (2) from dash panel (1).
6. Pull the release cable through the hole in dash panel and remove the hood release cable assembly from the vehicle.
INSTALLATION
1. Position the hood latch release cable assembly (4) into the vehicle.
2. Route the release cable through the hole in the dash panel (1) and up to the front of the engine compartment.
3. Install the rubber grommet (2) into the dash panel.
4. Position the hood release cable assembly to the cowl panel (5) and install the two retaining screws (3). Tighten the screws securely.
5. Install the trim panel onto the driver side cowl panel.
6. Connect the hood latch release cable to the hood latch and install the latch.
7. Install the grille.
8. Verify hood alignment and latch operation. The hood should have even gaps aligned to 4 mm (0.160 in.) to the adjacent body panels.