
PT Cruiser L4-2.4L Turbo VIN 8 (2005)
Trunk / Liftgate Hinge: Removal and Replacement
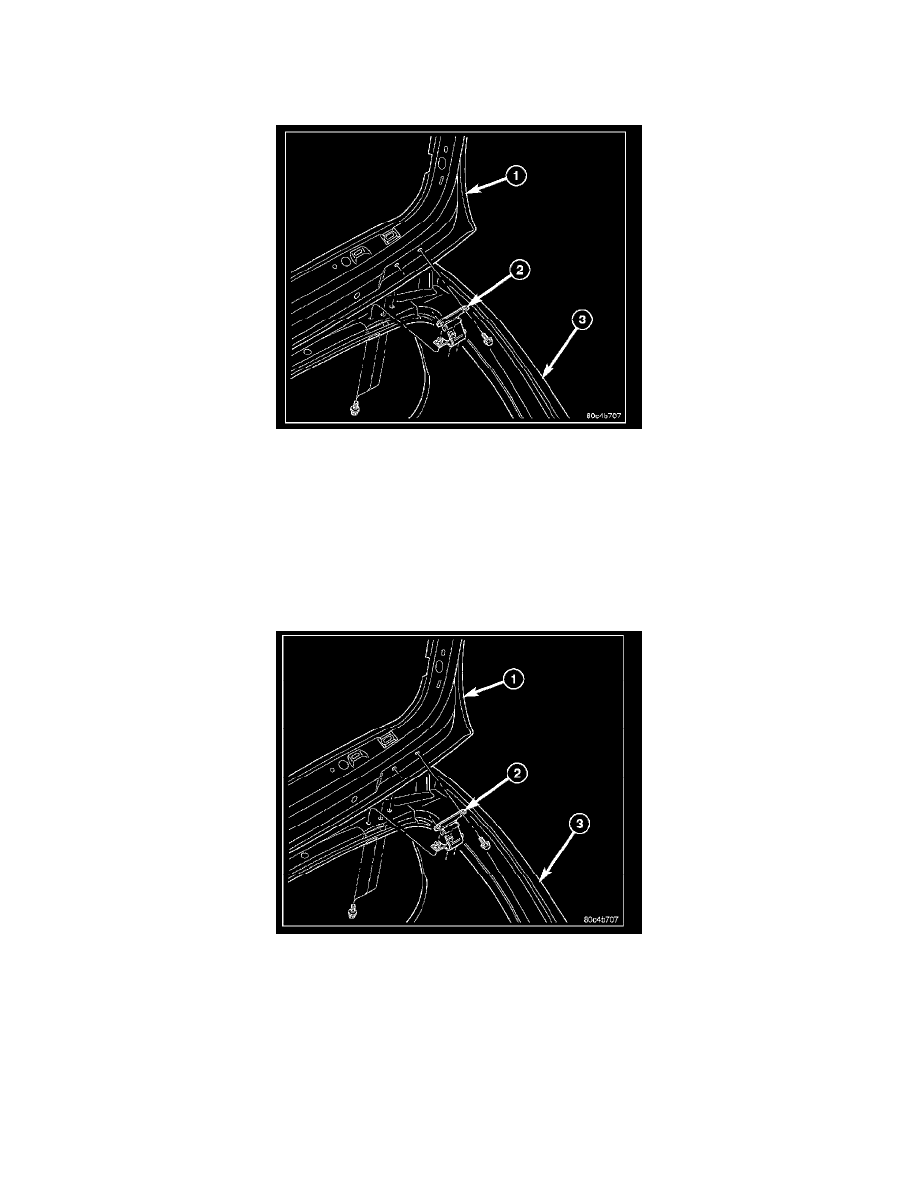
HINGE
REMOVAL
1. Release liftgate latch and open liftgate (1).
2. Remove the trim panels as necessary from the side of the vehicle being serviced and lower the rear of the headliner to gain access to the liftgate
hinge bolts.
3. Support liftgate with a suitable lifting device in the full open position on the side of the vehicle being serviced.
4. Apply several layers of duct tape on the outside of to roof across the gap to the liftgate to hold the lift-gate in position on the side of the vehicle
being serviced.
5. Remove the two bolts that secure the liftgate hinge (2) to the liftgate.
6. Remove the three bolts that secure the liftgate hinge to the roof header (3) and remove the hinge.
INSTALLATION
1. If necessary, paint the replacement liftgate hinge (2) prior to installation.
2. Position the liftgate hinge to the roof header (3) and install the retaining bolts. Tighten the bolts to 33 N.m (24 ft. lbs.).
3. Position the liftgate hinge to the liftgate (1) and loosely install the retaining bolts.
4. Tighten the two outer retaining bolts to 33 N.m (24 ft. lbs.) and the center bolt to 12 N.m (105 in. lbs.).
5. Remove the duct tape from the roof and liftgate.
6. Align the liftgate. The liftgate should fit flush and have even gaps to adjacent body panels. Gap specifications are as follows:
-
7 mm (0.280 in.) to the fascia.
-
6 mm (0.240 in.) to the roof header.
-
4 mm (0.160 in.) to the body side.
7. Reinstall the headliner and trim panels as necessary.