
PT Cruiser L4-2.4L Turbo VIN 8 (2005)
Trunk / Liftgate Interior Trim Panel: Service and Repair
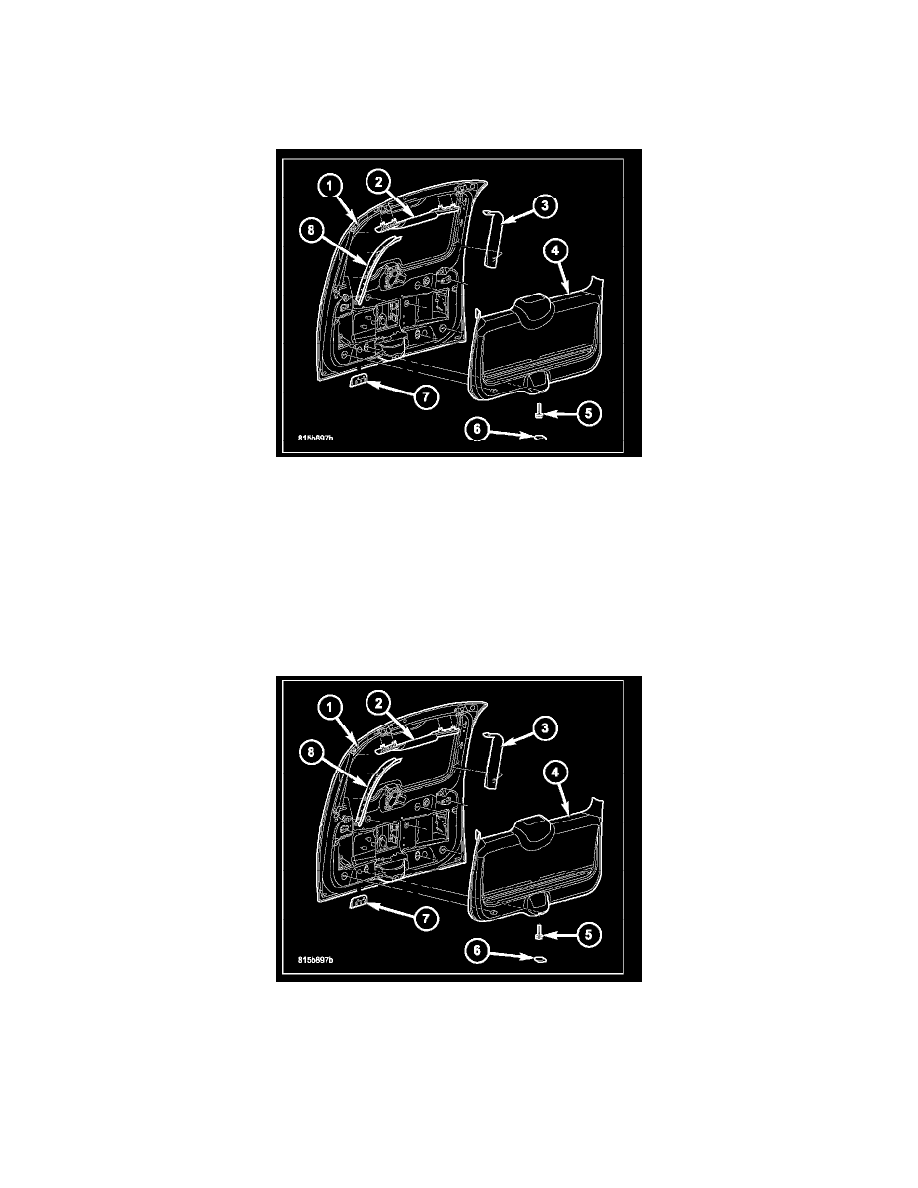
Trim Panel
PANEL - TRIM
REMOVAL
1. Open the liftgate (1).
2. Using a trim stick C-4755 or equivalent flat bladed tool, disengage the snap retainers that secure the CHMSL cover panel (2) to the liftgate and
remove the cover panel.
3. Using a trim stick C-4755 or equivalent flat bladed tool, disengage the snap retainers that secure the left and right trim panels (3 and 8) to the
liftgate and remove the trim panels.
4. Remove the cover plug (6) and remove the screw (5) that secures the bottom of the lower trim panel (4) to the liftgate.
5. Using a trim stick C-4755 or equivalent flat bladed tool, disengage the snap retainers that secure the lower trim panel to the liftgate and remove the
trim panel.
6. If necessary, remove the liftgate pull cup (7).
INSTALLATION
1. If removed, install the liftgate pull cup (7) to the lift-gate (1).
2. Position the lower trim panel (4) to the liftgate and engage the snap retainers that secure the trim panel to the liftgate. Make sure the retainers are
fully engaged.
3. Install the screw (5) that secures the bottom of the lower trim panel to the liftgate. Tighten the screw securely.
4. Install the cover plug (6) to the bottom of the lower trim panel.
5. Position the left and right trim panels (3 and 8) to the liftgate and engage the snap retainers that secure the trim panels to the liftgate. Make sure the
retainers are fully engaged.
6. Position the CHMSL cover panel (2) to the liftgate and engage the snap retainers that secure the cover panel to the liftgate. Start at the center of
the cover panel and work outward using the palm of your hand to fully engage the retainers to the liftgate.