
PT Cruiser L4-2.4L Turbo VIN 8 (2005)
14. Disconnect oxygen sensor electrical connector.
15. Remove exhaust manifold lower retaining fasteners.
16. Lower vehicle and remove the upper exhaust manifold retaining fasteners.
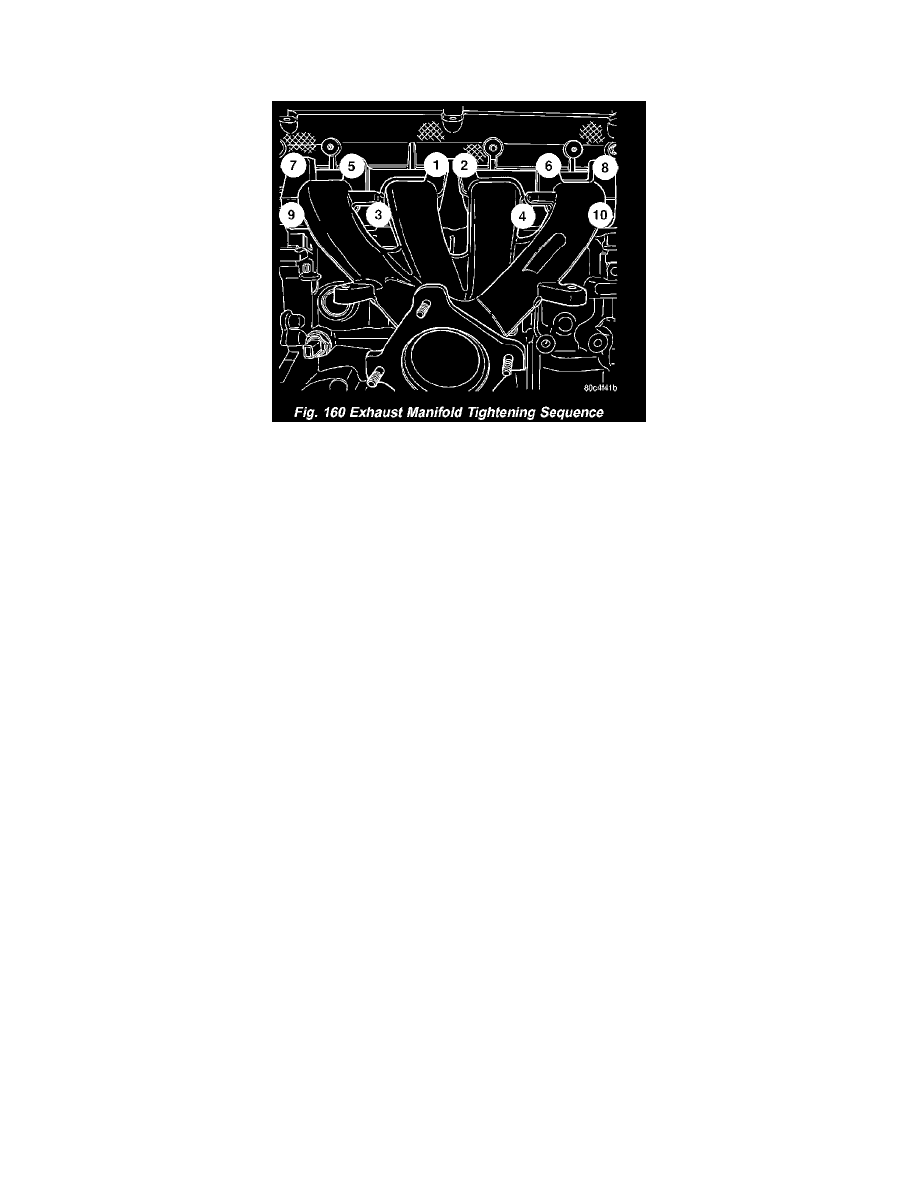
17. Remove exhaust manifold (Fig. 160) from above/between the engine and cowl panel.
18. Remove and discard manifold gasket.
CLEANING
1. Discard gasket (if equipped) and clean all surfaces of manifold and cylinder head.
INSPECTION
1. Inspect manifold gasket surfaces for flatness with straight edge. Surface must be flat within 0.15 mm per 300 mm (0.006 in. per foot) of manifold
length.
2. Inspect manifolds for cracks or distortion. Replace manifold as necessary.
INSTALLATION
NOTE: The exhaust manifold on Turbocharged equipped vehicles is serviced as an assembly with the Turbocharger.
1. Install a new exhaust manifold gasket. DO NOT APPLY SEALER.
2. Position exhaust manifold in place. Tighten fasteners, starting at center and progressing outward in both directions to 23 Nm (200 inch lbs.) (Fig.
160). Raise and lower vehicle for fastener access as necessary. Repeat tightening procedure until all fasteners are at specified torque.
3. Install exhaust manifold heat shields (Fig. 159). Tighten bolts to 12 Nm (105 inch lbs.) (Fig. 155).
4. Install exhaust manifold support bracket (Fig. 158).
5. Install engine wiring heat shield (Fig. 157).
6. Connect oxygen sensor electrical connector.
7. Install exhaust pipe to manifold (Fig. 156). Tighten fasteners to 28 Nm (250 inch lbs.).
8. Install coolant recovery container.
9. Install fasteners securing power steering fluid reservoir to cylinder head.
10. Connect MAP sensor electrical connector.
11. Connect throttle and speed control cables to the throttle lever and bracket.
12. Connect negative cable to battery.
13. Install clean air hose and air cleaner housing.