
PT Cruiser L4-2.4L Turbo VIN 8 (2005)
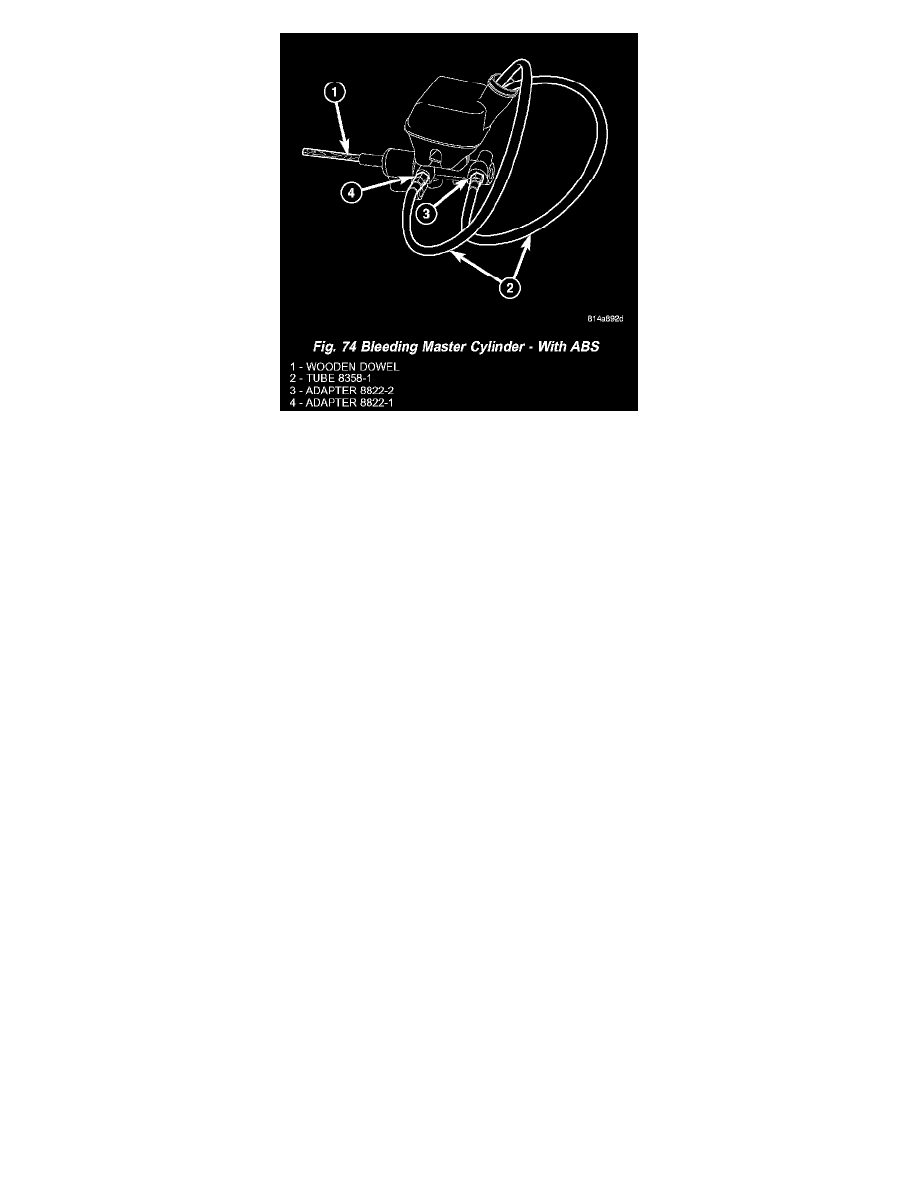
5. Continental Teves Master Cylinder with ABS -Attach the special tools for bleeding the master cylinder in the following fashion (Fig. 74):
a. Thread Adapter, Special Tool 8822-1, into the primary outlet port of the master cylinder. Tighten Adapter to 17 Nm (145 inch lbs.) torque.
b. Thread Adapter, Special Tool 8822-2, into the secondary outlet port of the master cylinder. Tighten Adapter to 17 Nm (145 inch lbs.) torque.
c. Thread a Bleeder Tube, Special Tool 8358-1, into each Adapter. Tighten Tube nuts to 17 Nm (145 inch lbs.) torque.
d. Flex each Bleeder Tube and place open end into the neck of the master cylinder reservoir, down through the slot at the base of the neck (Fig.
72). Position the open ends of the tubes into the reservoir so their outlets are below the surface of the brake fluid in the reservoir when filled.
NOTE: Make sure ends of the Bleeder Tubes stay below the surface of the brake fluid in reservoir at all times during the bleeding procedure.
6. Fill the brake fluid reservoir with fresh Mopar Brake Fluid DOT 3 Motor Vehicle, or equivalent.
7. Using an appropriately sized wooden dowel as a pushrod (Fig. 70) (Fig. 71) (Fig. 73) (Fig. 74), slowly press the pistons inward discharging brake
fluid through the Bleeder Tubes, then release the pressure, allowing the pistons to return to the released position. Repeat this several times until all
air bubbles are expelled from the master cylinder bore and Bleeder Tubes.
8. Remove the Bleed Tubes and Adapters from the master cylinder and plug the master cylinder outlet ports.
9. Install the fill cap on the reservoir.
10. Remove the master cylinder from the vise.
11. Install the master cylinder on the vehicle.