
PT Cruiser L4-2.4L Turbo VIN 8 (2005)
11. Remove the pivot thru-bolt securing the forward bracket to the trailing arm.
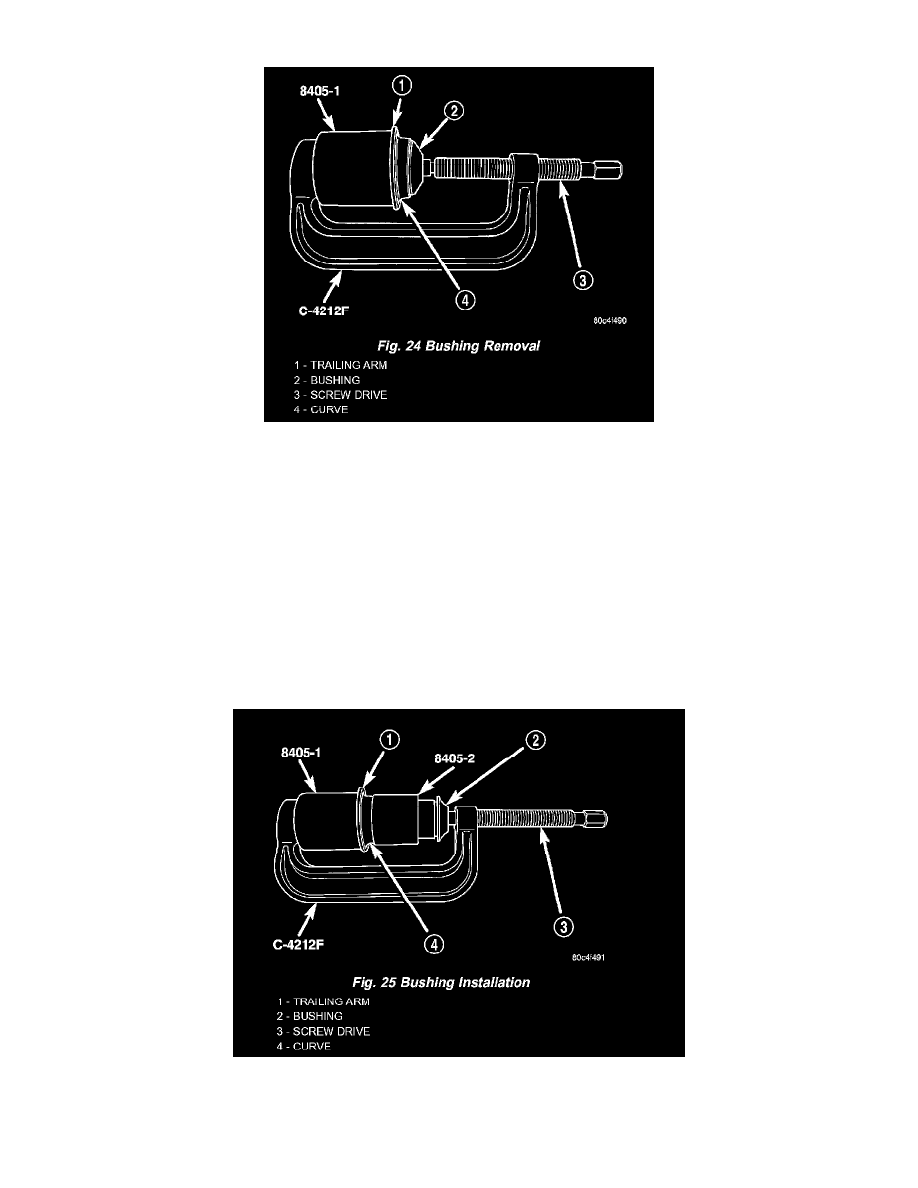
12. Place Receiver, Special Tool 8405-1, on Press, Special Tool C-4212F, and tighten the set screw.
13. Place the special tool assembly over the bushing to be replaced as shown. When properly installed, the screw drive on the special tool will be
toward the center of the vehicle. Note the curve on the axle trailing arm. This curve prevents the tool from being properly installed in the opposite
direction.
14. Tighten the screw drive, pressing the bushing out of the trailing arm into the receiver.
15. Remove the tool and the bushing from the trailing arm. Discard the used bushing.
16. If the opposite side bushing needs to be removed, repeat Step 11 through Step 15 on the opposite bushing.
INSTALLATION
NOTE: To ease and attain proper installation of the bushing using Special Tool 8405, use Mopar(R) Rubber Bushing Installation Lube as indicated
in the following step.
1. Apply Mopar Rubber Bushing Installation Lube to the outside edges of the NEW bushing. Also, lubricate the inside of the Installer, Special Tool
8405-2 with the special lube.
2. Place the stepped end of the Installer on the end of the trailing arm bushing sleeve that has the curved flange at the arm.
3. Place the lubricated bushing inside the large opening in the Installer.
4. Place the Press, Special Tool C-4212F, with Receiver, Special Tool 8405-1, installed, over the arm, Installer and bushing as shown. When
properly installed, the screw drive on the special tool will be toward the center of the vehicle. Note the curve on the axle trailing arm. This curve