
PT Cruiser L4-2.4L Turbo VIN 8 (2005)
Transmission Cooler: Service and Repair
Removal and Installation
AUTOMATIC TRANSMISSION OIL COOLER
REMOVAL
1. Remove front fascia.
NOTE: When the transaxle cooler lines are removed from the rolled-groove type fittings at the cooler and transaxle, damage to the inner wall of hose
will occur. To prevent potential leakage, the cooler hoses and clamps must be replaced.
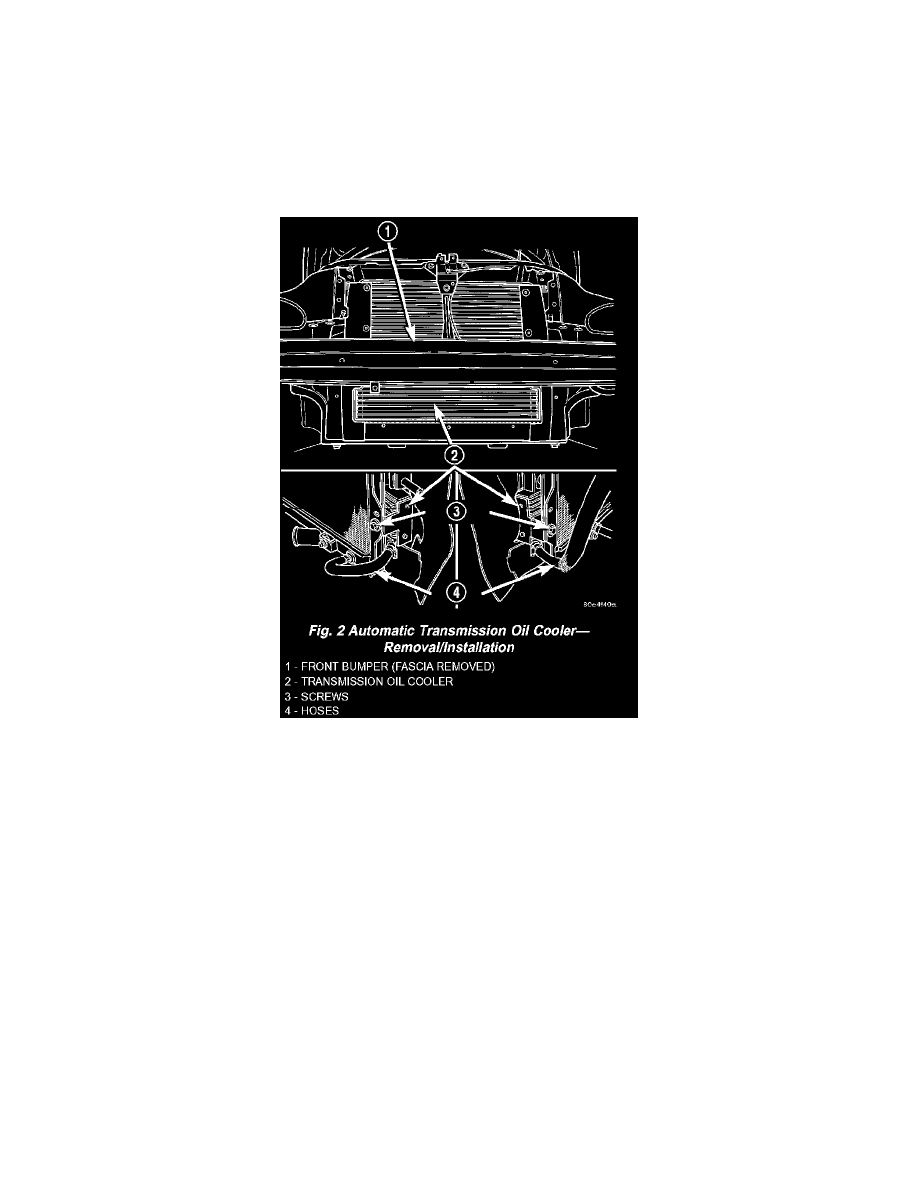
2. Disconnect hoses from transmission oil cooler (Fig. 2).
3. Remove screws attaching transmission oil cooler to radiator (Fig. 2).
4. Remove transmission oil cooler (Fig. 2).
CLEANING
Check the external cooler for debris on the cooling fin surfaces. Clean as necessary.
INSPECTION
Inspect all hoses, tubes, clamps and connections for leaks, cracks, or damage. Replace as necessary. Use only approved transmission oil cooler hoses that
are molded to fit the space available.
Inspect external coolers for leaks, loose mounts, or damage. Replace as necessary.
INSTALLATION
1. Install transmission oil cooler and tighten screws to 8 Nm (70 inch lbs.) (Fig. 2).
NOTE: When the transaxle cooler lines are removed from the rolled-groove type fittings at the cooler and transaxle, damage to the inner wall of hose
will occur. To prevent potential leakage, the cooler hoses and clamps must be replaced.
2. Replace automatic transmission cooler hoses and clamps.
3. Connect hoses to cooler (Fig. 2).
4. Install front fascia.
5. Start engine and check transmission fluid level. Adjust level as necessary.