
PT Cruiser L4-2.4L Turbo VIN G (2004)
Valve Spring: Service and Repair
VALVE SPRINGS & SEALS
REMOVAL - CYLINDER HEAD ON
1. Remove cylinder head cover.
2. Remove camshafts.
3. Rotate crankshaft until piston is at TDC on compression.
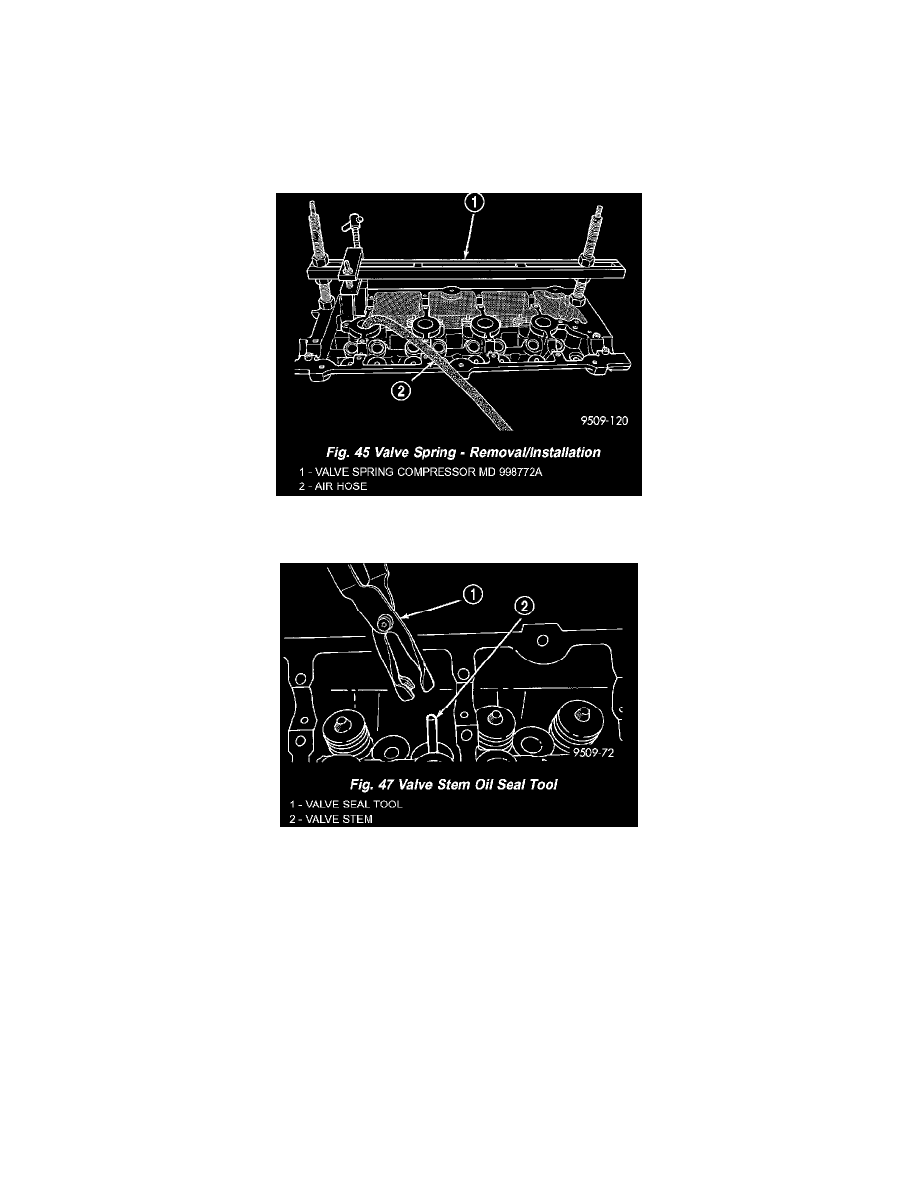
4. With air hose attached to adapter tool installed in spark plug hole, apply 90-120 psi air pressure.
5. Using Special Tool MD-998772-A with adapter 6779 (Fig. 45), compress valve springs and remove valve locks.
6. Remove valve spring(s).
7. Remove valve stem seal(s) by a using valve stem seal tool (Fig. 47).
REMOVAL - CYLINDER HEAD OFF
1. With cylinder head removed from cylinder block, compress valve springs using a universal valve spring compressor.
2. Remove valve retaining locks, valve spring retainers, valve stem seals and valve springs.
3. Before removing valves, remove any burrs from valve stem lock grooves to prevent damage to the valve guides. Identify valves, locks and
retainers to insure installation in original location.
4. Inspect the valves.
INSPECTION
1. Whenever valves have been removed for inspection, reconditioning or replacement, valve springs should be tested for correct tension. Discard the
springs that do not meet specifications. The following specifications apply to both intake and exhaust valves springs:
-
Valve Closed Nominal Tension-76 lbs. @ 38.0 mm (1.50 inch)
-
Valve Open Nominal Tension-136 lbs. @ 29.75 mm (1.17 inch)
2. Inspect each valve spring for squareness with a steel square and surface plate, test springs from both ends. If the spring is more than 1.5 mm (1/16
inch) out of square, install a new spring.