
Sebring V6-2.5L SOHC 24 Valve (1996)
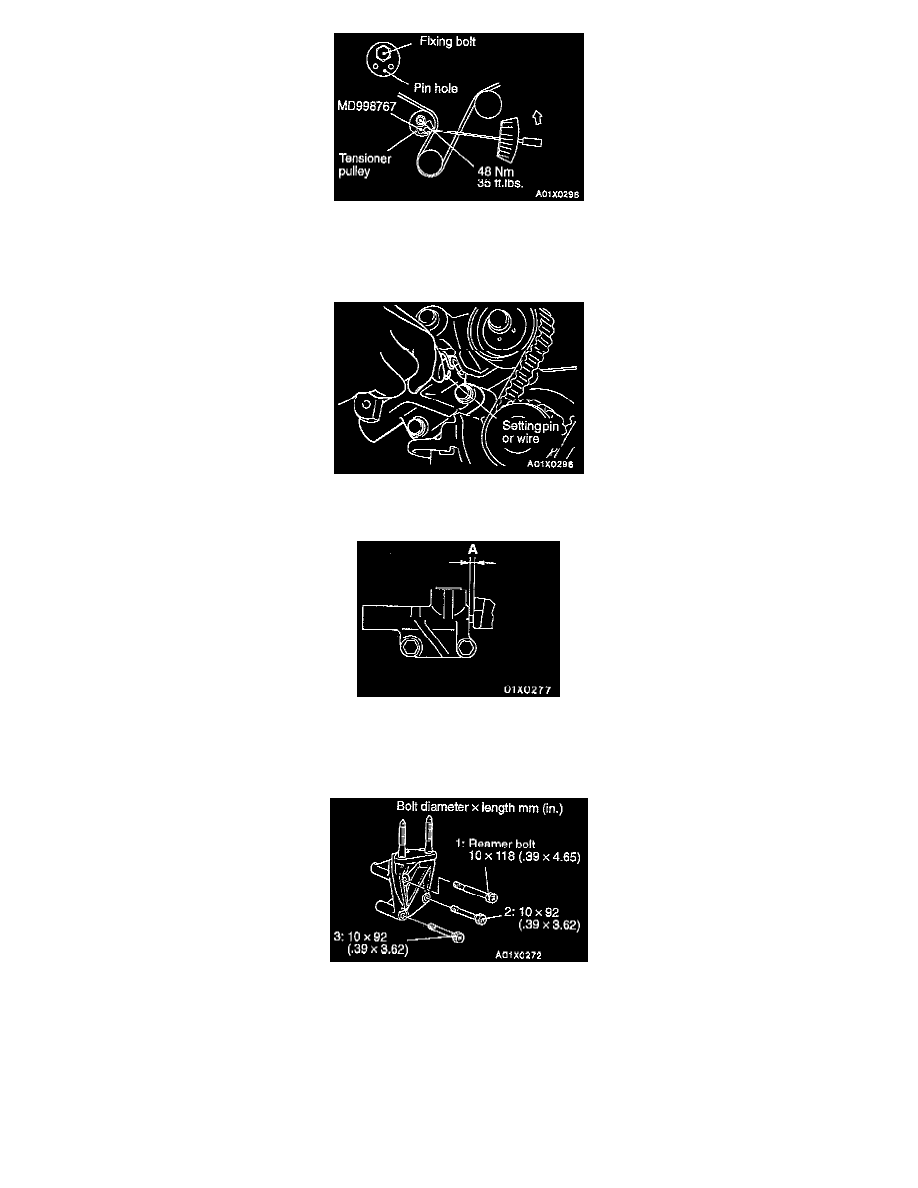
10. Loosen the center bolt of the tensioner pulley. Use the special tool and a torque wrench to apply tension to the timing belt as shown in the
illustration. Then tighten center bolt to the specified torque of 4.4 Nm (3.3 ft. lbs.).
CAUTION: When tightening the bolt, make sure that the tensioner pulley shaft doesn't rotate with the bolt.
11. Pull out the auto tensioner setting pin or wire. At this time, check that the setting pin or wire can be pulled out easily. Turn the crankshaft
clockwise 2 turns and hold it for 5 minutes or more. Then check again that the auto tensioner setting pin or wire can be pulled or inserted easily.
NOTE: Even if the setting pin or wire cannot be easily inserted, then it is satisfactory if the auto tensioner rod projection is within the standard
value (A) of 3.8 - 4.5 mm (0.149 - 0.177 inch). If it is not within the standard value, repeat the operations in steps 9. to 11.
12. Check again that each of the sprocket timing marks is aligned.
13. Since the engine support bracket mounting bolts differ in size depending on their locations, install them in the numbered sequence shown in the
illustration.
CAUTION: When installing the reamer bolt, tighten it slowly while spraying lubricant on the reamer area.