
Sebring V6-2.5L VIN N (1997)
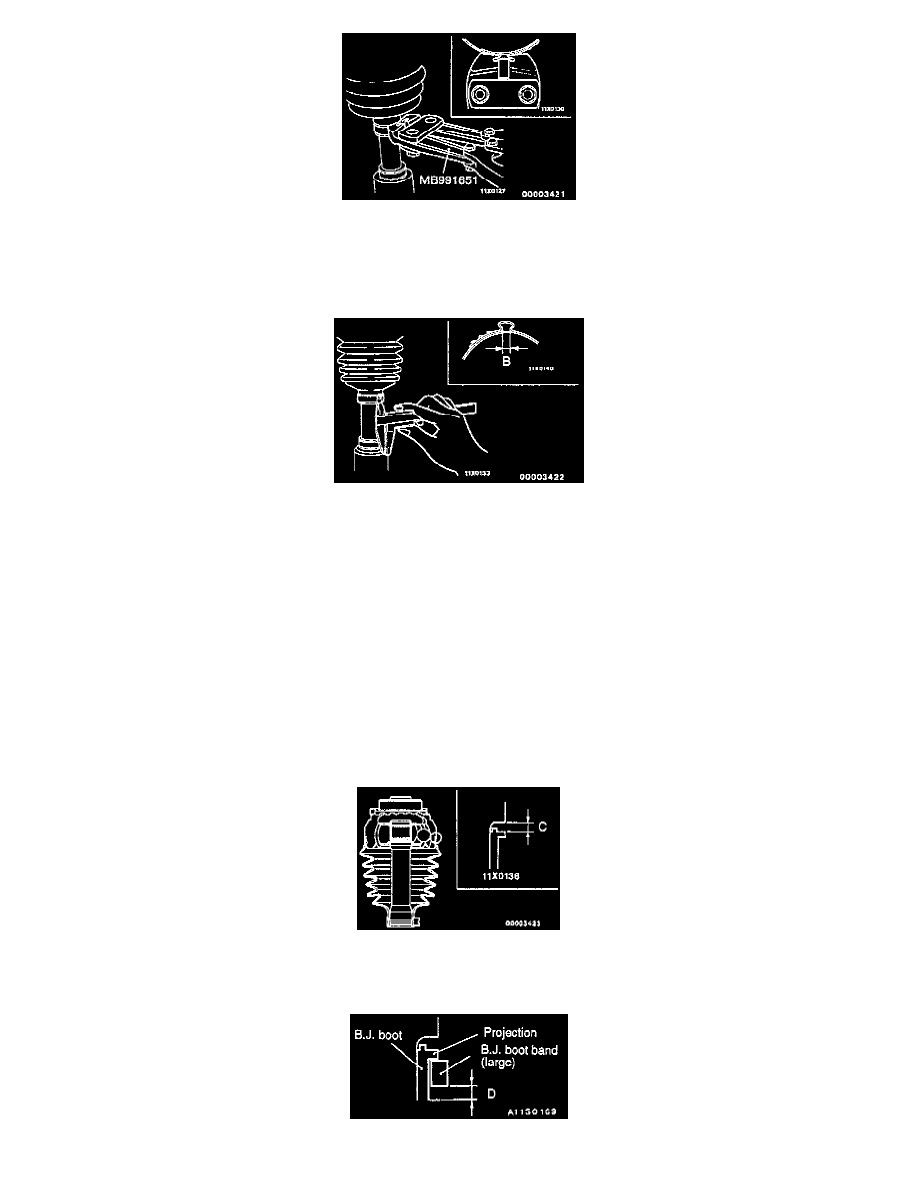
6. Using the special tool, crimp the boot band.
CAUTION:
-
With the drive shaft secured vertically, pinch positively the portion to be crimped of the band between the tips of the special tool.
-
Be sure to compress the boot band until the special tool handle comes in contact with the stopper.
7. Make sure that the amount of boot band crimping (B) is 2.4 - 2.8 mm (0.094 - 0.110 inch).
When Amount Of Crimping Is Above 2.8 mm (0.110 inch):
Readjust W given in (4) above to the value calculated by the following formula, and repeat work described in (6).
W = 5.5 mm (0.217 inch) - B
[Example: When B = 2.9 mm (0.114 inch), W = 2.6 mm (0.102 inch)]
When Amount Of Crimping Is Below 2.4 mm (0.094 inch):
Remove the boot band, readjust W given in (4) to the value calculated by the following formula and repeat work described in (5) and (6) by using
a new boot band.
W = 5.5 mm (0.217 inch) - B
[Example: When B = 2.3 mm (0.091 inch), W = 3.2 mm (0.126 inch)]
8. Make sure that the boot band does not protrude from the band mounting area. If the band protrude, replace it with a new band and repeat work
described in (5) through (7).
9. Pack the boot with Grease in repair kit with 155 grams (5.47 oz.).
10. Install the boot with a clearance of 0.1 - 1.55 mm (0.004 - 0.061 inch) (C) provided between the large diameter end of the boot and the shoulder
of B.J. housing.
11. Adjust the width of opening in the special tool (W) to 3.2 mm (0.126 inch) in the same manner as described in (4).