
Sebring Convertible V6-2.5L VIN H (1997)
Ball Joint: Service and Repair
Ball Joint Replacement
Lower Ball Joint Replacement
REMOVAL
1. Remove lower control arm assembly from vehicle
2. Wrap a shop towel around the ball joint and seal boot. This is to prevent dirt and cleaning solvent to enter ball joint when cleaning area around
ball joint.
3. Using ONLY a solvent such as Mopar (R) Foamy Engine Degreaser or an equivalent, thoroughly clean lower control arm in area around ball joint
and seal. Then using a shop towel saturated with the engine degreaser, carefully wipe off the ball joint seal boot.
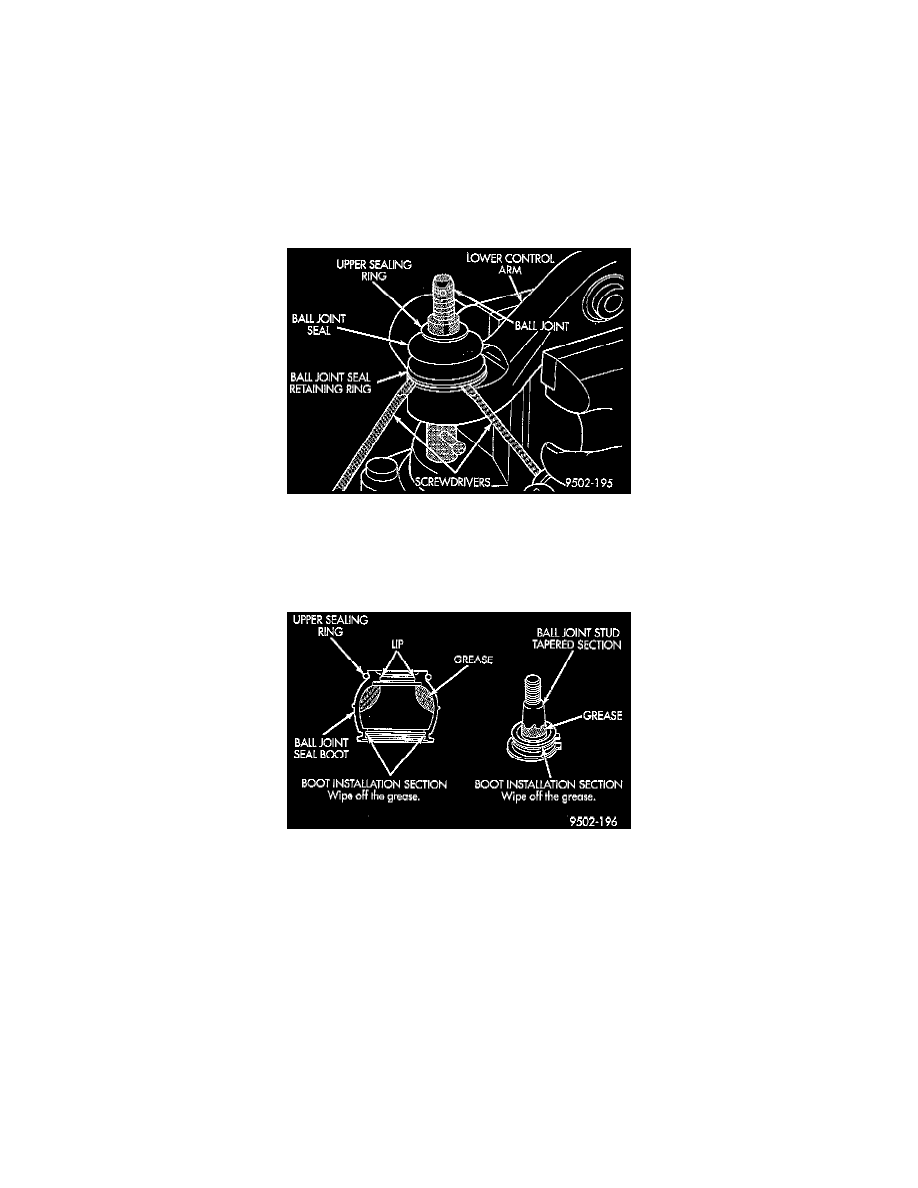
4. Using 2 screwdrivers remove the ball joint seal retaining ring from the bottom of the ball joint seal.
5. Remove ball joint seal from ball joint.
CAUTION: When replacing ball joint seal, do not use any other type of grease to lubricate ball joint other than the lubricant provided in the Mopar (R)
Ball Joint Seal service kit.
INSTALLATION
1. Apply grease from the ball joint seal kit, to the specified areas of the ball joint stud and seal. Be sure no grease is present on the seal boot
installation section of the seal boot or lower control arm.
2. Slide ball joint seal boot with upper seal ring installed, down tapered section of ball joint stud. Seal boot is to be installed on stud of ball joint until
seal boot is sitting on seal groove in lower control arm.
3. Carefully position ball joint seal boot in seal retaining groove on lower control arm. After installing seal boot in retaining groove, carefully bleed
air out of sealing boot without getting grease pushed into seal boot retaining groove in lower control arm.