
Sebring LXI Convertible V6-2.7L VIN R (2002)
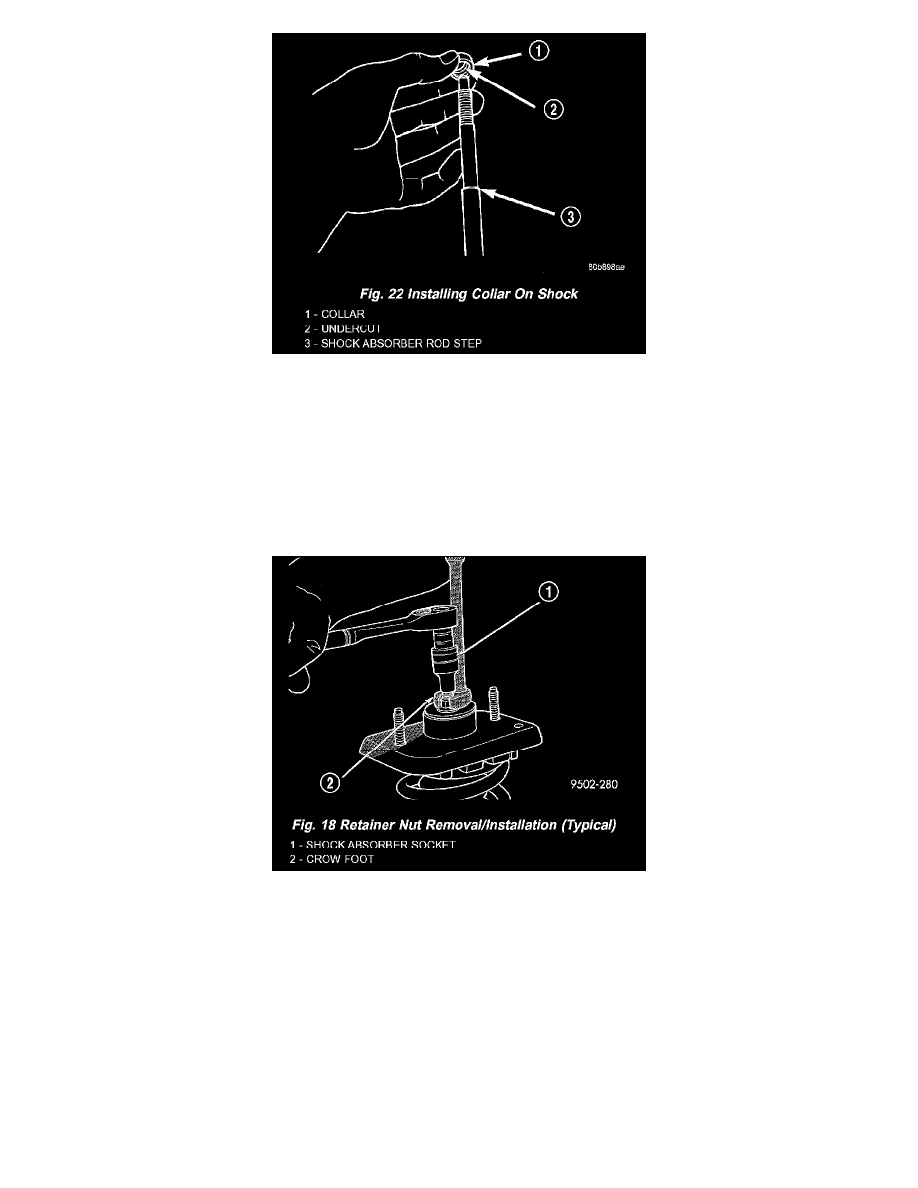
8. Install the collar on the rod of the shock absorber assembly with the undercut side of sleeve facing down. Push the collar down until seated on the
step of the shock absorber rod.
9. Install the shock through the bottom of the coil spring until the lower spring seat contacts the lower end of the coil spring. Install the clamp
temporarily securing the shock absorber to the coil spring.
10. Install dust shield and cup over the jounce bumper and onto the rod of the shock absorber.
11. Install the lower shock rod bushing retainer washer on the shock absorber rod.
12. Install the upper spring isolator on the top of the coil spring. The bottom of the isolator is contoured to fit around the inside diameter of the coil
spring and has a step built into it that the end of the coil spring must fit into upon installation.
13. Install the upper shock mount bracket and rod isolator bushings as an assembly on the top of the rod of the shock absorber.
14. Install the upper shock rod bushing retainer washer. Make sure the concave side is facing up.
15. Install the shock assembly retainer nut. Hold the shock rod from rotating using special socket Snap-On A 136, or equivalent, and tighten the
retainer nut using a crow foot wrench (on the end of a torque wrench and extension) to a torque of 55 Nm (40 ft. lbs.) .
16. Position the upper shock mount so its studs are in line with the bolt hole in the shock absorber lower bracket.
17. Slowly release the tension from the coil spring by backing off the compressor drive fully. As the tension is relieved, make sure the upper mount,
isolator, and coil spring align properly. Remove the clamp from the lower end of the coil spring and shock. Push back the spring compressor upper
and lower hooks, then remove the shock assembly from the spring compressor.
18. Install shock assembly on the vehicle.
INSTALLATION - SHOCK ASSEMBLY
1. Install shock assembly back in vehicle using the reverse sequence of removal.
2. Install upper shock mount into the mounting holes in rear shock tower.
3. Push down on rear knuckle to obtain clearance and then install shock absorber clevis bracket on rear knuckle.
4. Align clevis bracket on shock absorber with bushing in knuckle. Install and tighten bolt to a torque of 95 Nm (70 ft. lbs.).
5. Lower vehicle far enough to gain access to the trunk.
6. Install and tighten the 2 shock assembly upper mounting nuts to a torque of 54 Nm (40 ft. lbs.).