
Sebring LXI Sedan V6-2.7L VIN R (2002)
Ball Joint: Service and Repair
Lower Ball Joint Dust Cover
LOWER BALL JOINT SEAL BOOT
REMOVAL
CAUTION: The replacement of the lower ball joint seal boot can only be done in the event that the seal boot is damaged while performing a service
procedure on the vehicle.
CAUTION: Under no circumstances can a lower ball joint seal boot be replaced if it is determined that the vehicle had been driven with the seal boot
damaged. If the vehicle has been driven with a damaged seal boot contamination of the ball joint has occurred. When contamination of the ball joint
has occurred the lower control arm must be replaced. This is to ensure excessive wear of the ball joint does not occur from the contamination present
in the ball joint.
CAUTION: Excessive wear in the ball joint can lead to a separation of the ball joint from the lower control arm.
CAUTION: The procedure below must be carefully followed when replacing the ball joint seal in the event it is damaged while servicing a vehicle.
CAUTION: The ball joint used in the lower control arm of this vehicle is a lubricated for life ball joint. This ball joint does not require any additional
lubrication for the life of the vehicle. Do not alter the lower control arm or ball joint in an attempt to lubricate the lower control arm ball joint. If it is
determined that the ball joint is lacking proper lubrication, the lower control arm will need to be replaced.
1. Remove lower control arm assembly from vehicle.
2. Wrap a shop towel around the ball joint and seal boot. This is to prevent dirt and cleaning solvent to enter ball joint when cleaning area around
ball joint.
3. Using ONLY a solvent such as Mopar Foamy Engine Degreaser or an equivalent, thoroughly clean lower control arm in area around ball joint and
seal. Then using a shop towel saturated with the engine degreaser, carefully wipe off the ball joint seal boot.
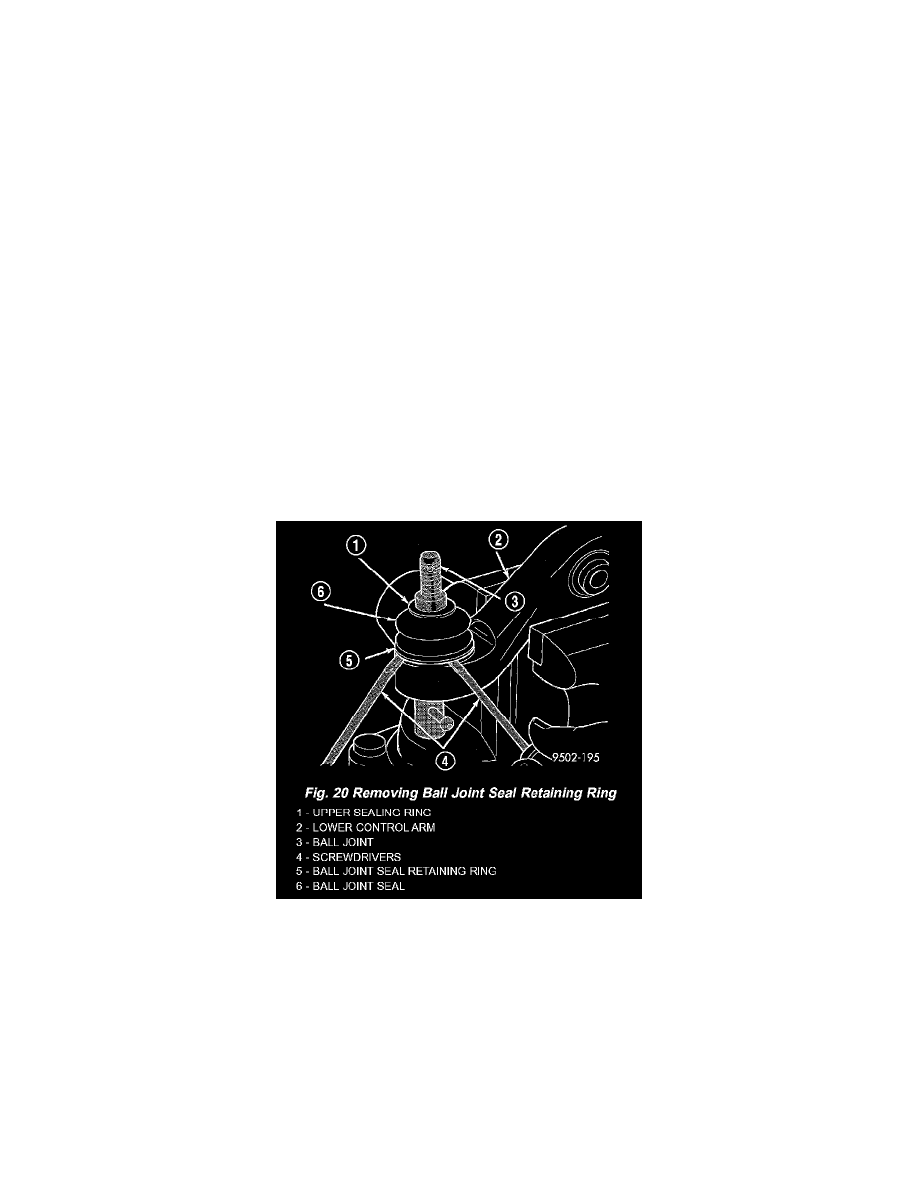
4. Using 2 screwdriversremove the ball joint seal retaining ring from the bottom of the ball joint seal.
5. Remove ball joint seal from ball joint.
INSTALLATION
CAUTION: The replacement of the lower ball joint seal boot can only be done in the event that the seal boot is damaged while performing a service
procedure on the vehicle.
CAUTION: Under no circumstances can a lower ball joint seal boot be replaced if it is determined that the vehicle had been driven with the seal boot
damaged. If the vehicle has been driven with a damaged seal boot contamination of the ball joint has occurred. When contamination of the ball joint
has occurred the lower control arm must be replaced. This is to ensure excessive wear of the ball joint does not occur from the contamination present
in the ball joint.