
Sebring LXI Sedan V6-2.7L VIN R (2002)
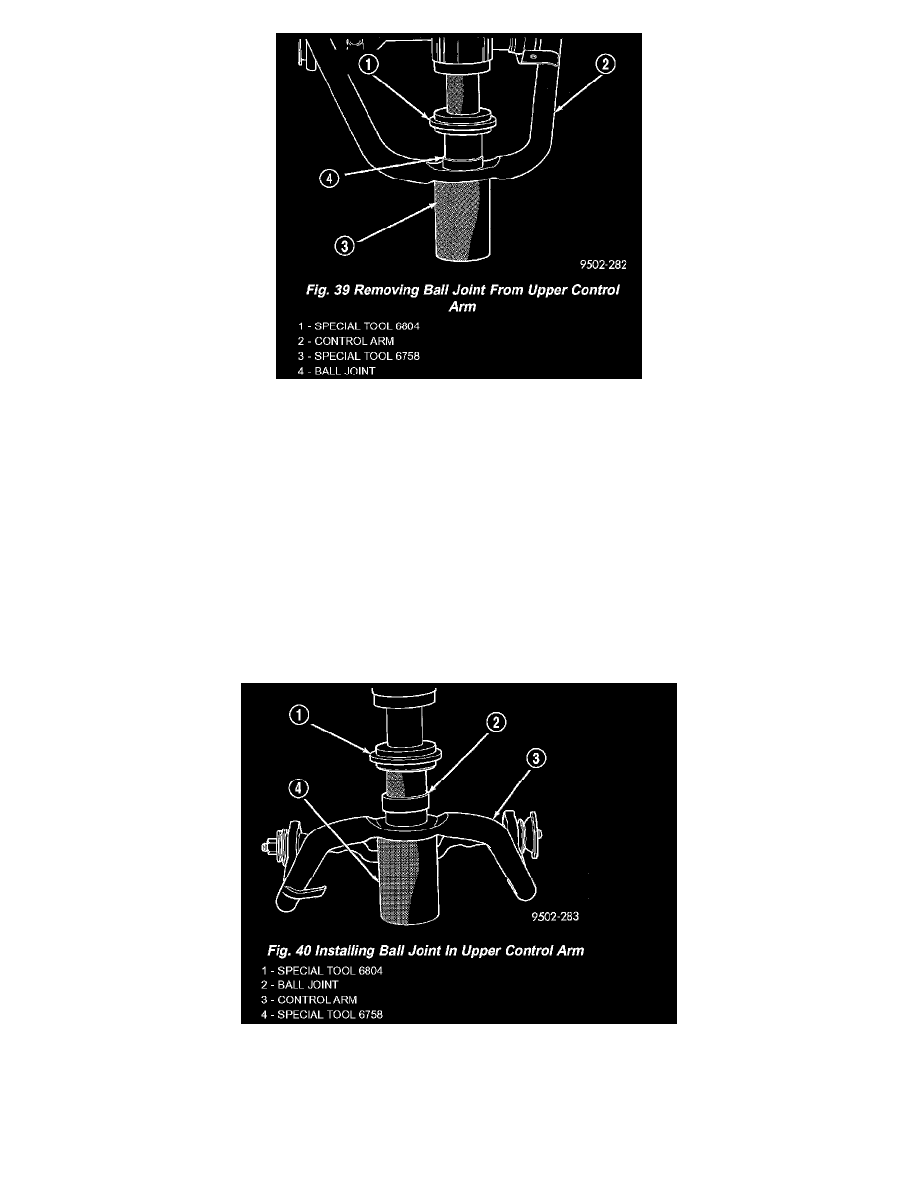
1. Position Receiving Cup, Special Tool 6758, to support control arm when removing ball joint assembly. Install Remover/Installer, Special Tool
6804 on top of ball joint assembly.
2. Using an arbor press, press the ball joint assembly out of the control arm.
INSPECTION
Inspect the control arm for physical damage. If it is determined that the upper control arm is broken or bent, the upper control arm must be replaced.
The rear suspension upper control arm is not a repairable component and no attempt is to be made to repair or to straighten it. The upper control arm
must be replaced if found to be damaged in any way.
Inspect the control arm pivot bushings for deterioration. If found to need replacement, the upper control arm is to be replaced.
The rear control arm, control arm bushings, and pivot bar are serviced as a complete assembly on this vehicle. Do not attempt to disassemble the
control arm from the pivot bar to service the rear control arm bushings.
The only component on the upper control arm that is serviceable is the rear upper ball joint and its seal.
ASSEMBLY - UPPER BALL JOINT
1. By hand, position ball joint assembly into ball joint bore of control arm. Be sure ball joint assembly is not cocked in the bore of the control arm.
This will cause binding of the ball joint assembly when being pressed into lower control arm.
2. Position assembly in an arbor press with Receiving Cup, Special Tool 6758, supporting lower control arm. Then install Remover/Installer, Special
Tool 6804, on the top of the ball joint assembly.
CAUTION: When installing the ball joint in the upper control arm, do not press the ball joint into the control arm all the way. The lip on the ball
joint must not touch the surface of the control arm. Refer to Step 3 below when installing the ball joint.