
Sebring Sedan V6-2.7L (2009)
CAUTION: Because of power brake booster design, it is very important to tighten the mounting nuts in the proper sequence.
3. Tighten the brake pedal/booster mounting nuts in the proper sequence to 23 Nm (17 ft. lbs.).
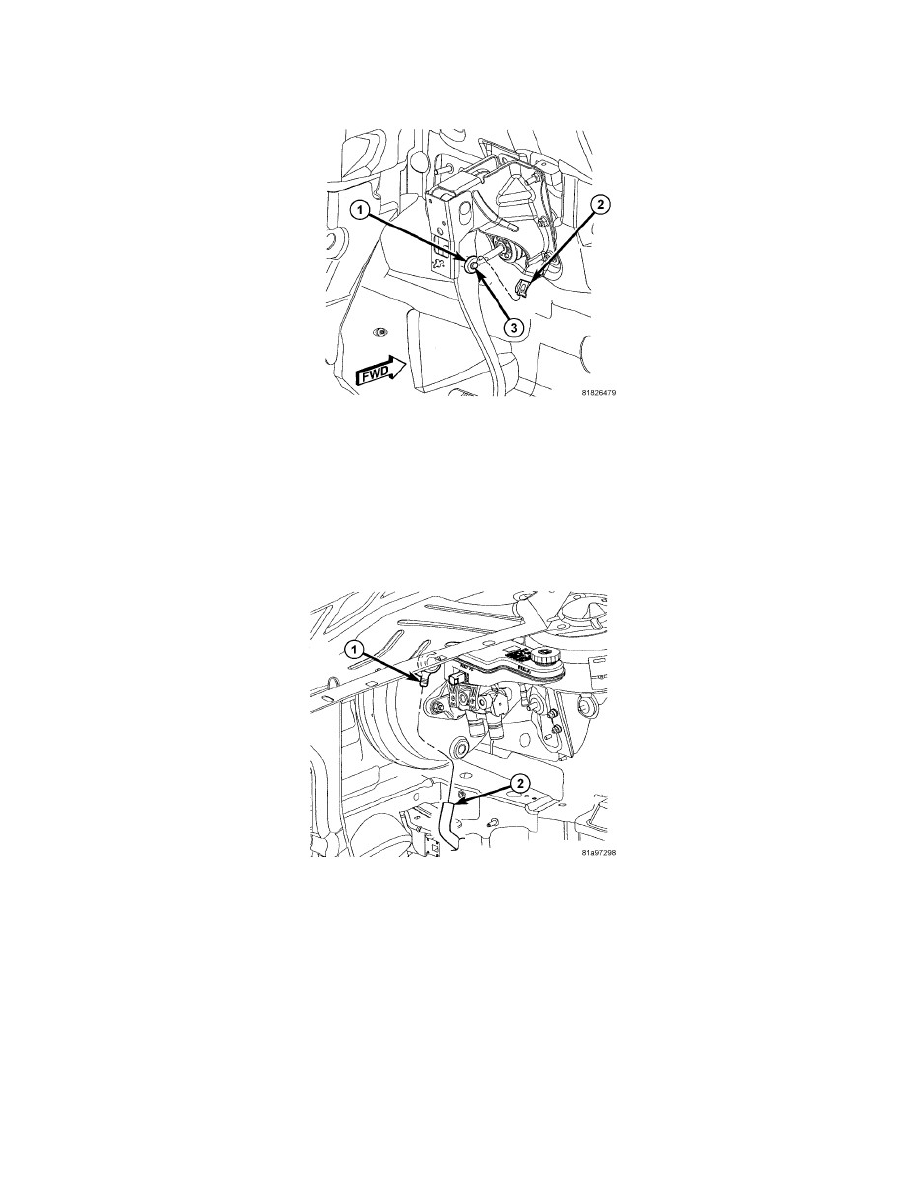
4. Using Mopar(R) Lubriplate, or an equivalent, coat the surface of the brake pedal pin (3) where it contacts the brake booster input rod (1).
5. Install the power brake booster push rod (1) on the pin (3) mounted on the side of the brake pedal. Install a NEW retaining clip (2) on the end of
the pin. Do not reuse the old clip.
6. Install and adjust the stop lamp switch in the brake pedal bracket See: Lighting and Horns/Brake Light Switch/Service and Repair/Stop Lamp
Switch - Installation
7. Install the steering column opening cover (and airbag if equipped) on the instrument panel. See: Body and Frame/Interior Moulding /
Trim/Dashboard / Instrument Panel/Service and Repair/Steering Column Opening Cover - Installation
CAUTION: When installing the vacuum hose on the check valve (1), make sure the hose is routed properly to avoid possible contact with
unfriendly surfaces.
8. Connect the vacuum hose (2) to the vacuum check valve (1).