
Sebring Sedan V6-3.5L (2009)
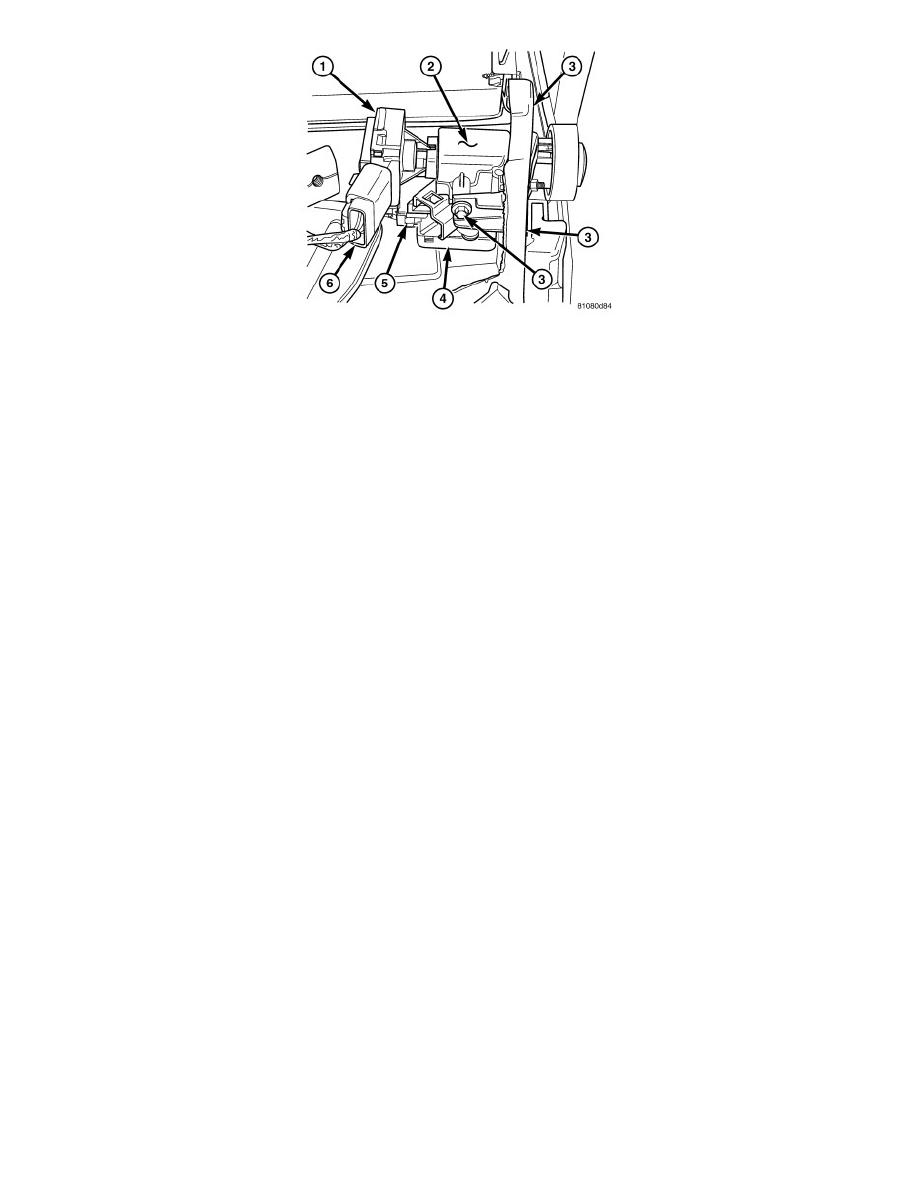
8. Reach up behind the left side of the center stack and connect the ignition switch electrical connector (6) and the WCM electrical connector (5).
9. Install the instrument cluster See: Instrument Panel, Gauges and Warning Indicators/Instrument Cluster / Carrier/Service and Repair/Instrument
Cluster - Installation.
10. Install the drivers surround bezel See: Body and Frame/Interior Moulding / Trim/Dashboard / Instrument Panel/Service and Repair/Instrument
Panel Bezel - Installation.
11. Install the instrument cluster trim bezel See: Body and Frame/Interior Moulding / Trim/Dashboard / Instrument Panel/Service and
Repair/Instrument Cluster Bezel - Installation
12. Install the three screws from the lower steering column shroud and secure the upper and lower shroud to the steering column.
13. Install the radio See: Accessories and Optional Equipment/Radio, Stereo, and Compact Disc/Radio/Stereo/Service and Repair/Removal and
Replacement/Radio - Installation
14. Install the upper center instrument panel trim bezel See: Body and Frame/Interior Moulding / Trim/Dashboard / Instrument Panel/Service and
Repair/Instrument Panel Bezel - Installation
15. Install the center console trim bezel See: Body and Frame/Interior Moulding / Trim/Console/Service and Repair/Center Console Bezel -
Installation.
16. Connect battery negative cable.