
Town & Country V6-3.8L (2009)
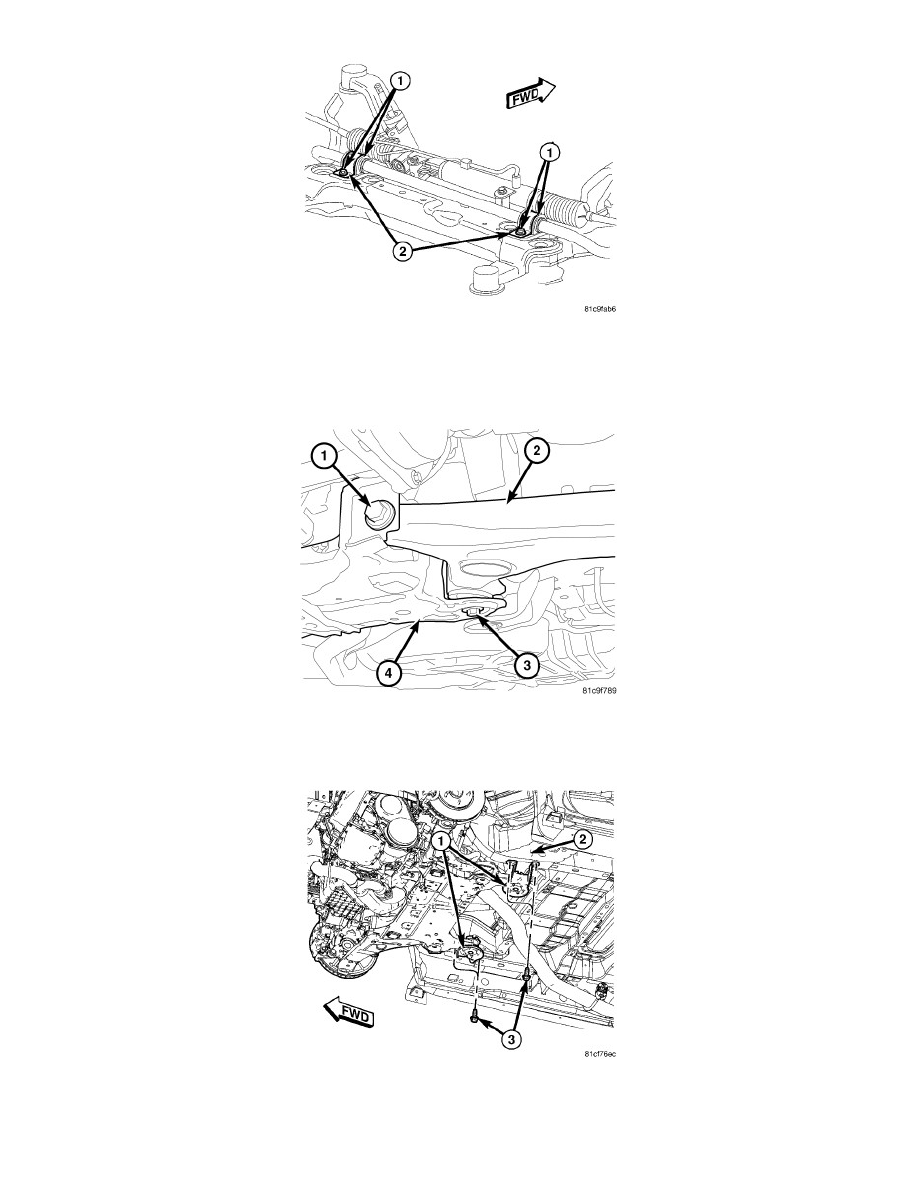
3. Install the stabilizer bar on the crossmember.
4. Install the two stabilizer bushing retainers (2) over the cushions on the bar.
5. Install the four screws (1) securing the stabilizer bushing retainers (2) to the crossmember. Tighten screws to 45 Nm (33 ft. lbs.).
6. Raise the front suspension crossmember using the transmission jack until the lower control arms can be easily installed on the crossmember.
7. Position each lower control arm (2) into brackets on the suspension crossmember (4).
8. Install the front mounting bolt (1) and the rear mounting bolt (3) and nut attaching each lower control arm to crossmember. Do not tighten the
front bolt (1) at this time. Tighten the rear mounting bolt nut to 155 Nm (114 ft. lbs.).
9. Continue to raise the front suspension crossmember into mounted position using the transmission jack lining up the mounting holes.
10. Place the front crossmember support brackets (1) over the crossmember rear bushings and frame rail (2). Install, but do not tighten mounting bolts
(3).