
Alignment: Specifications (page 8 of 11)
- Make
- Chrysler
- Model
- Town & Country
- Engine
- V6-3.8L VIN L
- Year
- 2006
- Section
- Alignment
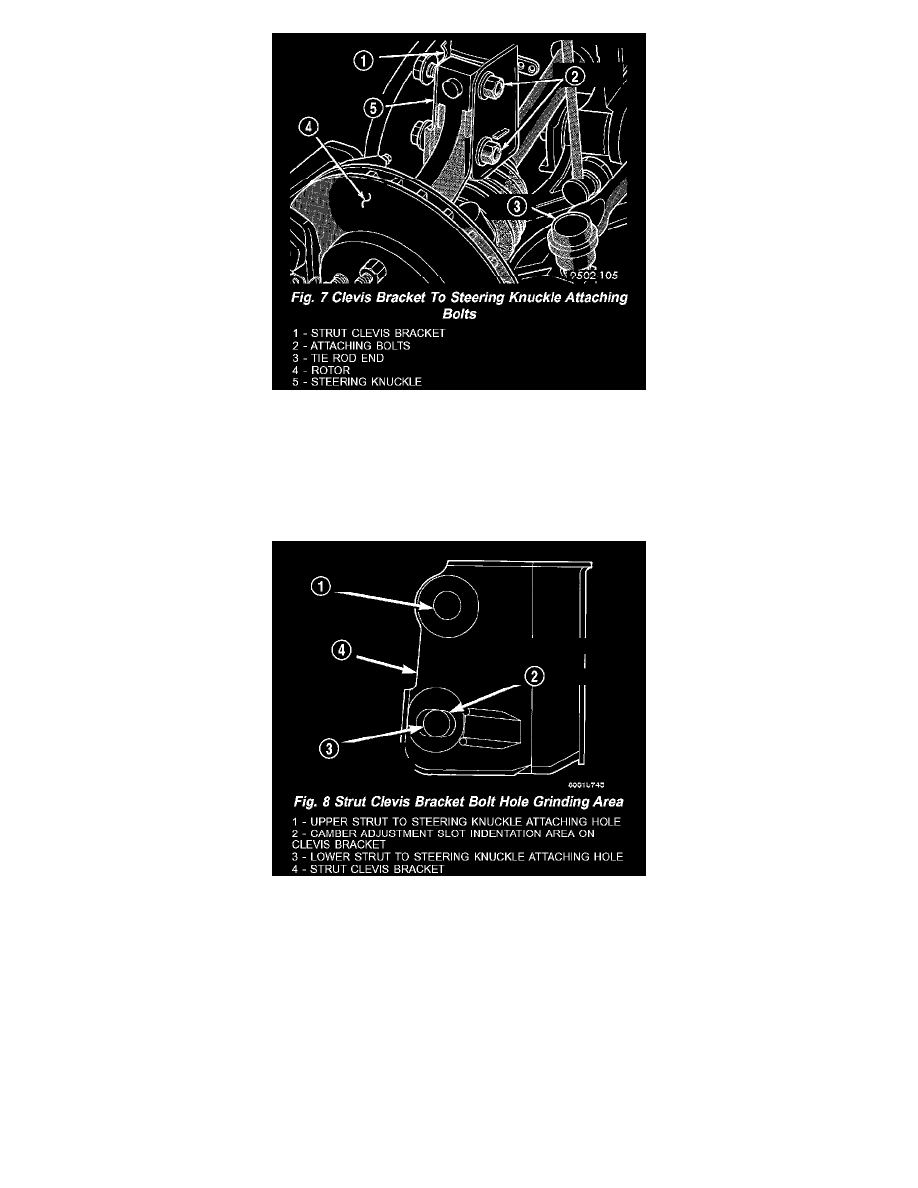
Fig. 7 Clevis Bracket To Steering Knuckle AttachingBolts
3) Remove the top and bottom, strut clevis bracket to steering knuckle attaching bolts (Fig. 7) and discard. Separate the steering knuckle from the
strut clevis bracket and position steering knuckle so it is out of the way of the strut.
CAUTION: When slotting the bottom mounting hole on the strut clevis bracket, do not enlarge the hole beyond the indentations on the sides of the
strut clevis bracket (Fig. 8).
Fig. 8 Strut Clevis Bracket Bolt Hole Grinding Area
4) Using an appropriate grinder and grinding wheel, slot the bottom hole in both sides of the strut clevis bracket (Fig. 8).
CAUTION: After slotting the strut clevis bracket hole, do not install the original attaching bolts when assembling the steering knuckle to the strut
assembly. Only the flange bolts, cam bolts, and dog bone washers from the service package must be used to attach the steering knuckle to the strut
after the mounting hole is slotted.
Pinch or Ctrl + scroll to zoom. Double-tap to reset.
Parts & tools for this job For 2006 Chrysler Town & Country 3.8L
- TOOLTie rod end toolSearch: tie rod end puller
- TOOLBall joint separatorSearch: ball joint separator
- FLUIDPower steering fluidSearch: Chrysler power steering fluid
Links open Amazon search results in a new tab. As an Amazon Associate I earn from qualifying purchases.