
Town & Country V6-4.0L (2008)
10. Raise and support the vehicle.
11. Lubricate new rubber O-ring seals with clean engine coolant and install them onto the rear heater core tube fittings. Use only the specified O-rings
as they are made of a special material designed for use with engine coolant. Use only engine coolant of the type recommended for the engine in the
vehicle.
CAUTION: DO NOT apply excessive force on underbody heater lines or rear heater hose quick connect fittings when connecting the
connections. Excessive force may damage or deform the fittings and or lines, causing an engine coolant leak.
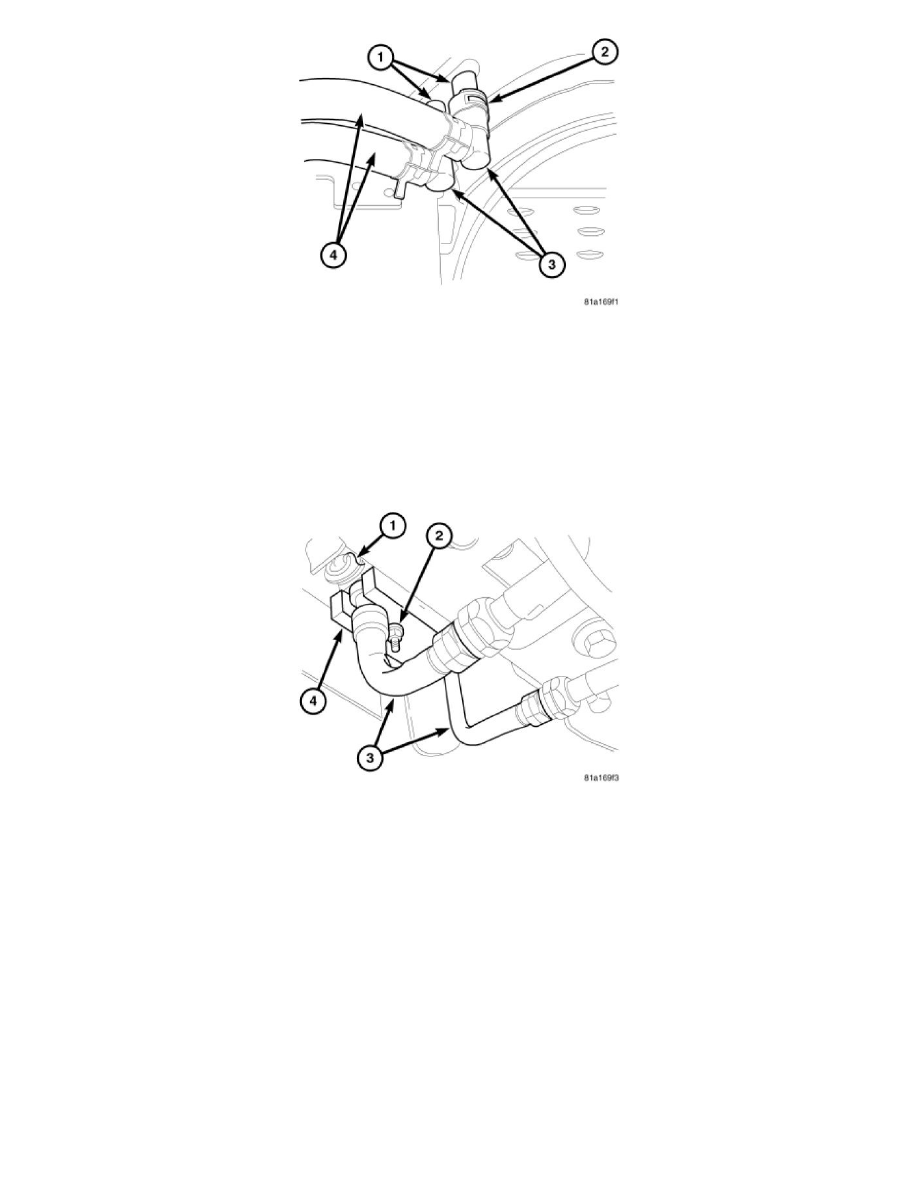
12. Connect the quick connect fittings (3) for the underbody heater lines (4) to the rear heater core tubes (1) and engage the inserts (2). Make sure the
inserts are fully engaged to the rear heater core tube fittings.
NOTE: Illustration shown with rear body cradle removed for clarity.
13. Remove the tape or plugs from underbody refrigerant extension line fittings and rear expansion valve ports.
14. Lubricate new rubber O-ring seals with clean refrigerant oil and install them onto the rear underbody refrigerant line fittings. Use only the
specified O-ring seals as they are made of a special material for the R-134a refrigerant system. Use only refrigerant oil of the type recommended
for the A/C compressor in the vehicle.
15. Connect the underbody refrigerant extension lines (3) to the rear A/C expansion valve (1).
16. Install the nut (2) that secures the extension lines and sealing plate (4) to the to the rear A/C expansion valve. Tighten the nut to 23 Nm (17 ft.
lbs.).
17. Lower the vehicle.
18. Reconnect the negative battery cable.
19. If the heater core is being replaced, flush the cooling systemSee: Engine, Cooling and Exhaust/Cooling System/Service and Repair.
20. Fill the engine cooling systemSee: Engine, Cooling and Exhaust/Cooling System/Service and Repair.
21. Evacuate the refrigerant systemSee: Service and Repair/Procedures/Refrigerant System Evacuate.
22. Charge the refrigerant systemSee: Service and Repair/Procedures/Refrigerant System Charge.
23. Initiate the Actuator Calibration function using a scan tool.