
Town & Country Van 2WD V6-201 3.3L VIN R MFI (1996)
Radiator Cooling Fan Motor: Service and Repair
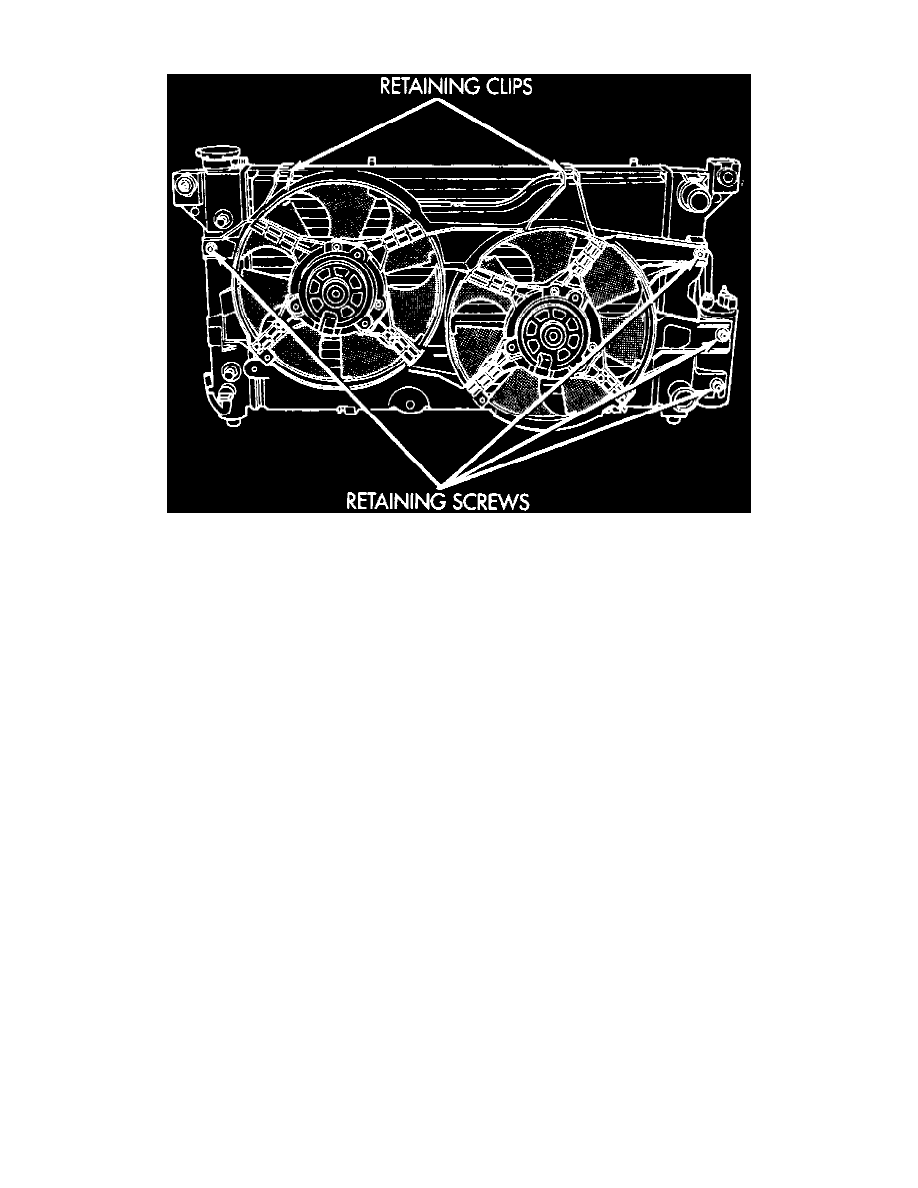
Fig. 3 Electric Cooling Fan Module
COMPONENT REPLACEMENT, COOLING FAN
1. Raise and support vehicle.
2. Remove radiator outlet hose from mounting clips on fan shroud.
3. On models with auxiliary transmission cooler, remove lower fluid line from mounting clips on fan shroud.
4. On all models, lower vehicle, then remove air cleaner and ducting from throttle body and vehicle.
5. Disconnect electrical connector for cooling fan, then remove attaching screw for coolant recovery system from crossmember.
6. Disconnect upper radiator mounts from crossmember.
7. Mark position of hood latch on crossmember for later alignment, then remove latch and position aside.
8. Remove bolts holding crossmember to body, then remove crossmember from vehicle by lifting up, then forward.
9. Remove fan shroud to radiator retaining screws.
10. On models with auxiliary transmission cooler, remove upper fluid line from mounting clips on fan shroud.
11. On all models, disconnect lower left transmission cooler line from radiator and plug.
12. Raise and support vehicle, then remove mounting bolts for A/C drier unit, fan shroud and radiator mounting from lower right side.
13. Lower vehicle, then remove fan shroud to radiator retaining clips.
14. Remove fans and shroud from vehicle.
15. Remove fans from shroud as necessary.
16. Reverse procedure to install, noting the following:
a. Torque fan shroud to radiator screws and radiator to crossmember mounts to 105 inch lbs.
b. Torque, coolant recovery system mounting screw to 18 inch lbs.
c. Ensure proper alignment and closure of hood.
d. Check and correct fluid levels as necessary.