
Charade L4-1295cc 1.3L (1989)
Distributor: Adjustments
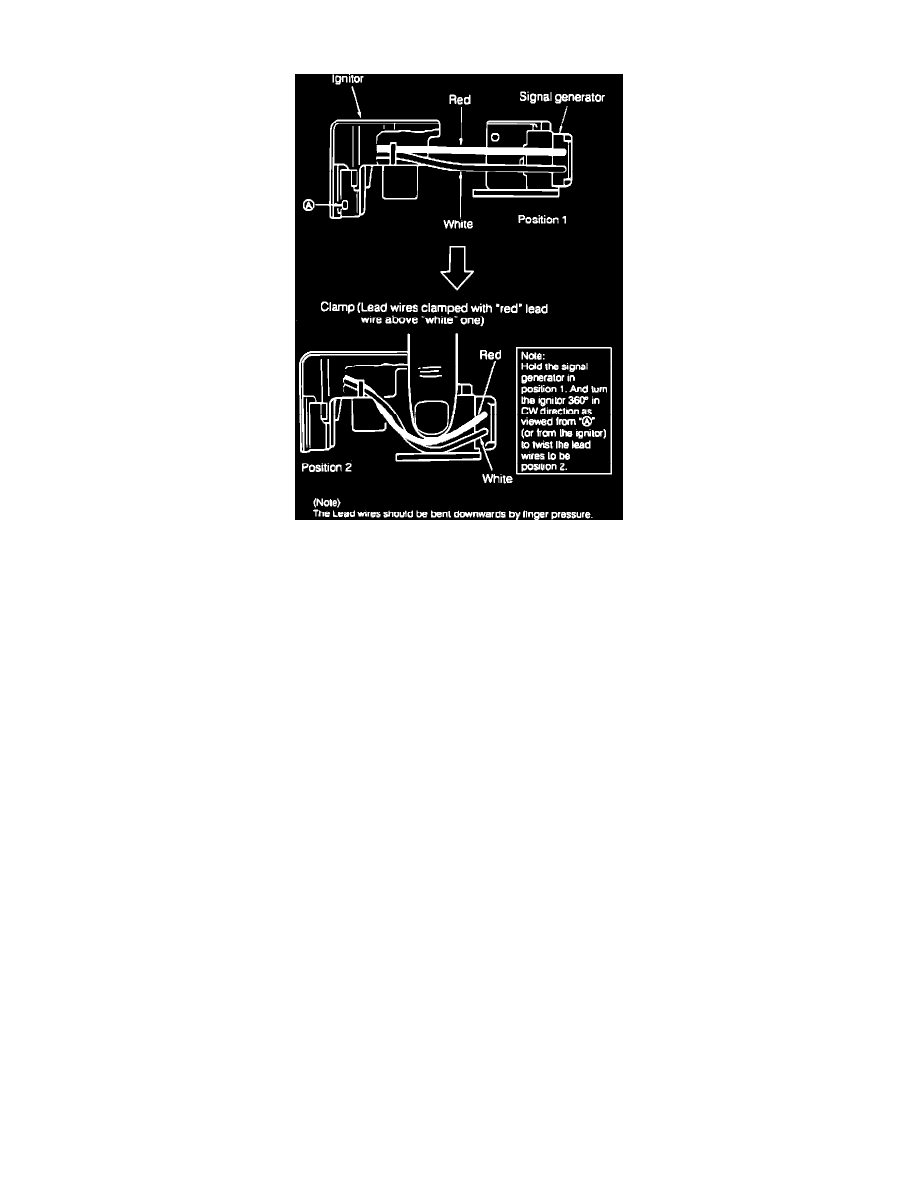
Fig. 4 Installing Igniter.
1.
Remove spark plug wires from cap, then disconnect distributor connector from cap.
2.
Check vacuum advance as follows:
a. Disconnect vacuum hose from vacuum advance, then using suitable vacuum device, apply a vacuum over 150mm Hg. If vacuum advance does
not move, repair or replace vacuum advance.
3.
Check mechanical advance by turning rotor clockwise, then releasing. Rotor should return to original position. Check for excessive play. Replace
mechanical advance as necessary.
4.
Remove rotor, then turn crankshaft until signal rotor faces toward signal generator.
5.
At all four points of rotor, air gap between rotor and signal generator should be .008-.015 inch (0.2-0.4 mm). If not as specified adjust as follows:
a. On Charade models, carefully remove distributor gasket then igniter. On Rocky models, remove wire from signal generator. Do not damage
wires.
b. Loosen signal generator attaching screws.
c. Adjust air gap between signal generator and signal rotor to specifications, then tighten attaching screws and recheck air gap.
d. On Rocky, install wire from signal generator to dust proof cover. On Charade models Install igniter, Fig. 4.
6.
Install remaining parts in reverse order of removal. Set timing to specifications.