
Charade L4-1295cc 1.3L (1989)
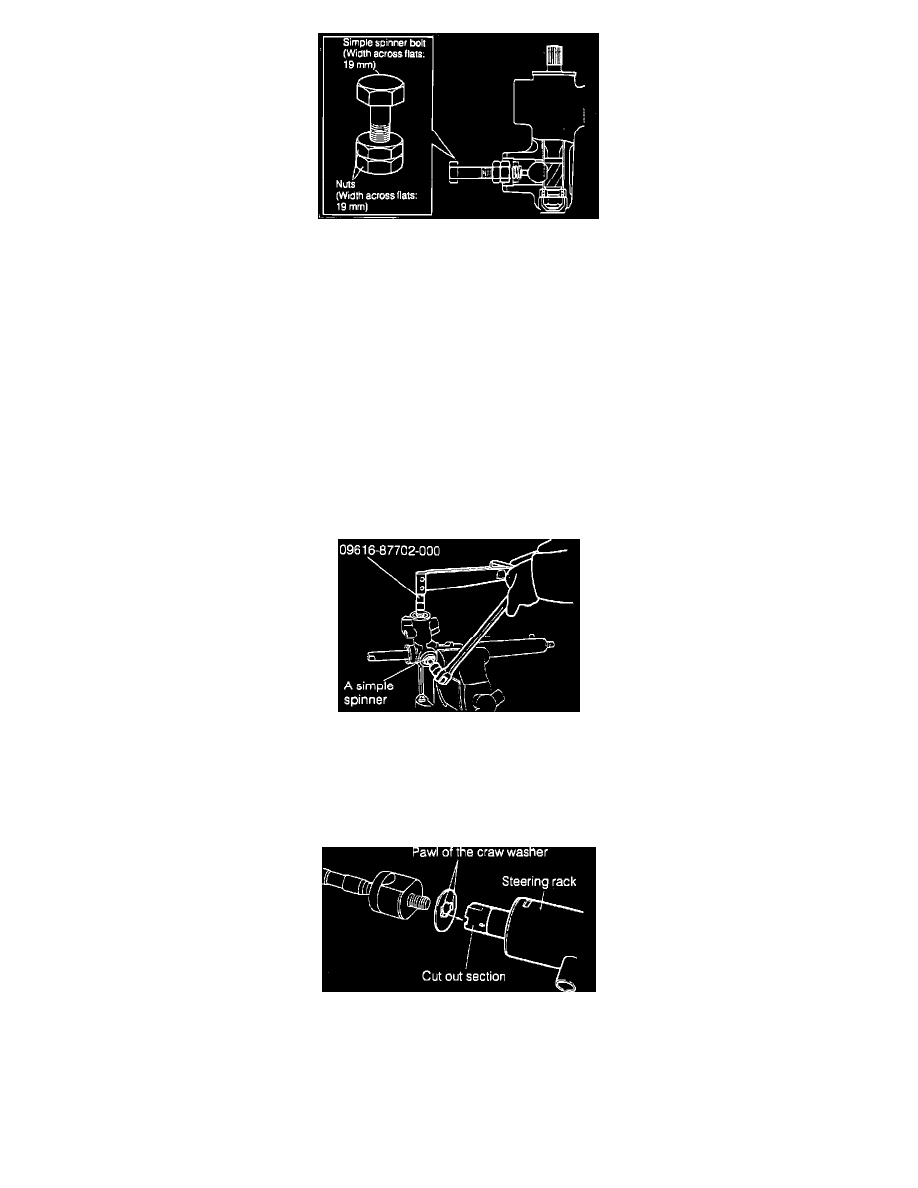
Fig. 5 Removing Rack Guide Spring Cap
1.
Remove steering rack boot bands, then the steering rack, Fig. 3.
2.
Straighten claw washer, then remove the steering rack end. Use care to avoid twisting rack side, Fig. 4.
3.
Remove rack guide spring cap locknut.
4.
Remove rack guide spring cap, using a 19 mm bolt and two 19 mm nuts, Fig. 5.
5.
Remove compression spring and rack guide.
ASSEMBLY
1.
Apply suitable lithium based grease to mating surface of steering rack and rack guide.
2.
Insert rack guide and compression spring, then pack compression spring attaching hole of rack guide with lithium based grease.
3.
Apply liquid gasket to threaded portion of rack guide spring cap, then tighten rack guide spring cap using a 19 mm bolt and two 19 mm nuts.
Torque to 18 ft. lbs.
4.
Using the 19 mm nut and bolts, back off rack spring cap about 12°.
5.
Push steering rack in and out a few times by turning control valve shaft (input shaft) so steering rack will seat. Ensure rack end is installed.
6.
Loosen spring cap until compression spring of rack guide is inoperative.
Fig. 6 Preload Of Control Valve
7.
Tighten spring cap gradually with the 19 mm nut and bolts and with a special socket No. 09616-87702 torque wrench until a preload of 7.2-11.5
inch lbs. is reached Fig. 6.
8.
Apply liquid gasket to rack guide spring cap and threaded part of locknut. With rack guide spring cap secured, torque locknut to specifications.
9.
Recheck preload.
Fig. 7 Installing New Claw Washer
10.
Install a new claw washer to steering rack as shown in Fig. 7, then install steering rack end.
11.
Secure steering rack side. Torque rack end to specifications. Do not twist rack side.
12.
Stake claw washer.
13.
Attach steering rack boots to respective sides.