
Caravan AWD V6-201 3.3L (1991)
4.
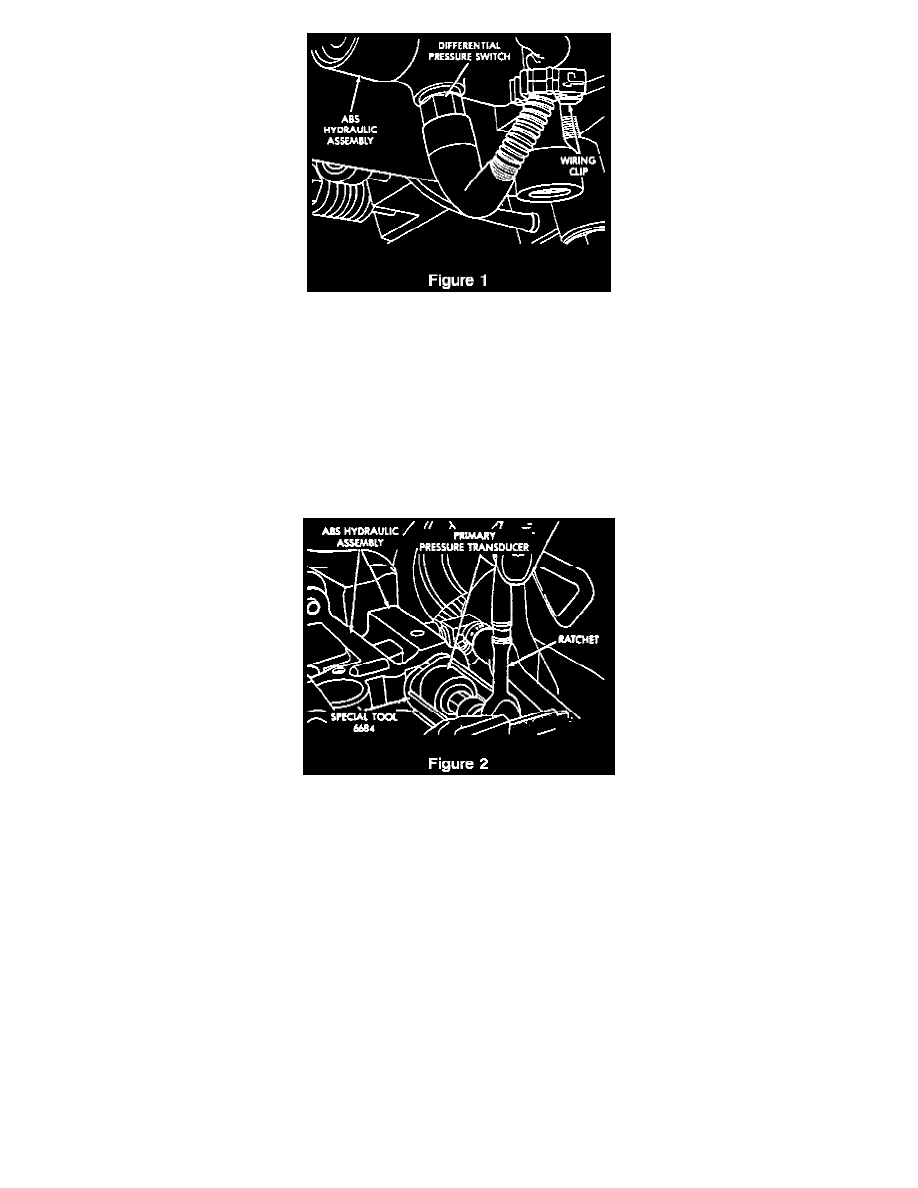
Remove the differential pressure switch and connector from the actuator housing (Figure 1).
5.
Install the new differential pressure switch into the actuator housing. Tighten to 1.35 - 1.81 N-m (12 - 16 in.lbs.).
6.
Connect the differential pressure switch connector and the primary pressure transducer connector.
Primary Pressure Transducer Replacement
1.
With the ignition key in the OFF position, discharge the ABS accumulator by pumping the brake pedal a minimum of 40 times.
2.
Drain and remove the master cylinder reservoir by removing the three pins that hold it in place.
3.
Disconnect the primary pressure transducer connector.
4.
Using special tool # 6684 (Figure 2), remove the primary pressure transducer from the actuator housing.
5.
Install the new primary pressure transducer into the actuator housing and torque to 9 - 14 N-m (80 - 124 in.lbs.).
6.
Connect the primary pressure transducer connector.
7.
Install the master cylinder reservoir.
8.
Bleed the left front and right rear brake circuits (primary circuit).
9.
Fill the master cylinder reservoir using fresh, clean brake fluid such as Mopar or equivalent, conforming to DOT 3 requirements.
Boost Pressure Transducer Replacement
1.
With the ignition key in the OFF position, discharge the ABS accumulator by pumping the brake pedal a minimum of 40 times.
2.
Disconnect the dual function pressure switch and boost pressure transducer connectors.