
Caravan AWD V6-201 3.3L (1991)
16.
Install the secondary piston, spring end first, into the actuator bore (Figure 12). Ensure the seal cup is not folded back or twisted. Push the
secondary piston in until the rear end of the piston is flush with the actuator bore opening (Figure 13).
17.
Position the caged spring at the end of the primary piston assembly over the pin on the rear of the secondary piston (Figure 12). The caged spring
must remain over this pin throughout the installation procedure.
18.
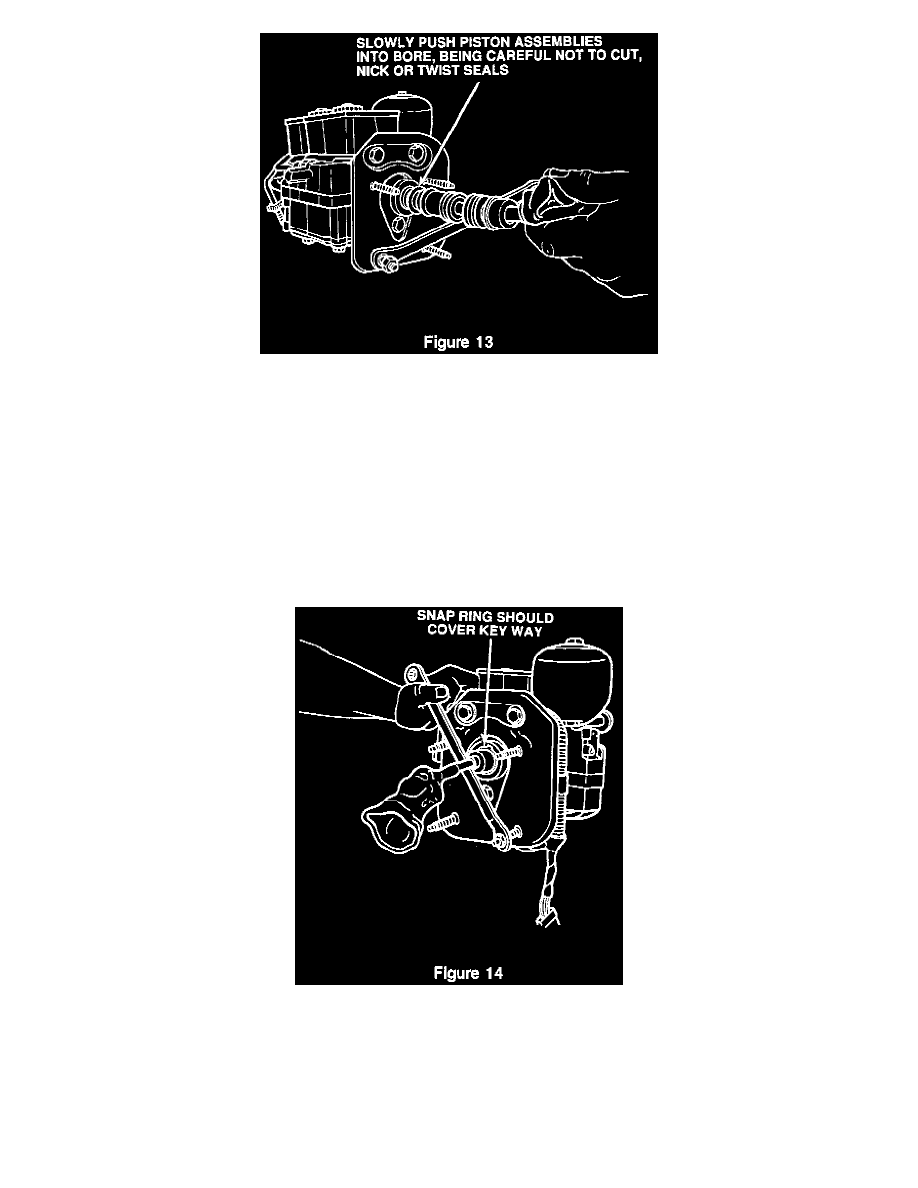
Slowly, push both piston assemblies into the actuator bore. Do not cut, nick or twist any of the seals, or the unit will not function properly.
19.
Place the new snap ring over the master cylinder push rod and bearing.
20.
Push the piston assemblies all the way into the bore, compressing the springs. The shoulder of the bearing should be in past the snap ring groove.
21.
Secure the piston in the bore with a nut and wrench, in the same manner as used during removal of the snap ring.
22.
With the keyway at the top of the bore, in the 12 o'clock position, position the snap ring so that one end is in 10 o'clock position and the other end
is in the 8 o'clock position (Figure 14). The snap ring should cover the keyway at the 12 o'clock position.
23.
Place the 10 o'clock end of the snap ring into the snap ring groove. Use a flat blade screwdriver, push the snap ring into the groove, working in a
clockwise direction. Ensure the snap ring and both ends are seated completely into the groove.
24.
Slowly release the wrench, then remove the nut and wrench from the stud.