
Caravan AWD V6-201 3.3L (1991)
2.
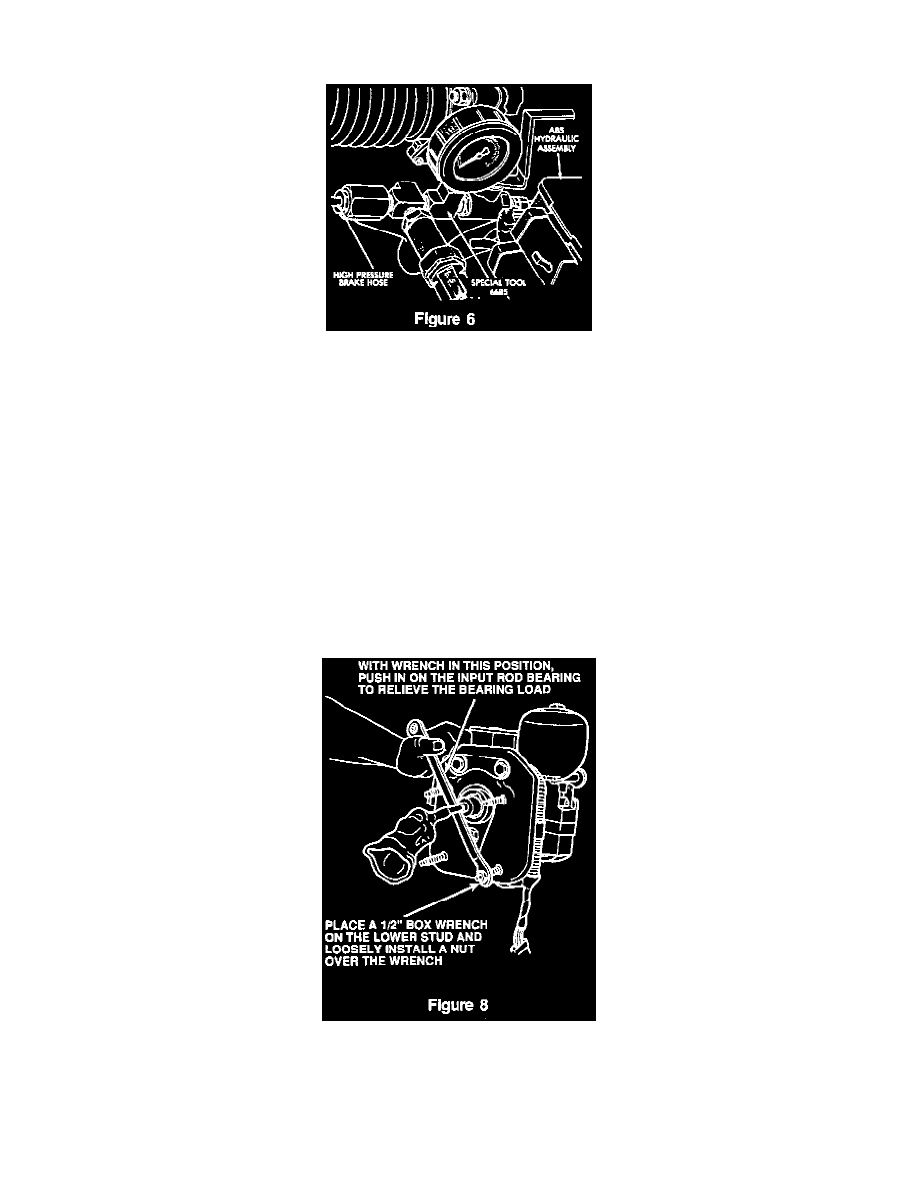
Locate the high pressure hose end fitting and remove the high pressure hose tube nut from the high pressure hose hydraulic fitting.
3.
Verify the shut off valve on the internal leak test fixture is OPEN and install it in line with the high pressure hose (Figure 6). Screw the male end
into the hydraulic unit, then the hose into the leak test fixture. The pressure gauge should be on the high pressure hose side of the shut off switch.
4.
Install MST-6163 pressure tester into the hydraulic unit.
5.
Refer to the "Hydraulic Pressure Performance Test" in the Antilock Diagnostic for the diagnostic tree.
**Actuator Piston Assemblies
1.
With the ignition key in the OFF position, discharge the ABS accumulator by pumping the brake pedal 40 times.
2.
Remove the hydraulic unit from the vehicle as outlined in the appropriate service manual, and place on a clean, dry work bench.
3.
Secure the hydraulic unit in a vise (Figure 7). Do not over tighten.
4.
Remove the flange gasket from the hydraulic assembly mounting bracket/dash board.
5.
Loosen the dash mounting bracket from the hydraulic actuator assembly enough to separate the black dust boot from the actuator housing,
re-tighten bracket.
6.
Place a 1/2" box end wrench over the lower mounting stud of the hydraulic unit, see Figure 8. Place a nut onto the stud and turn it enough to
engage the threads 100%. Make sure that the wrench is aligned, as illustrated in Figure 2, on the input rod bearing.
7.
Push in on the wrench against the bearing, moving the bearing inward approximately 1/4", to relieve the bearing load from the snap ring.