
Caravan AWD V6-201 3.3L (1991)
Air Door Cable: Service and Repair
REMOVAL AND INSTALLATION
1. Remove heater-A/C control panel. Disconnect the attaching flag on the control cable from the heater-A/C control panel.
2. Remove console assembly.
3. Remove instrument panel lower steering coumn cover.
4. Remove the right lower instrument panel/glove box door assembly.
NOTE: This assembly is clipped to the upper instrument panel at the right upper side.
5. A/C equipped vehicles, From under the hood, disconnect the A/C suction line mounting bracket from the dash panel (above the expansion valve).
6. From under the hood, loosen (do not remove) the four heater-A/C assembly to dash panel mounting nuts.
7. From inside the vehicle: Remove the vertical (heater-A/C housing) support bracket (below the glove box).
8. Tilt the entire heater-A/C housing assembly downward to gain access to the temperature cable.
Temperature Control Cable
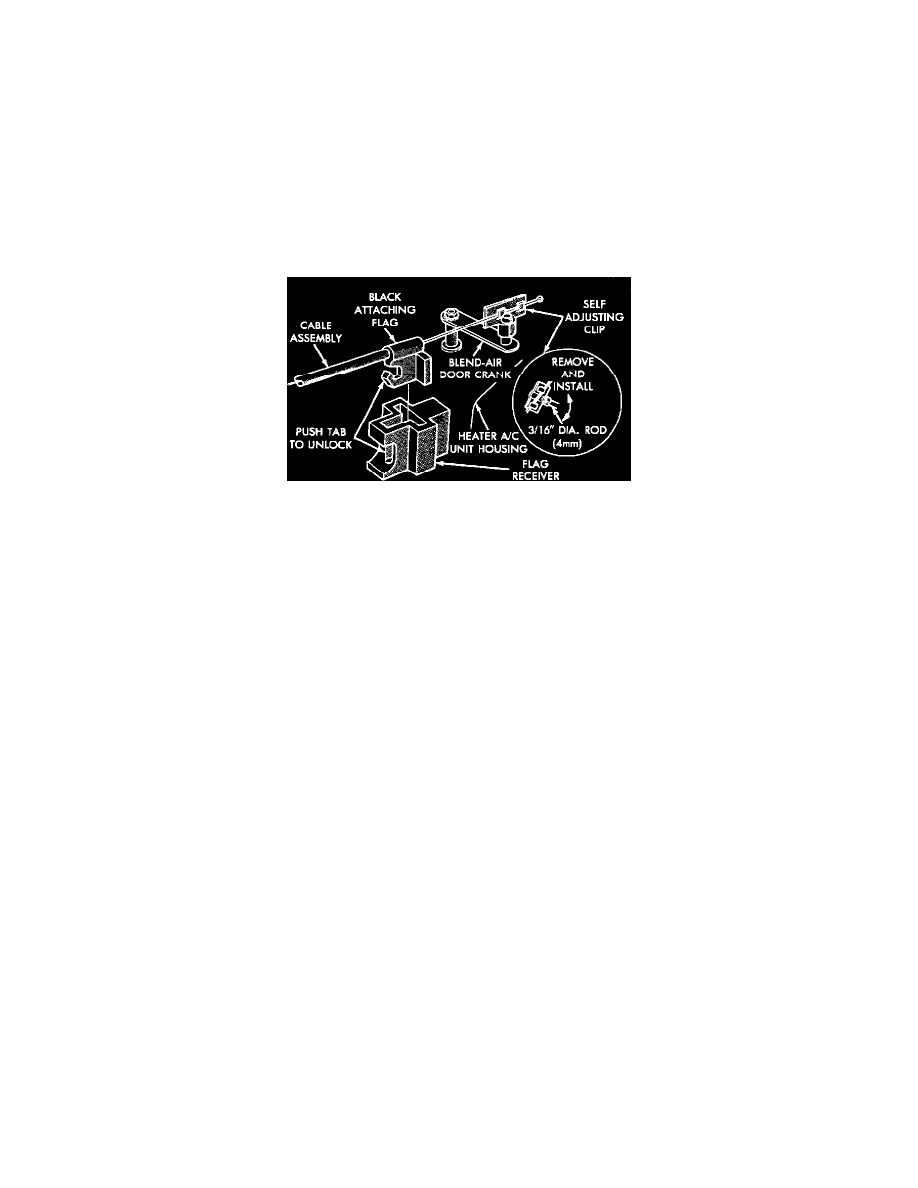
9. Locate and disconnect the attaching flag on the control cable at the heater-A/C housing.
10. Slip the cable self-adjusting clip from the blend-air door crank.
11. Remove the cable from the vehicle.
12. To remove the self-adjusting clip from cable:
Insert a 3/16 inch (4 mm) diameter tool (drill bit or phillips screw driver shank) into the door crank access hole. Then rotate the clip from the
cable.
To install, reverse the preceding operation.
To adjust temperature cable: Position the TEMP lever on the control to the cool side of its travel. Allowing the self-adjusting clip to slide on the cable,
rotate the blend-air door crank counterclockwise by hand until it stops.