Caravan FWD L4-2.4L VIN B (1998)

Crankshaft: Service and Repair
Removal and Installation
REMOVAL
NOTE: Crankshaft can not be removed when engine is in vehicle.
1. Remove oil filter and oil pan.
2. Remove Timing Belt Cover, Timing Belt and Oil Pump.
3. Remove Balance Shafts Assembly.
4. Remove all main bearing cap bedplate bolts from the engine block.
5. Using a mallet gently tap the bedplate loose from the engine block dowel pins.
CAUTION: Do not pry up on one side of the bedplate. Damage may occur to cylinder block; to bedplate alignment and thrust bearing.
6. Bedplate should be removed evenly from the cylinder block dowel pins to prevent damage to the dowel pins and thrust bearing.
7. Lift out crankshaft from cylinder block. Do not damage the main bearings or journals when removing the crankshaft.
INSTALLATION
Installing Main Bearing Upper Shell
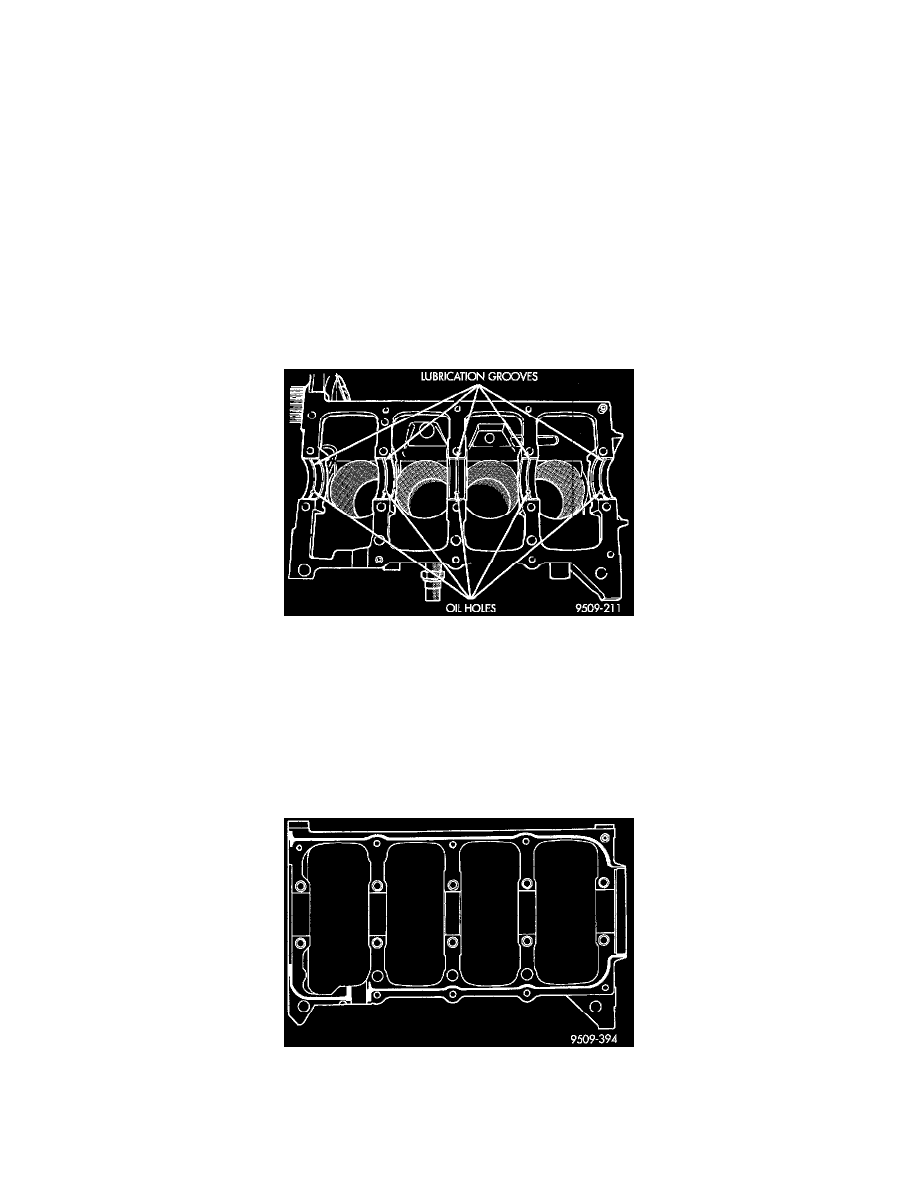
1. Install the main bearing shells with the lubrication groove in the cylinder block.
2. Make certain oil holes in block line up with oil hole in bearings and bearing tabs seat in the block tab slots.
CAUTION: Do not get oil on the bedplate mating surface. It will may effect the sealer ability to seal the bedplate to cylinder block.
3. Oil the bearings and journals. Install crankshaft.
CAUTION: Use only the specified anaerobic sealer on the bedplate or damage may occur to the engine.
Main Bearing Caps/bedplate Sealing
4. Apply 1.5 to 2.0 mm (0.059 to 0.078 inch) bead of Mopar (R) Torque Cure Gasket Maker to cylinder block as shown in image.
5. Install lower main bearings into main bearing cap/bedplate. Make certain the bearing tabs are seated into the bedplate slots. Install the main
bearing/bedplate into engine block.
