
Charger V6-3.5L (2009)
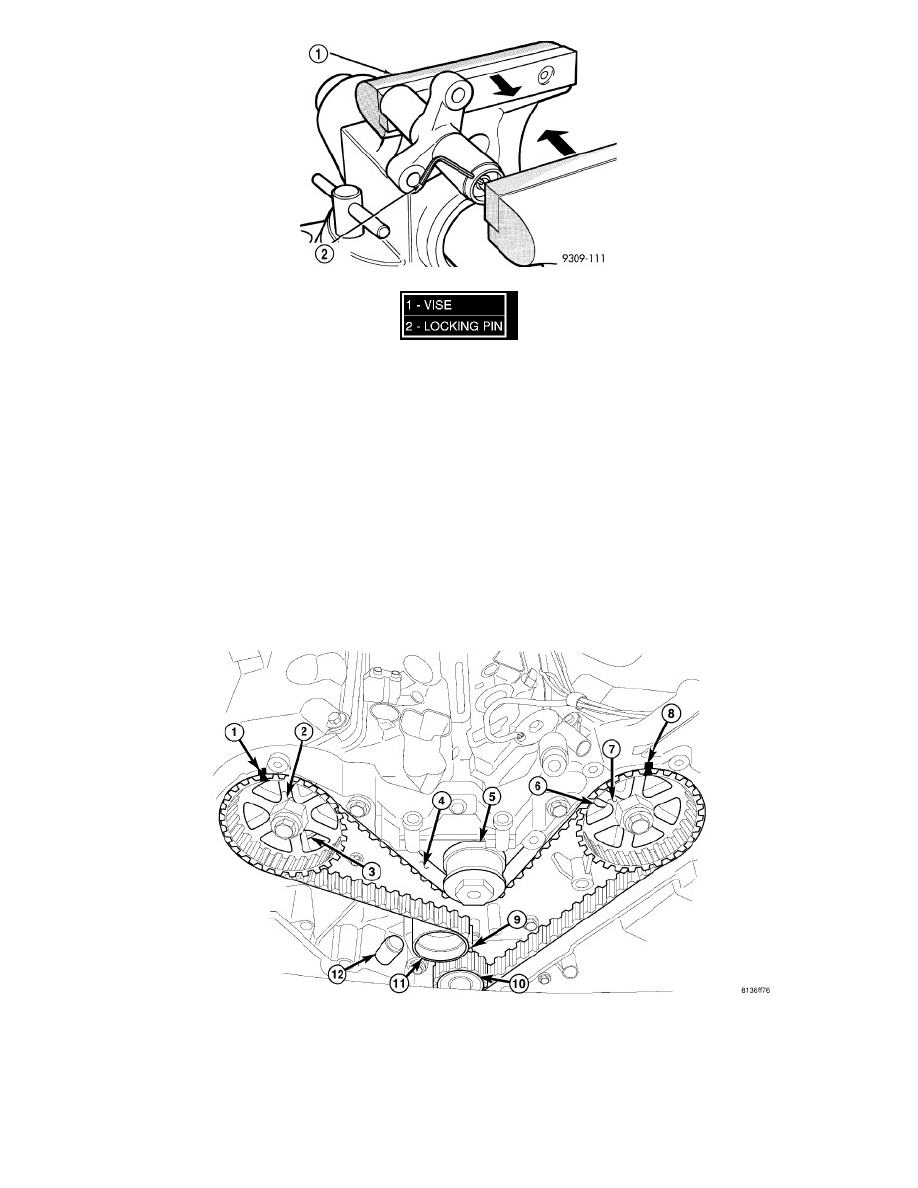
9. When tensioner is removed from the engine it is necessary to compress the plunger into the tensioner body. CAUTION: Index the tensioner in
the vise the same way it is installed on the engine. This ensures proper pin orientation when tensioner is installed on the engine.
a. Place the tensioner into a vise (1) and SLOWLY compress the plunger. Total bleed down of tensioner should take approximately two minutes.
b. When plunger is compressed into the tensioner body install a pin (2) through the body and plunger to retain plunger in place until tensioner is
installed.
Timing Belt & Sprockets - Installation
TIMING BELT
CAUTION: The 3.5L is NOT a freewheeling engine. Therefore, the valve train rocker assemblies must be removed before attempting to rotate
either crankshaft or camshafts independently of each other.
CAUTION: If camshafts have moved from the timing marks, always rotate camshaft towards the direction nearest to the timing marks (DO
NOT TURN CAMSHAFTS A FULL REVOLUTION OR DAMAGE to valves and/or pistons could result).
TIMING GEAR ALIGNMENT
1. Align the crankshaft sprocket (10) with the TDC mark (9) on the oil pump cover.
2. Align the camshaft sprockets (2, 7) timing reference marks (1, 8) with the marks on the rear cover.
3. Install the timing belt (4) starting at the crankshaft sprocket (10) going in a counterclockwise direction. Install the belt around the last sprocket and
maintain tension on the belt as it is positioned around the tensioner pulley (11).
NOTE: It is necessary to compress the plunger into the tensioner body and install a locking pin prior to reinstalling the tensioner. See Timing
Belt Removal for tensioner compression procedure See: Timing Belt & Sprockets - Removal .