
Charger SRT-8 V8-6.1L (2009)
CAUTION: DO NOT fully install one of the clockspring T10 Torx screws. Leave one clockspring T10 Torx screw out far enough to stop the
clockspring from rotating. This is necessary to keep the clockspring centered when installing to the steering shaft. Torque is
critical on the clockspring T10 torx screws, make sure the clockspring T10 Torx screws are torqued to specification.
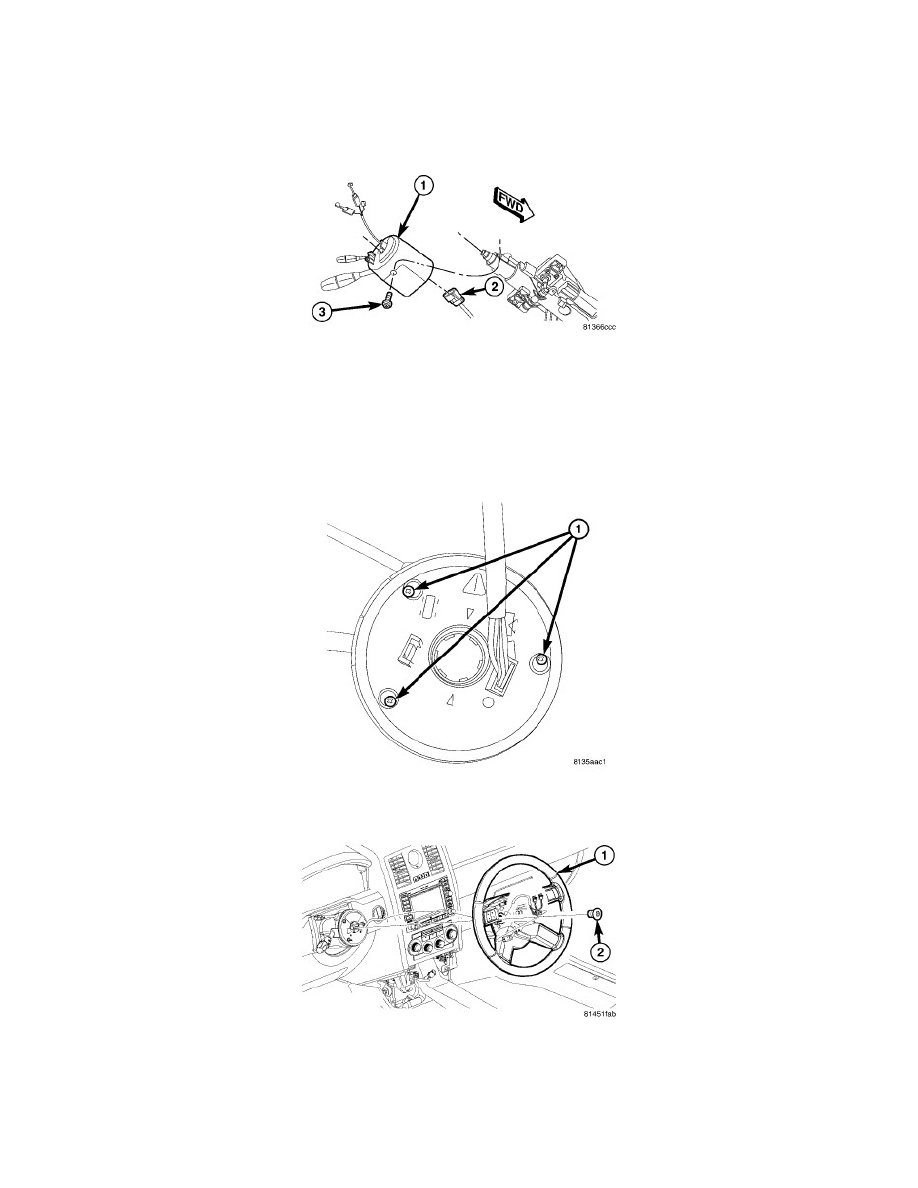
3. Install the clockspring and two T10 Torx screws (1), leave the remaining screw out far enough to stop the clockspring from rotating. Tighten T10
Torx screws to.7 Nm (6 in. lbs.).
WARNING: To service the speed control switch, the entire assembly that houses the speed control switch must be removed from the column.
This must be done due to the clockspring passing through the assembly and into the self docking connector. Failure to remove the
this assembly could damage the pins of the clockspring during installation and prevent the airbag system from operating properly.
4. Connect the electrical connector (2).
5. Install the SCCM assembly (1) onto the steering column.
6. Tighten the set screw (3) securing the SCCM assembly (1) to the steering column. Tighten screw to 4 Nm (35 in. lbs.).
7. Tighten the remaining clockspring T10 Torx screw to.7 Nm (6 in. lbs.).
8. Align the spline on the steering wheel hub to shaft and install the steering wheel (1).
9. Install a NEW retaining bolt (2). Tighten the bolt to 75 Nm (55 ft. lbs.).