
Charger SRT-8 V8-6.1L (2009)
Condenser HVAC: Service and Repair
A/C Condenser - Removal
REMOVAL
WARNING: Refer to the applicable warnings and cautions for this system before performing the following operation See: Service
Precautions/Warning and See: Service Precautions/Caution . Failure to follow these instructions may result in serious or fatal injury.
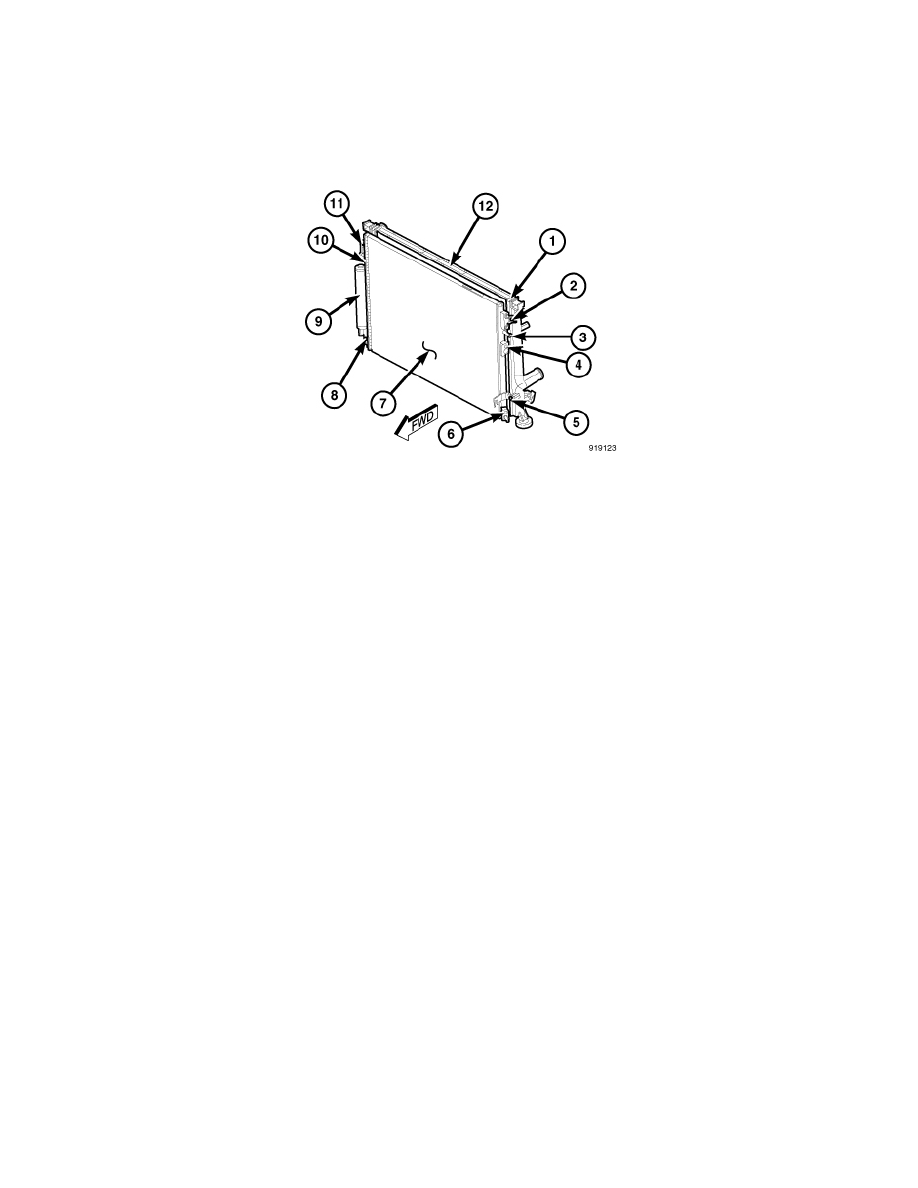
NOTE: Illustration shown with A/C condenser and radiator removed from vehicle for clarity.
1. Disconnect and isolate the negative battery cable.
2. Recover the refrigerant from the refrigerant system See: Service and Repair/Refrigerant System Recovery.
3. Remove the front fascia See: Body and Frame/Bumper/Front Bumper/Front Bumper Cover / Fascia/Service and Repair/Front Bumper Fascia -
Removal.
4. Disconnect the automatic transmission cooler lines from the automatic transmission cooler ports (1).
5. Disconnect the power steering hoses from the power steering cooler fittings (3 and 10).
6. Install plugs in the power steering cooler fittings and transmission cooler ports.
7. If equipped with 3.0L diesel engine, remove the charge air cooler .
8. Disconnect the A/C discharge line and A/C liquid line from refrigerant line fittings (4 and 6) See: Hose/Line HVAC/Service and Repair/A/C
Liquid Line - Removal and See: Hose/Line HVAC/Service and Repair/A/C Discharge Line - Removal.
9. Install plugs in, or tape over, the opened refrigerant line fittings and condenser ports.
10. Remove the four bolts (2, 5, 8 and 11) that secure A/C condenser (7) to the radiator (12).
11. Carefully tilt the bottom of the A/C condenser forward and lower the condenser out of the vehicle.
12. If required, place the A/C condenser onto a workbench and remove the A/C receiver/drier (9) See: Receiver Dryer/Service and Repair/A/C
Receiver Drier - Removal.