
Colt L4-089 1468cc 1.5L VIN K 2-bbl (1988)
installed, ensure belt is installed in original direction.
7.
Apply counterclockwise force to camshaft sprocket to tighten tension side of belt, ensuring that timing marks remain aligned.
8.
Install crankshaft pulley to prevent belt from slipping off sprocket, then adjust belt tension as follows:
a. Loosen tensioner bolts to allow tensioner to bear against belt, then tighten adjusting bolt and pivot bolt. Tighten adjusting bolt first to
prevent tensioner from rotating away from belt.
b. Rotate crankshaft clockwise one full revolution, then realign crankshaft sprocket timing mark with pointer. Crankshaft must be rotated
smoothly, in clockwise direction. Do not apply any force other than spring force of tensioner to timing belt.
c. Loosen tensioner pivot and adjusting bolts. then tighten adjuster bolt and pivot bolt. Tighten adjusting bolt first to prevent tensioner from
rotating away from belt.
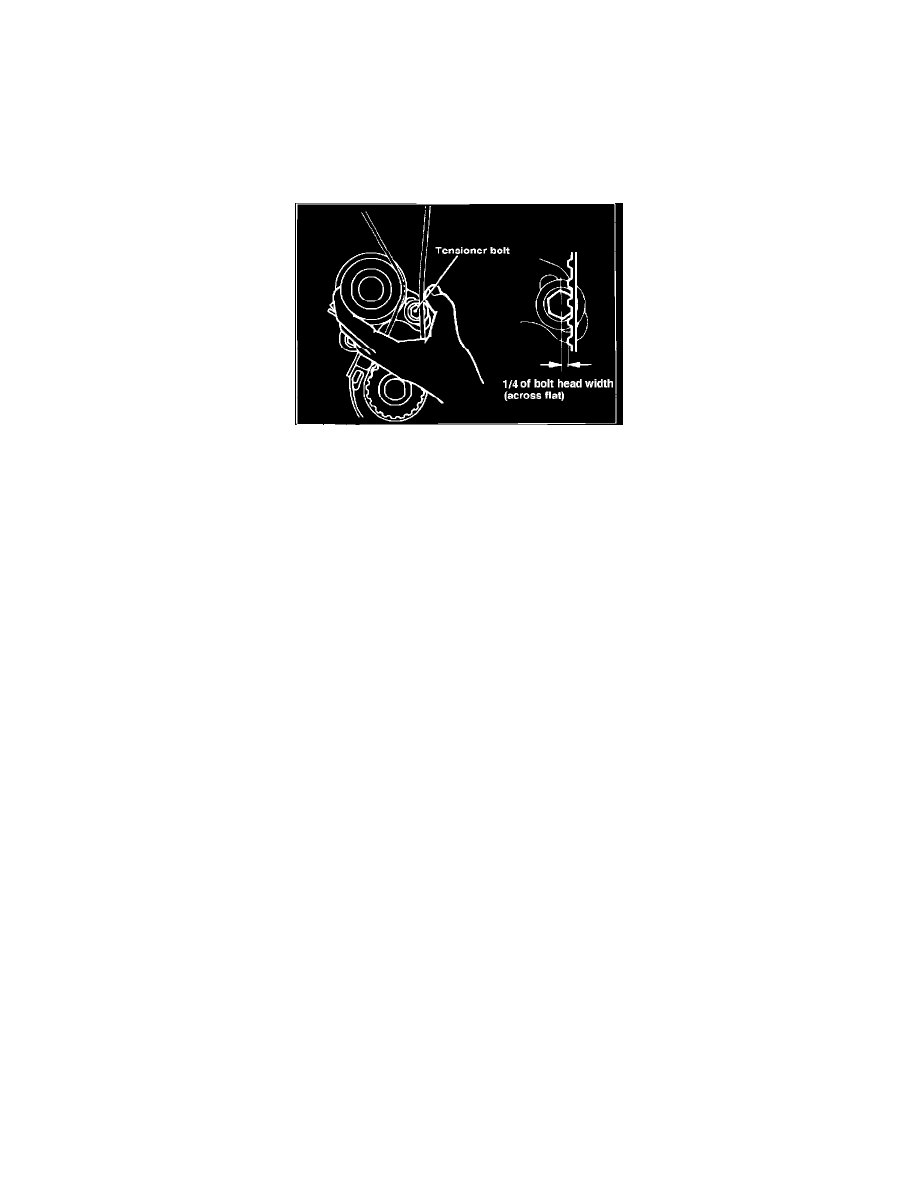
Fig. 39 Checking timing belt tension. 1400cc & 1500cc engines
d. Check belt tension by holding belt as shown in Fig. 39, and applying thumb pressure to tension side of belt. Tension is correct when tooth of
belt covers approximately 1/4 the width of the tensioner adjuster bolt.
e. Rotate crankshaft clockwise, one full revolution and ensure that timing marks line up.
9.
Reverse remaining procedure to complete installation, then adjust valve clearances as outlined.