
Dakota 2WD V8-4.7L Flex Fuel (2009)
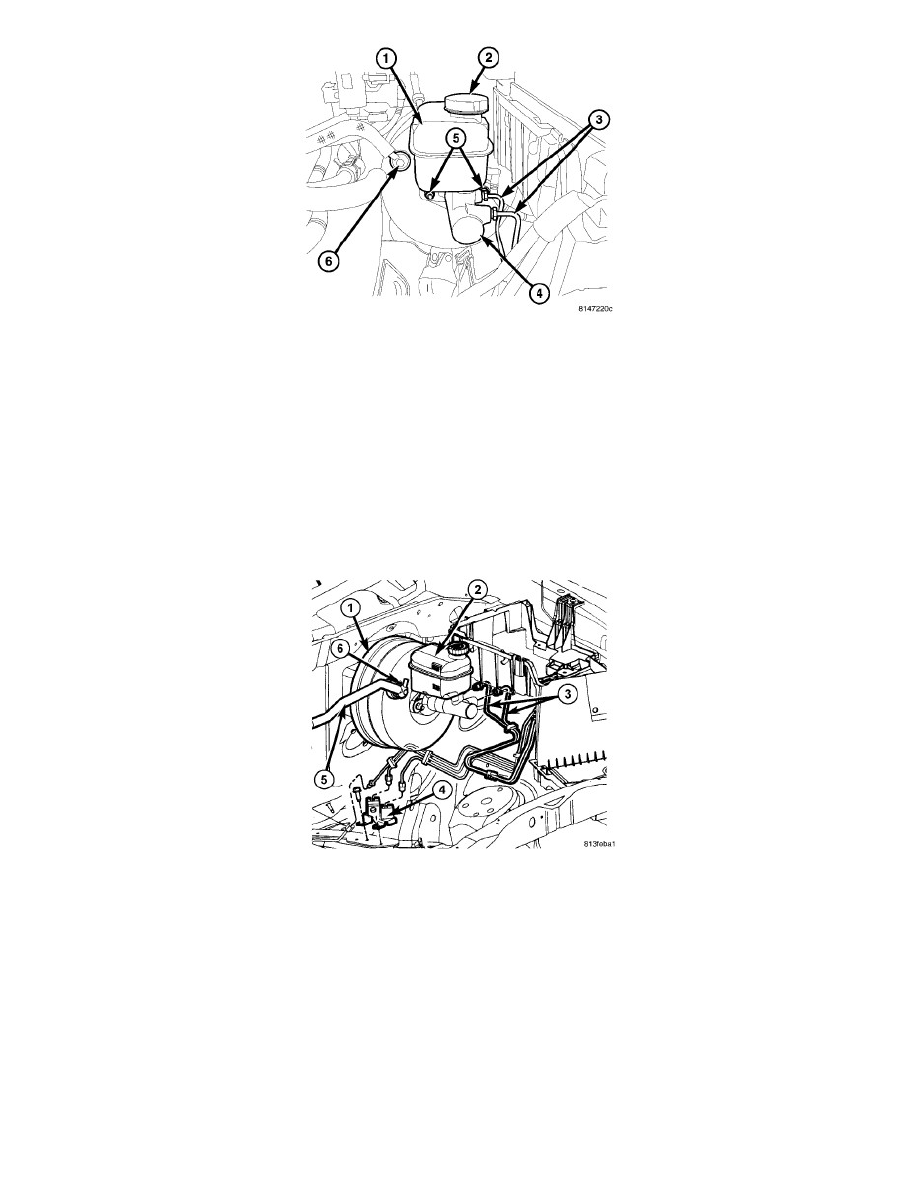
1. Gently install the master cylinder (4) on the booster mounting studs (5). NOTE: Take precautions to locate the master cylinder plunger over
the booster output rod, before installing the master cylinder. If correctly fitted the master cylinder should slide easily onto the booster
output rod before the mounting studs are engaged in the flange holes of the master cylinder.
2. Install new mounting nuts (5) and tighten to 10 Nm (90 in. lbs.)
3. Install the brake lines (3) and tighten to 19 Nm (170 in. lbs.).
4. Reconnect the electrical connector for the low fluid level switch.
5. Fill and bleed the base brake system. See: Brake Bleeding/Service and Repair.
Brake Master Cylinder Reservoir - Removal
REMOVAL
1. Install the prop rod on the brake pedal to keep pressure on the brake system.
2. Remove the reservoir cap and siphon fluid into a drain container.
3. Disconnect the electrical connector from the fluid level switch in the reservoir (2).
4. Remove the two reservoir mounting screws.
5. Remove the reservoir (2) from the master cylinder.
6. Remove old seals from the cylinder body.
Brake Master Cylinder Reservoir - Installation
INSTALLATION
CAUTION: Do not use any type of tool to install the seals. Tools may cut, or tear the seals creating a leak problem after installation. Install the
seals using finger pressure only.
1. Lubricate the new seals with clean brake fluid and Install new seals in cylinder body. Use finger pressure to install and seat seals.