
Dakota 2WD V8-4.7L VIN J (2005)
Accumulator HVAC: Service and Repair
REMOVAL
WARNING: REVIEW THE WARNINGS AND CAUTIONS IN THE FRONT OF THIS BEFORE PERFORMING THE FOLLOWING
OPERATION
1. Disconnect and isolate the negative battery cable.
2. Recover the refrigerant from the refrigerant system.
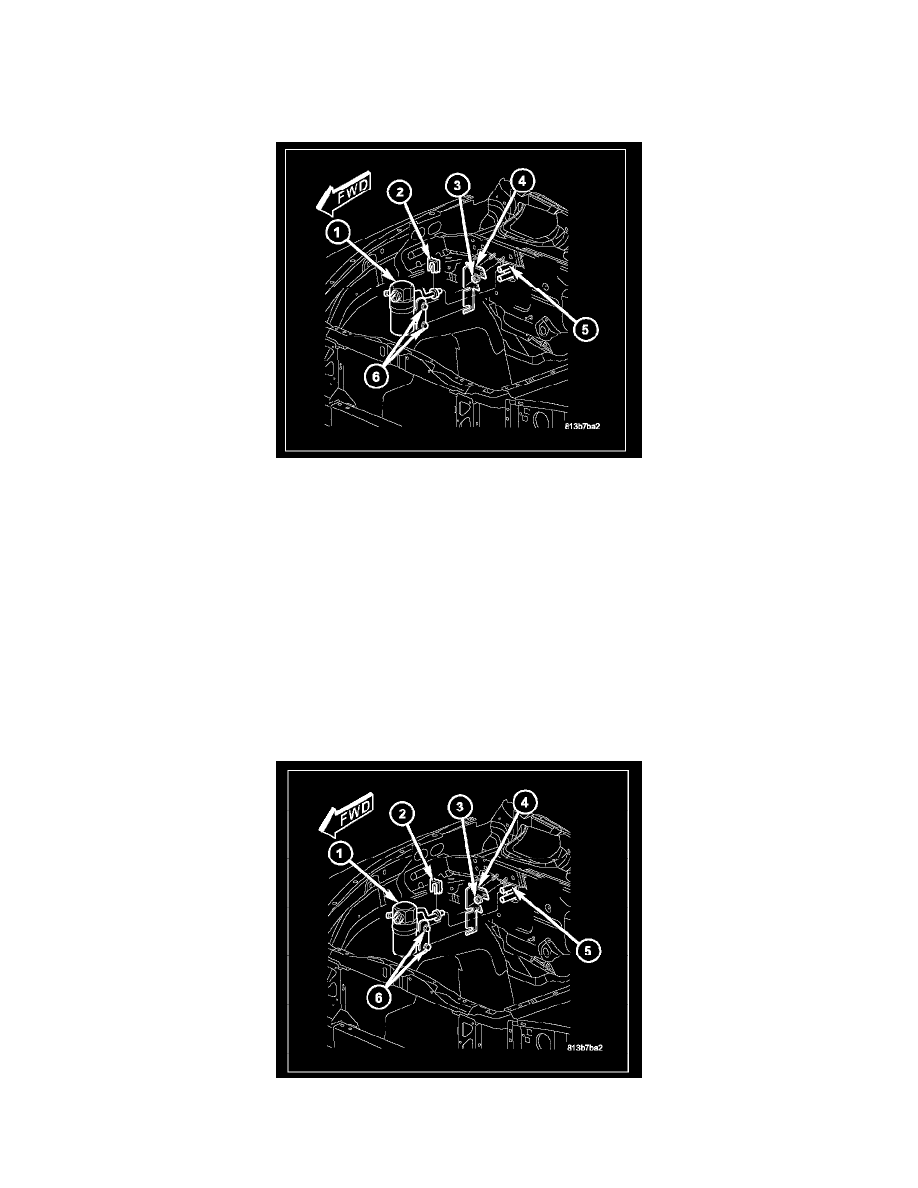
3. Remove the air filter housing to gain access to the A/C accumulator (1).
4. Disconnect the A/C suction line from the A/C accumulator and remove and discard the O-ring and gasket.
5. Remove the secondary retaining clip (2) from the spring-lock coupler that secures the accumulator inlet tube to the evaporator outlet tube (5).
6. Loosen the bolts (6) that secure the A/C accumulator to the mounting bracket (4).
7. Using the proper A/C line disconnect tool, disconnect the accumulator inlet tube from the evaporator outlet tube and remove and discard the
O-ring seals.
8. Install plugs in, or tape over the opened refrigerant system connections.
9. If required, remove the nuts (3) that secure the accumulator mounting bracket to the dash panel and remove the bracket from the engine
compartment.
INSTALLATION
NOTE: If the A/C accumulator is being replaced, add 60 milliliters (2 fluid ounces) of refrigerant oil to the refrigerant system. Use only refrigerant oil
of the type recommended for the A/C compressor in the vehicle.
1. If removed, install the accumulator mounting bracket (4) and retaining nuts (3). Tighten the nuts to 4.5 N.m (40 in. lbs.).
2. Position the A/C accumulator (1) onto the mounting bracket. Do not tighten the accumulator bracket bolts (6) at this time.
3. Remove the tape or plugs from the opened refrigerant system connections.